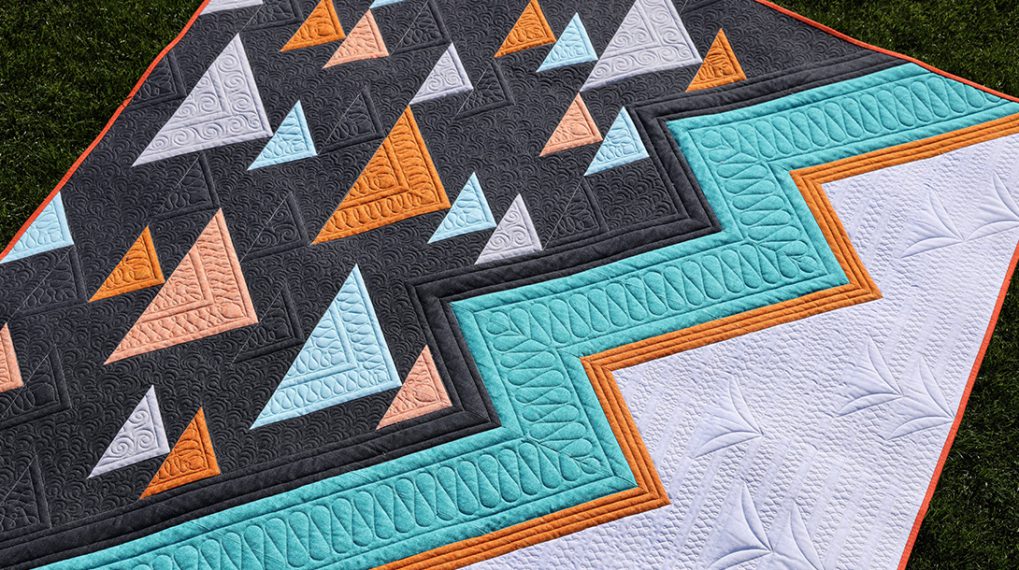
Q-matic Quilt Along, Part Three: Quilting Row One
Welcome back to the Q-matic Quilt Along! Did you finish your quilt top? Today, we’ll start quilting with the Q-matic system.
If you missed the first two parts of the Q-matic Quilt Along, you can read all about it here:
- Q-matic Quilt Along: Introduction
- Q-matic Quilt Along, Part One: Sewing the Quilt Top
- Q-matic Quilt Along, Part Two: Continuing to Sew the Quilt Top
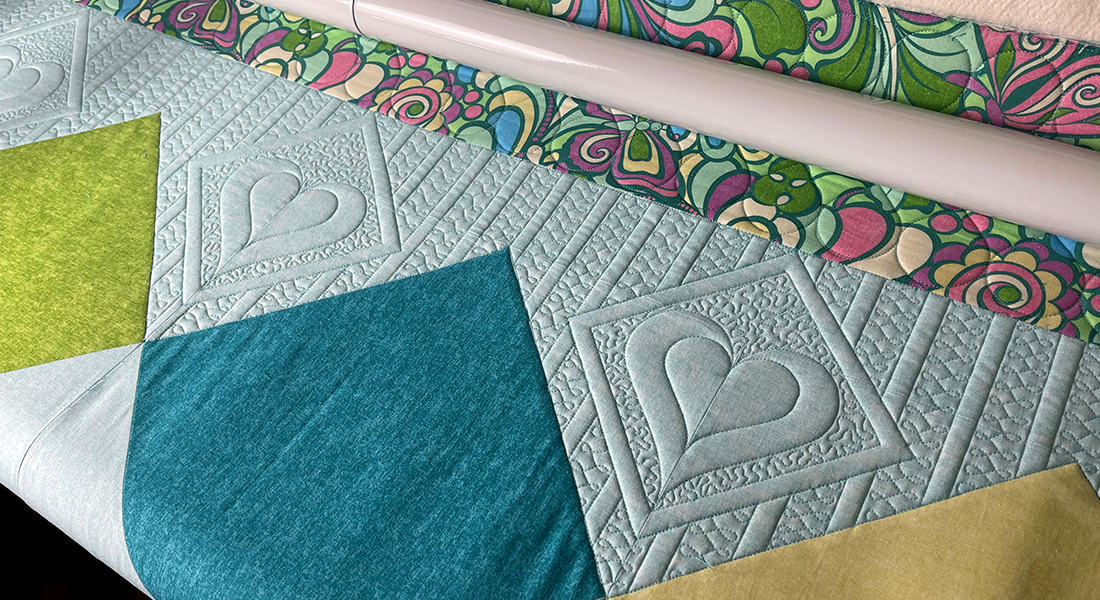
Row 1: Avoiding the Squares
Today, we will be quilting the first row of the Q-matic Quilt Along. We will only quilt on the orange fabric. This means we need to avoid the yellow squares.
For this row, you will learn to:
- load a design to your Q-matic
- repeat an edge-to-edge pattern
- exclude a part of the design
Setting Up Your Quilt
Now, before you can start quilting, you will need to set up your quilt. If you have done this many times before, skip ahead to ‘The Pattern’. Otherwise, you might want to read along.
Loading the Quilt
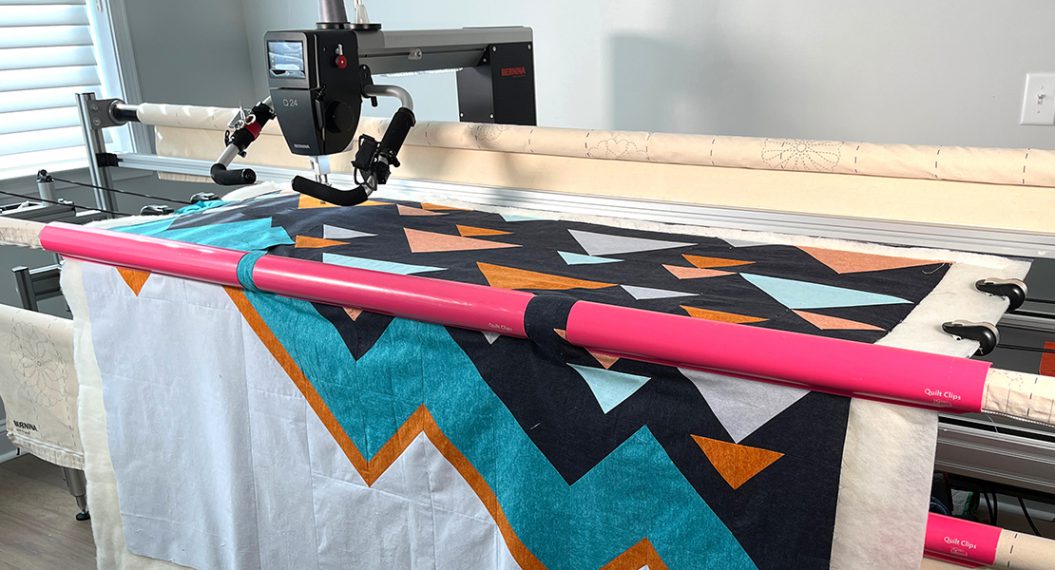
First, you load the quilt onto your machine like you normally do. If you need some help with that, this video will be a good one to watch:
In some of the images in this blog post, you will see red bars. Those are Red Snappers. I use these instead of pins, since I always prick myself 🙈.
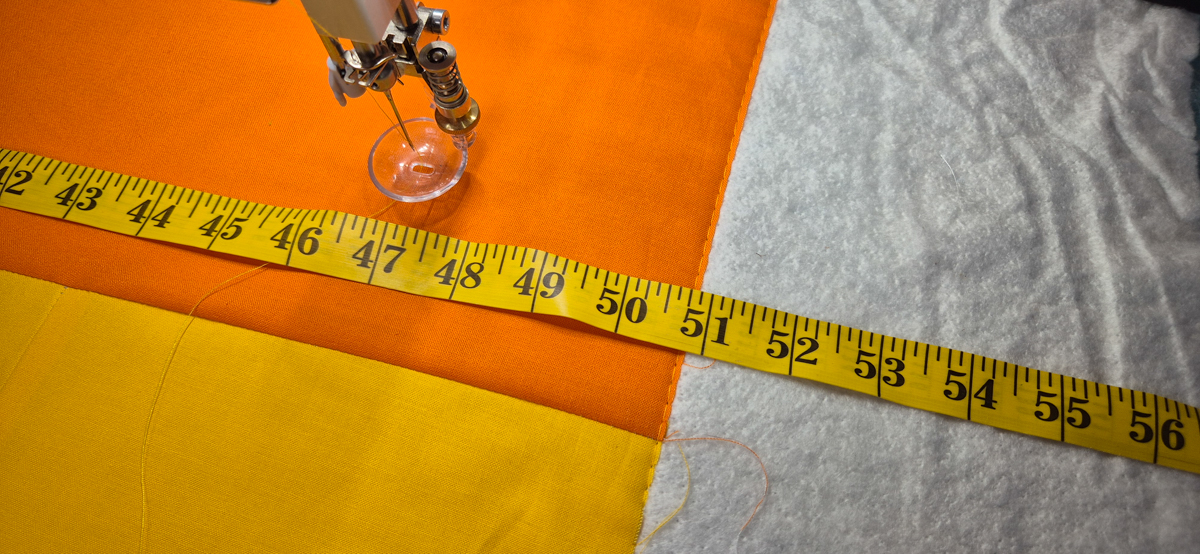
After loading the backing and the batting, I use a basting stitch with the BSR3 to stitch one line across. This will be my guideline to place my quilt top along.
Set Up the Q-matic
The quilt is loaded to the frame, which means it’s time to set up the Q-matic.
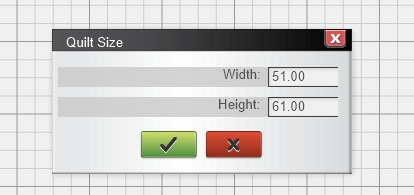
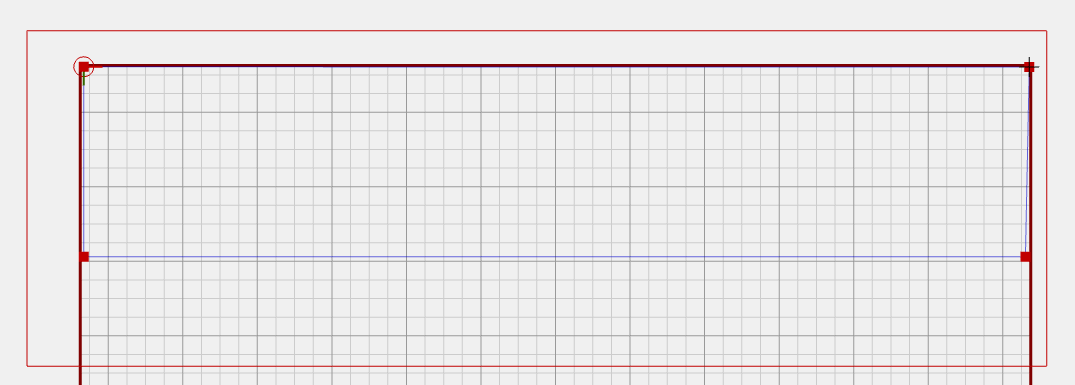
There are two things you need to do before you can start stitching. We need to set the safe area and enter the measurements of the quilt.
When you start the BERNINA application on the computer, it will automatically ask you to set the safe area.
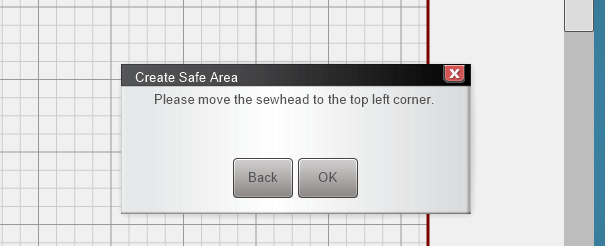
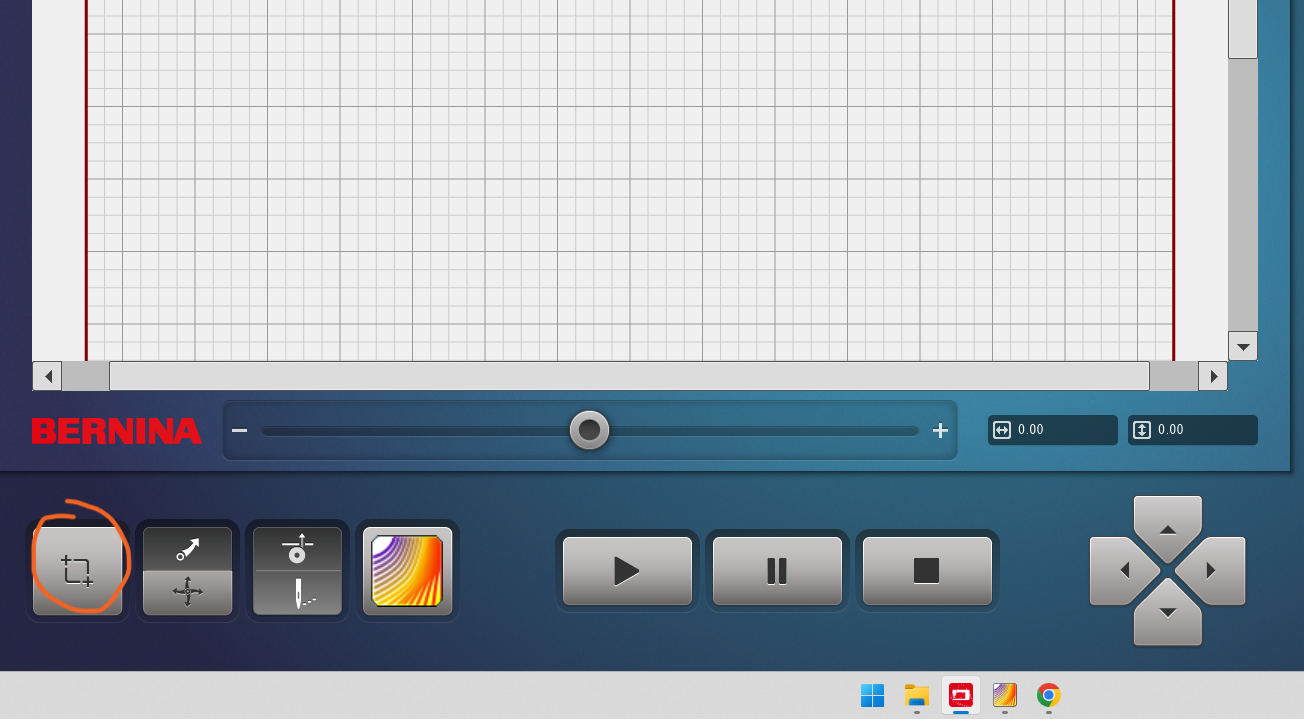
If you missed this or want to redo it, you can click on the icon in the bottom left side.
Then use the sew head to move to the upper left corner of your safe area, press SET on the screen of your machine. Move to the bottom right corner of the safe area and press SET again.
After setting the safe area, you can go ahead and enter the measurements of your quilt. This will help with positioning our repeat patterns on the screen of the computer.
Guidelines
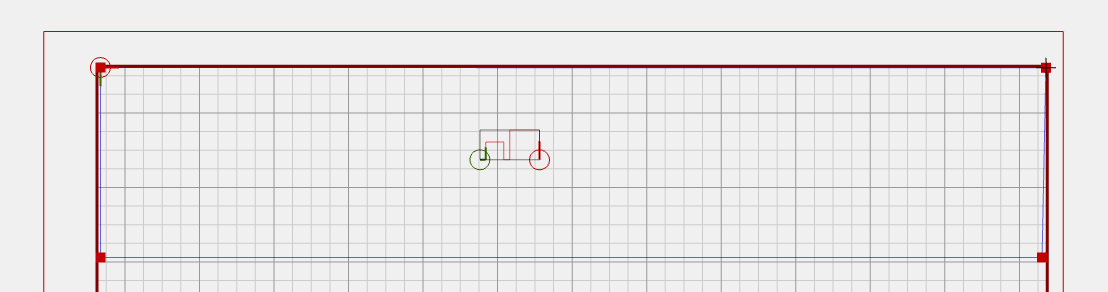
Something extra I did was place some markers for where the first row is. The Needle Point Laser comes in very handy for marking out parts of the quilt.
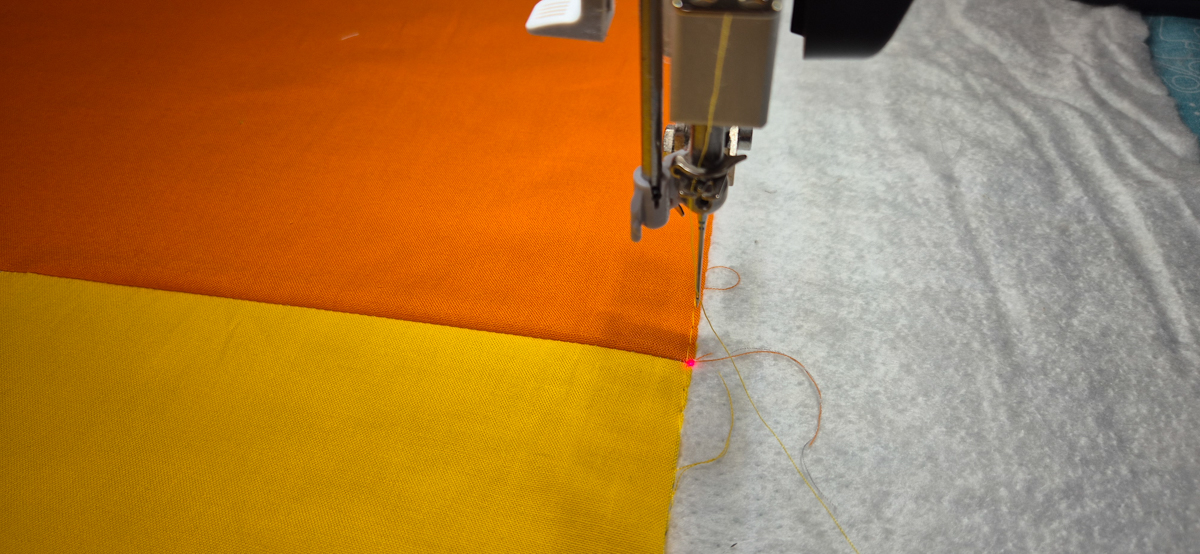
You can place markers by moving the sew head to all four corners of the first row.
When you have the four markers you can connect them. This will give you an extra box on the quilt design to get a feeling of where this first row ends.

Make sure to select the lines and use Sew Options to dequeue the box so you won’t accidentally quilt it later.
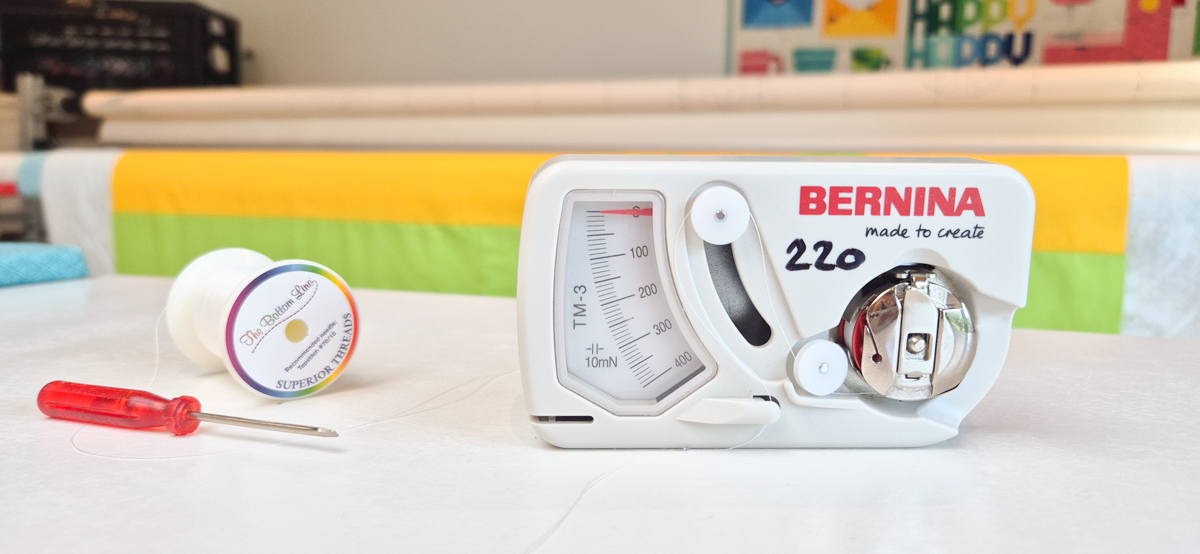
Bobbin Thread
For my bobbin thread, I used a thin white thread. Make sure to check the tension of your bobbin case before you start quilting. I wrote the number for the general tension on the tension gauge, so I don’t have to look it up every time I use it. Click here for a video on how to use the Bobbin Case Tension Gauge.
The Pattern
For every row in the Q-matic Quilt Along, you will find an edge-to-edge design to quilt on your row. You can go ahead and download it for free.

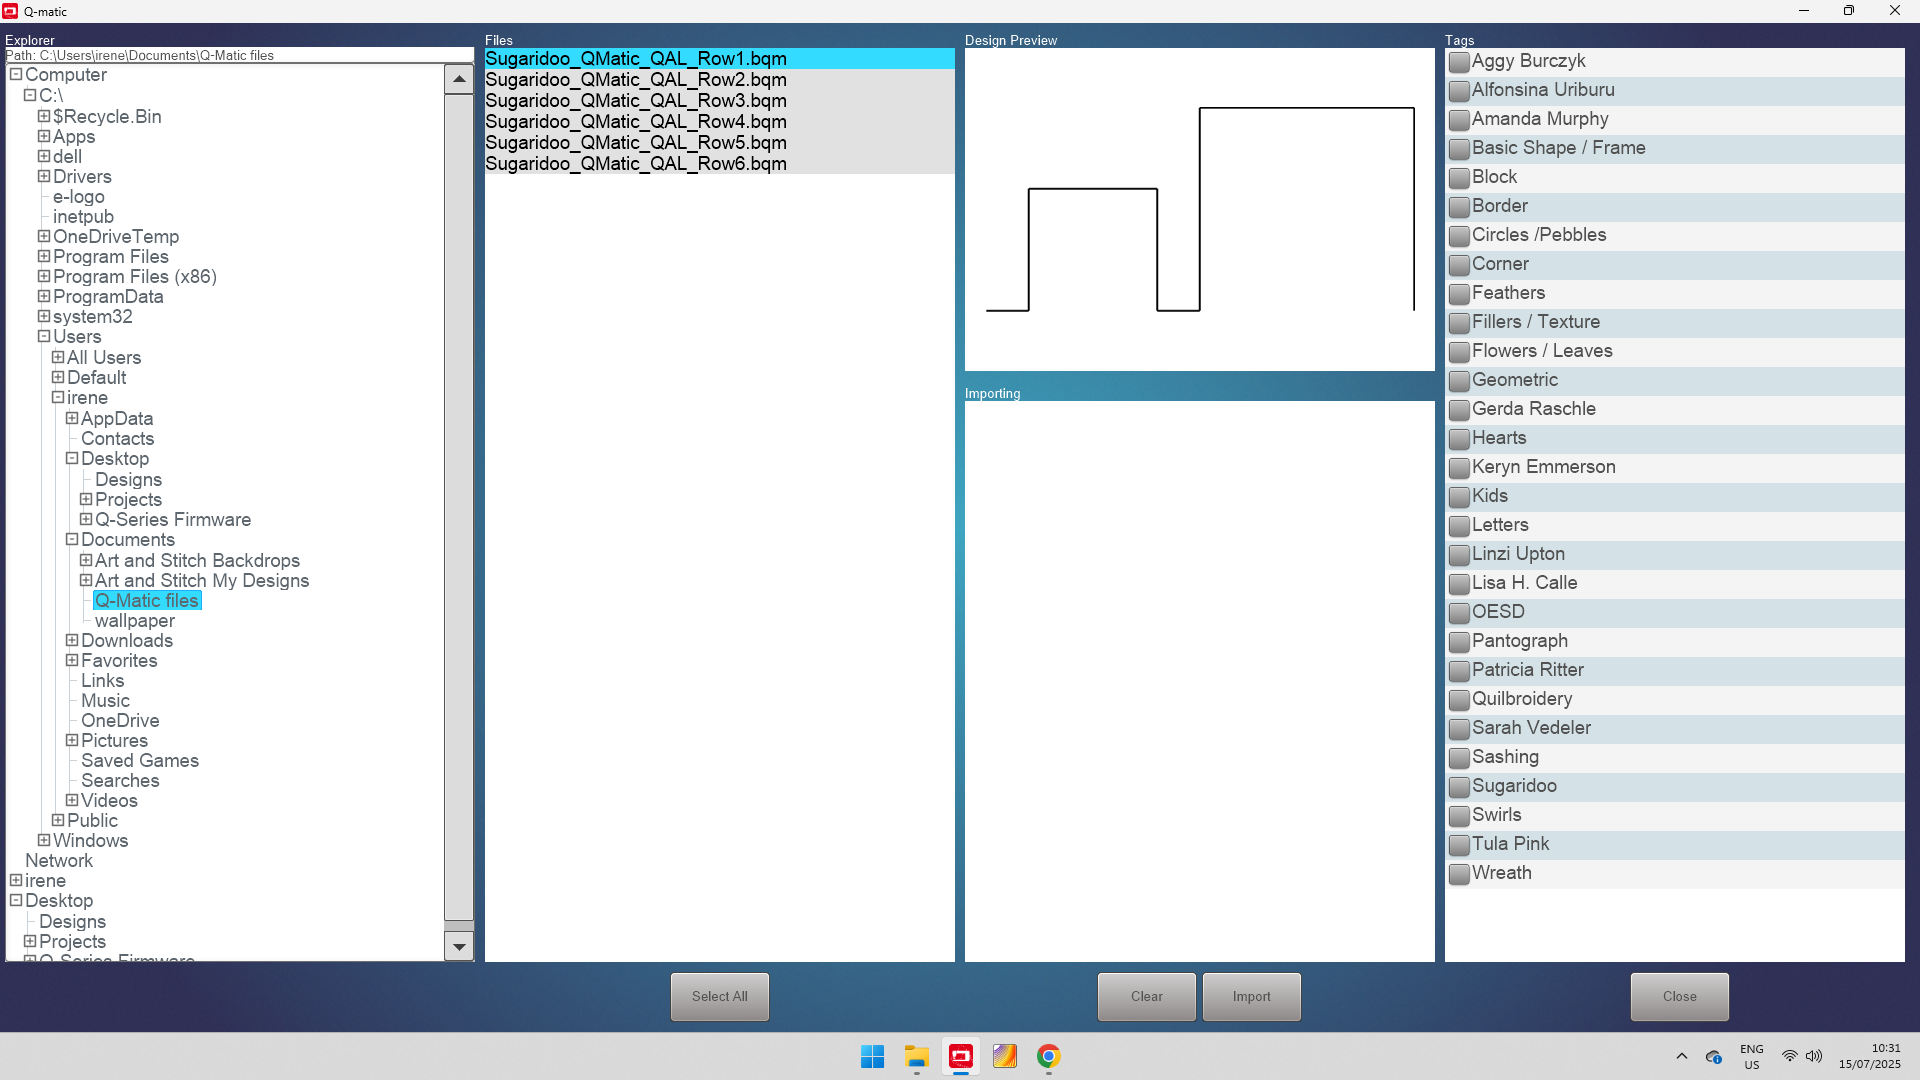
Import the Design
The file you just downloaded is a .bqm file. This is the type of file you can import to the Q-matic.
Go to Design Library and Import Design.
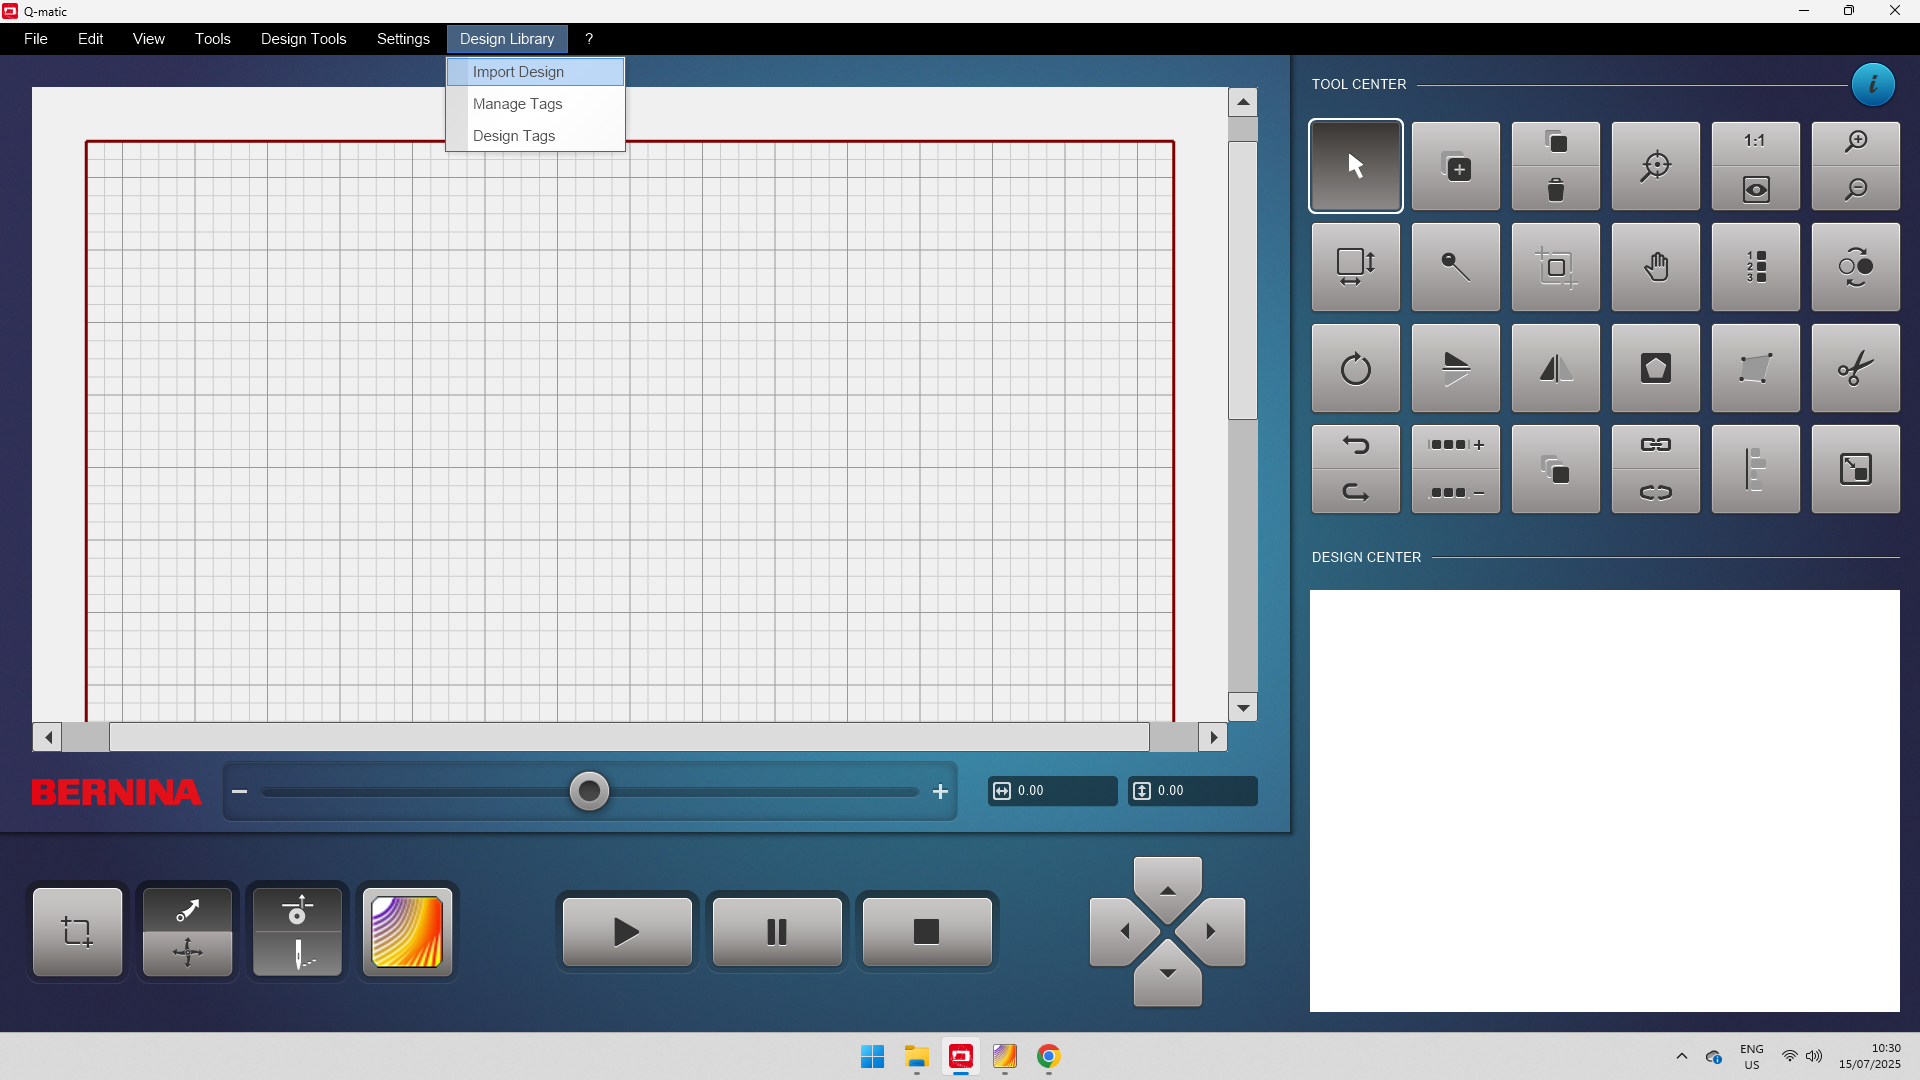
Select the design for row one from a folder on your computer. You can select a Tag as well to make it easier to find your design later on. Then go ahead and Import the design.
In the video below, you can also watch a run-through of all the steps.
Quilting
Now comes the fun part! We get to start building our design and start quilting.
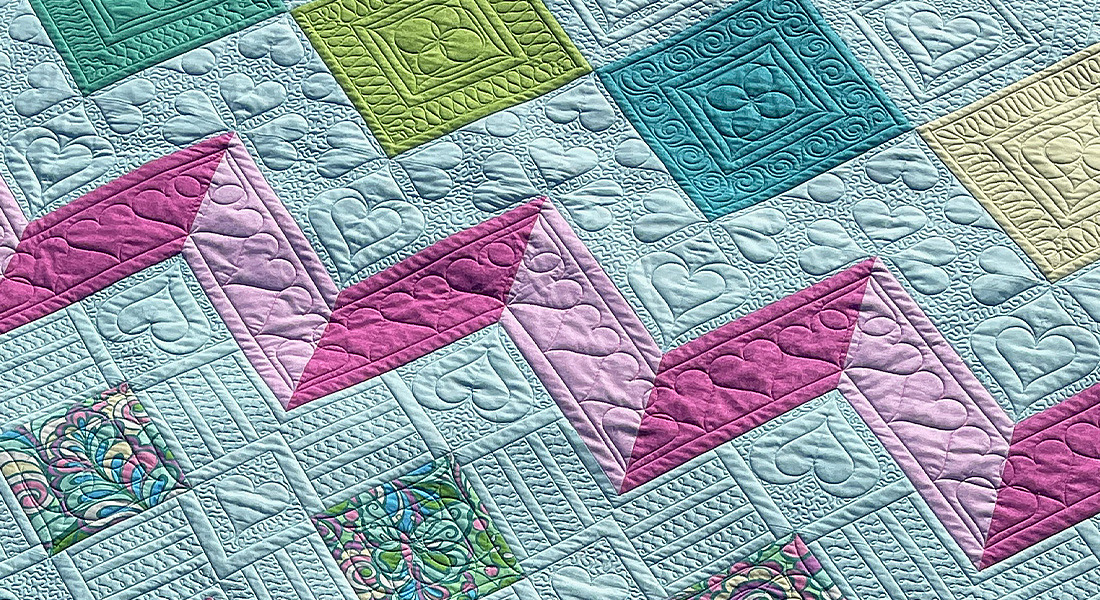
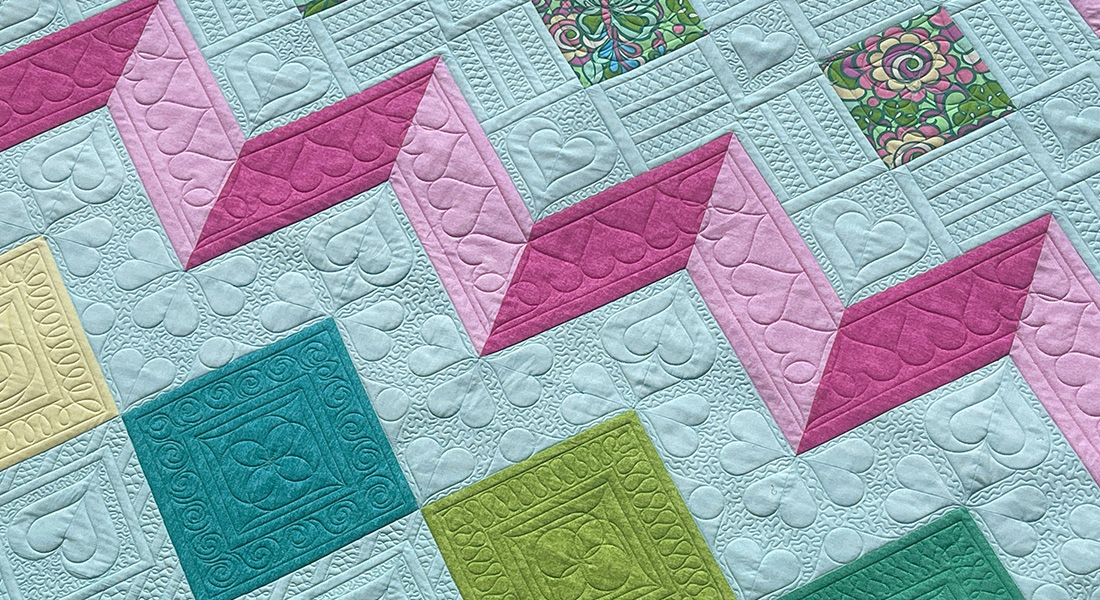
The first row in the Q-matic Quilt Along will be quilted with the square pattern. We will start off easy. Today, we will learn to repeat our design and to exclude the area that we don’t want to quilt.

Place the Design
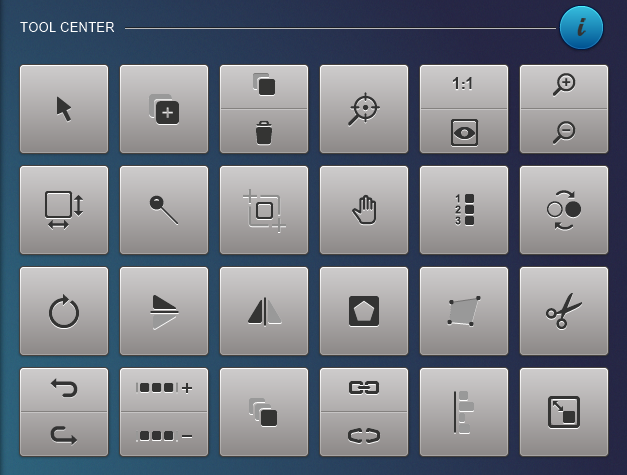
Now the design is added to your library. You can find it by clicking the plus button (right next to the cursor button) in the tool center.
I selected a tag I made, ‘Sugaridoo’, to find the design for this row. Here’s also a little sneak peek of the designs for the upcoming weeks 😉
Double-click the design for this row and press Close.
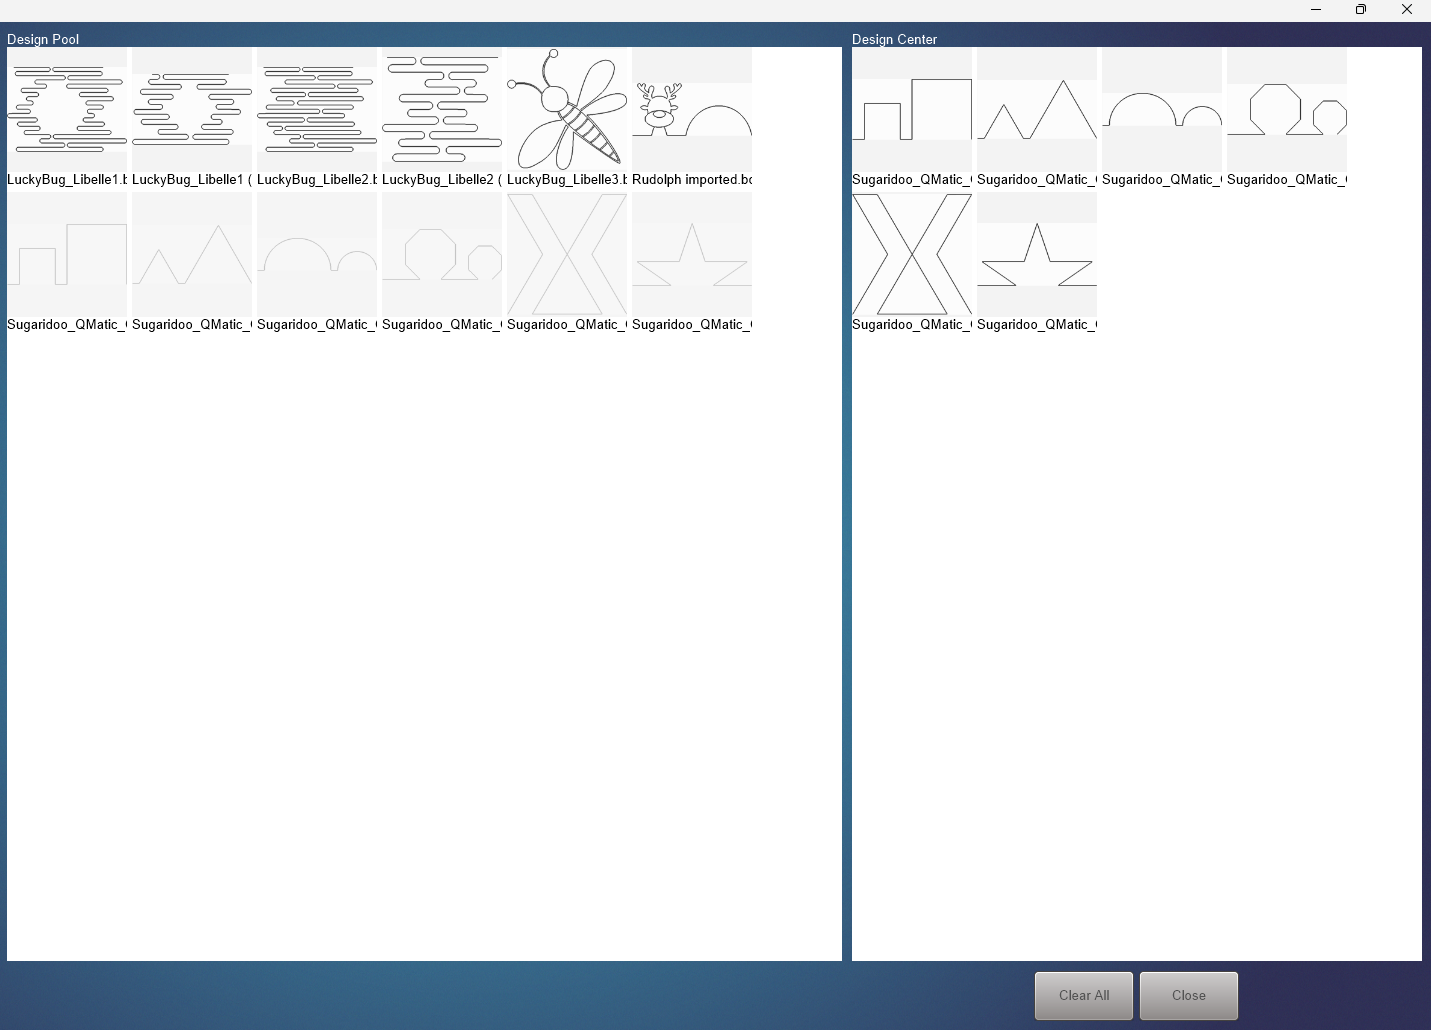
Now the design will be visible in the Design Center. Double-click the design to place it into your project.

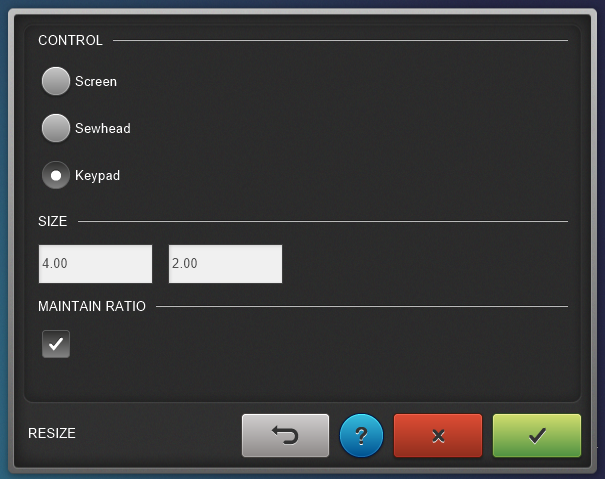
Resize the Design
You can change the size of the design by using the Resize button in the Tool Center, bottom right. I resized the design, with the Keypad option, to be 4 x 2 inches.
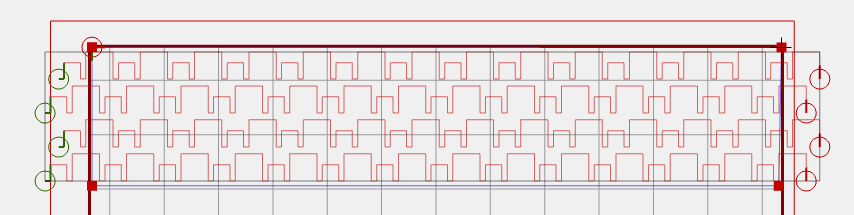
Multiply the Design
Now we are going to repeat the design horizontally and vertically by using the Multiply option.
First, we need to repeat the design across. Increase the number until it fills the width of the quilt and some more. We will trim it later.
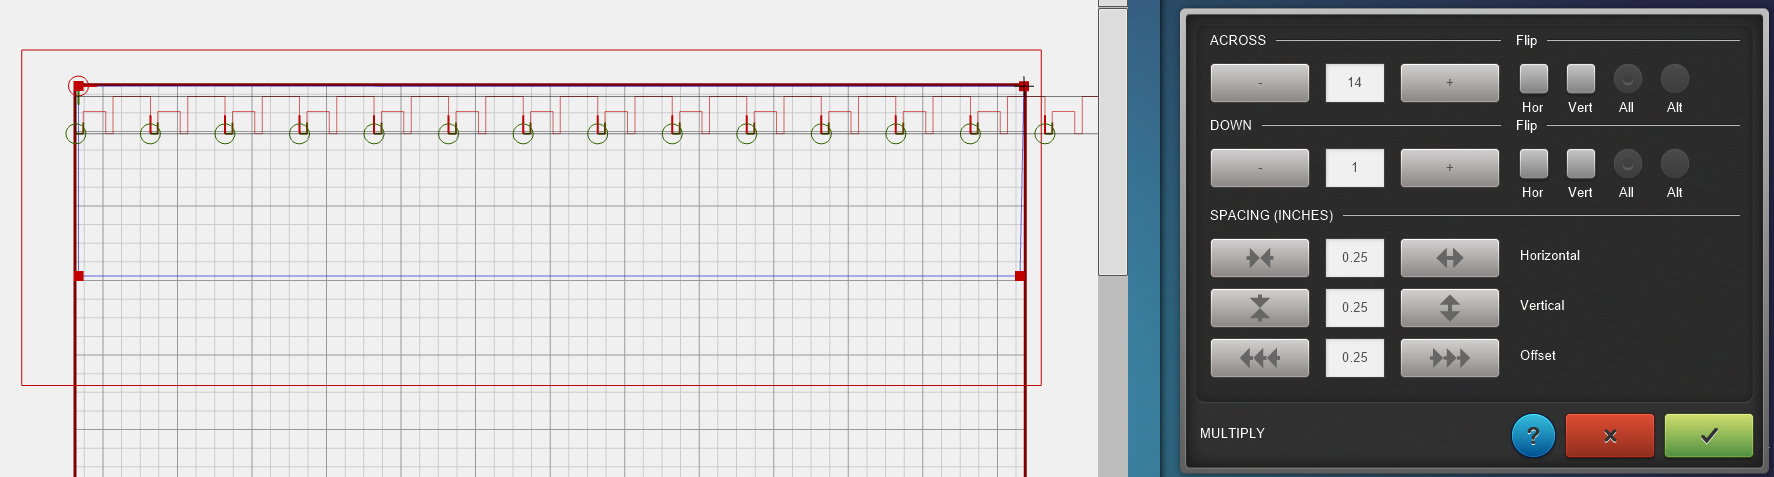 Now you can repeat the design down 4 times.
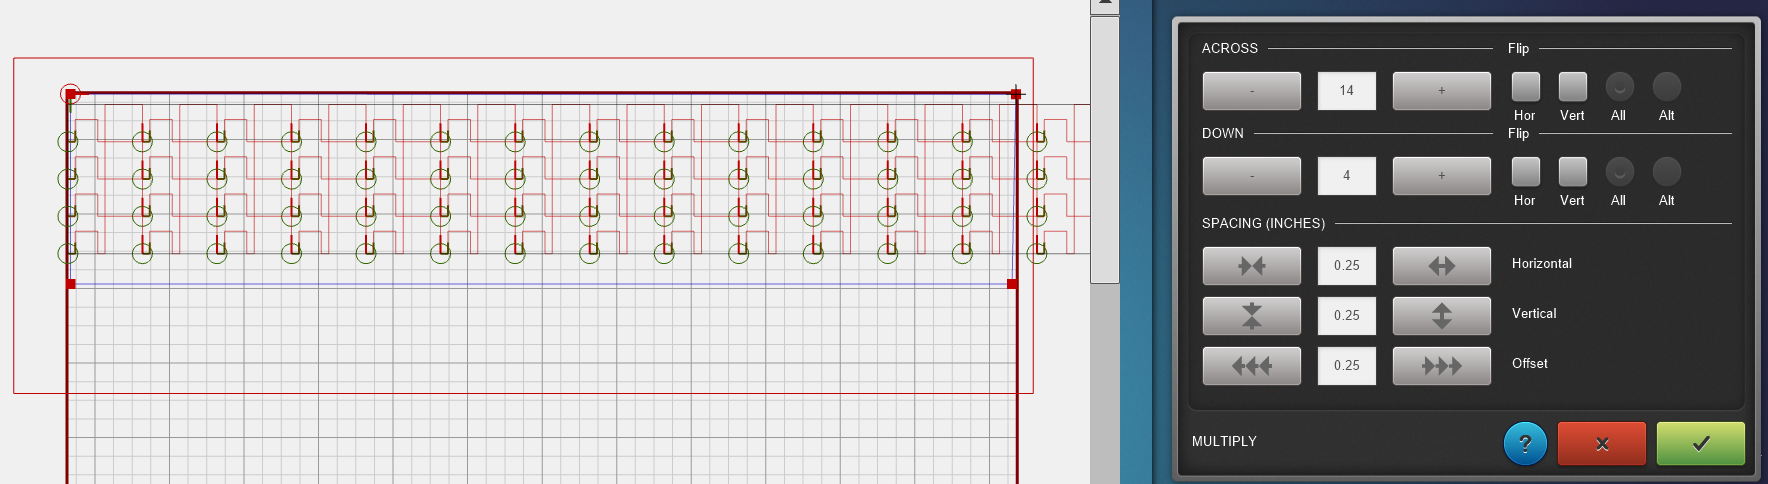
To make this look a little less static, you can play with the Spacing. Use the Vertical spacing to create a little space between the rows. Make sure that the four rows still fit within the area you created with the markers. Use the Offset to shift every second row. 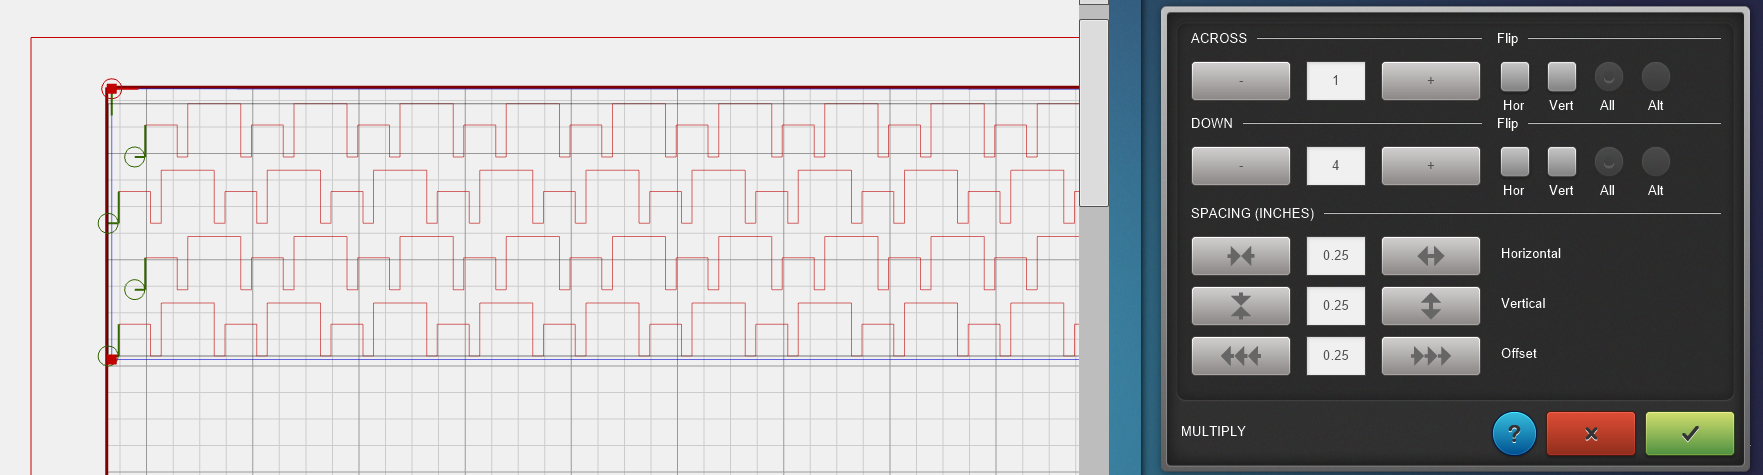
Grab and move the design so that it’s somewhat centered on the marked area.
Connect the Rows
Now I like to link the rows together so it will be quilted in one go. Use the Reverse Sew option from the tool center to reverse two of the rows. A green circle marks the starting point of a row, and a red circle the end point of a row. By alternating the starting points of the rows, you can easily link them.
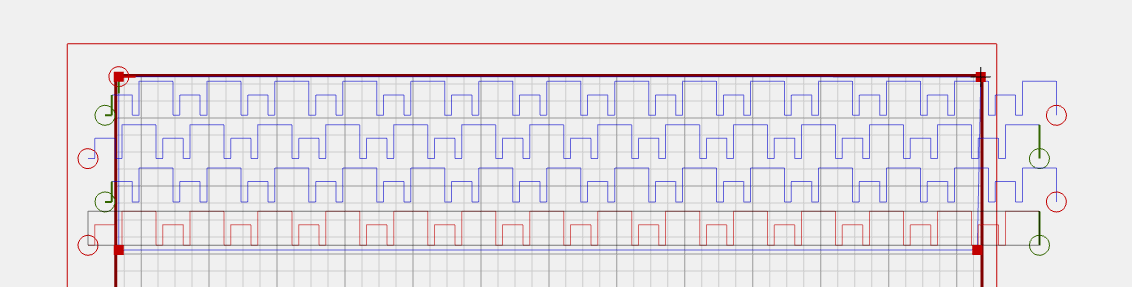
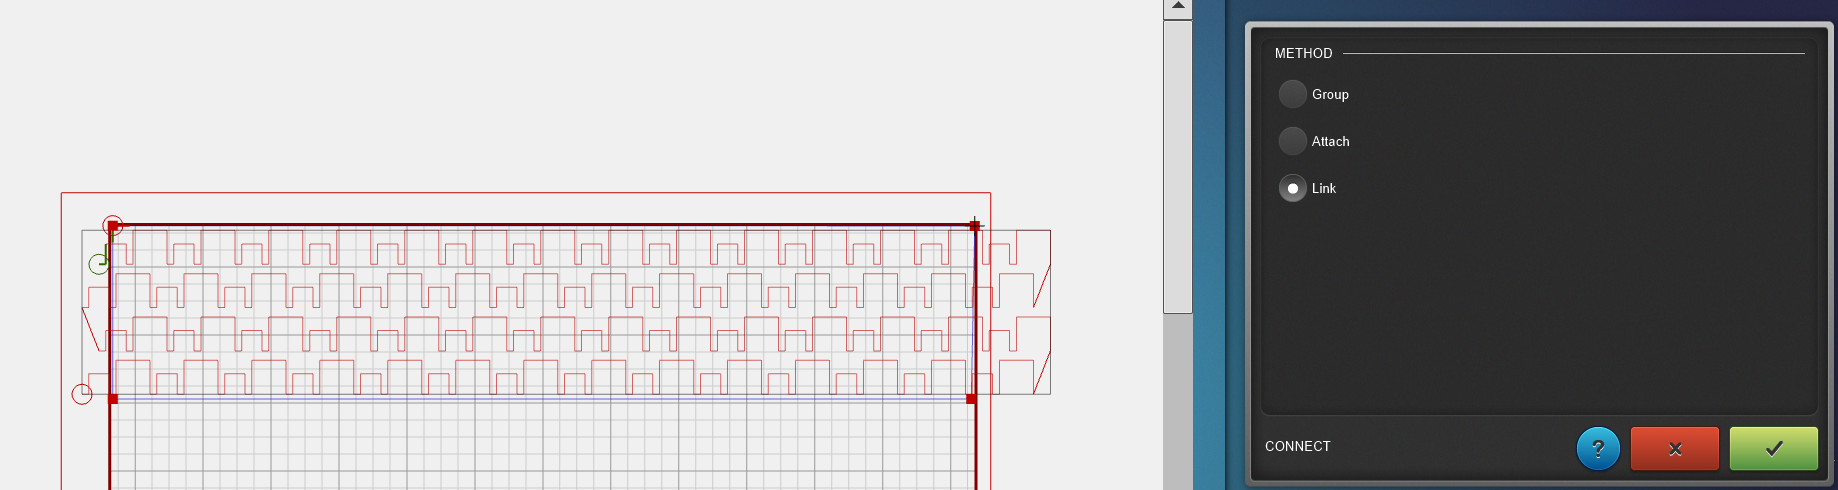
Click Connect in the tool center and select Link. Now select the rows from top to bottom, and you’ll see how the rows will be connected.
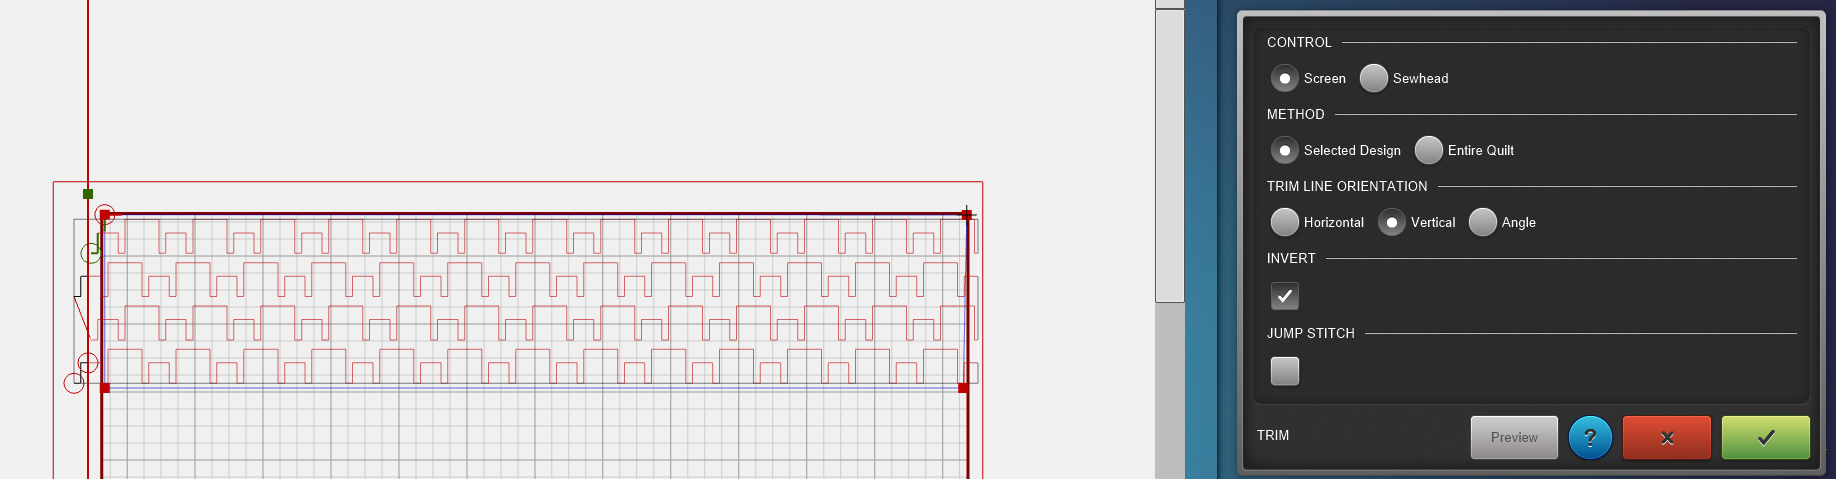
Now we will trim the sides. Select the design (a selected design will turn red) and use the Trim settings. Select Vertical and click just outside the marked area, but inside the safe area. Use the invert button to change what side of the design will be trimmed. The black part of the design will be trimmed.
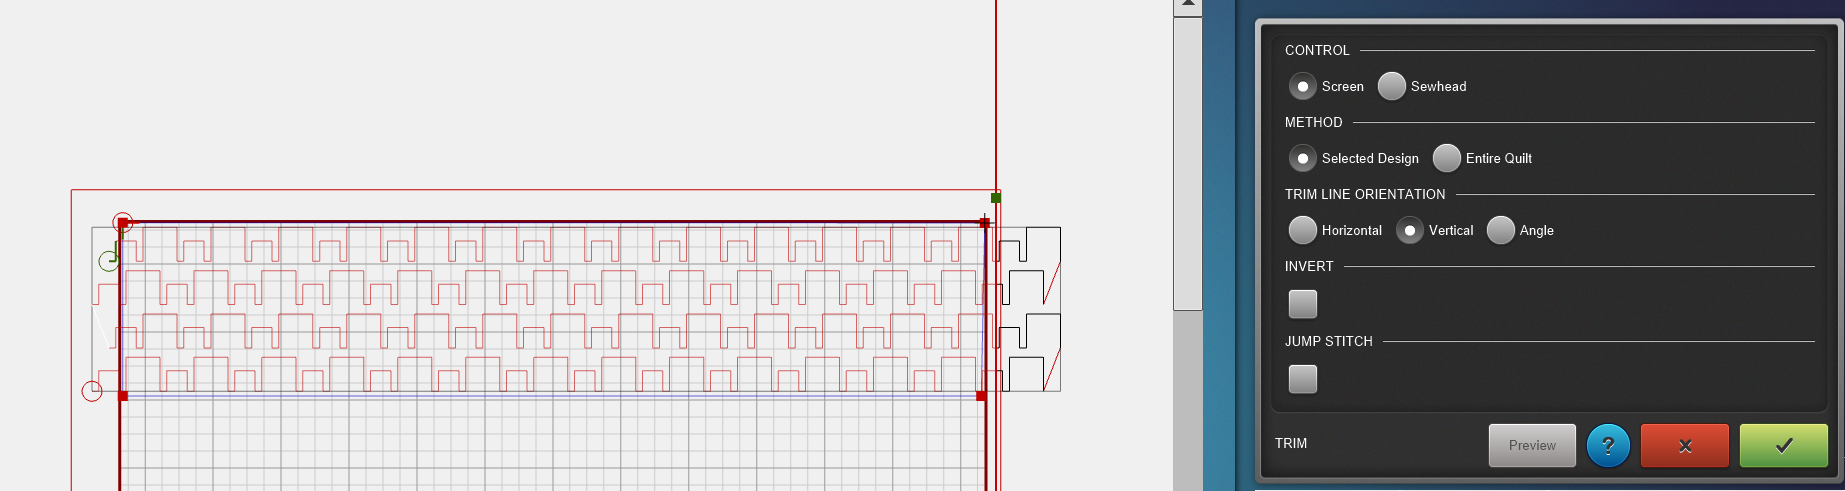
Repeat these steps on the other side.
 Make sure to save your project every now and then.
Exclude the Squares
You could quilt the rows like this. That would already be a fun design for the first row. If you want to take it a step further, you can read along and learn how to sew around the yellow squares.

To exclude the squares we use the Mask settings. Select Sewhead to use as the control. For method you select Create Region. Now you can move the sew head and mark all the corners of the squares. In the image below, I marked the points I selected with green dots.
I did not select Sew Mask Outline.
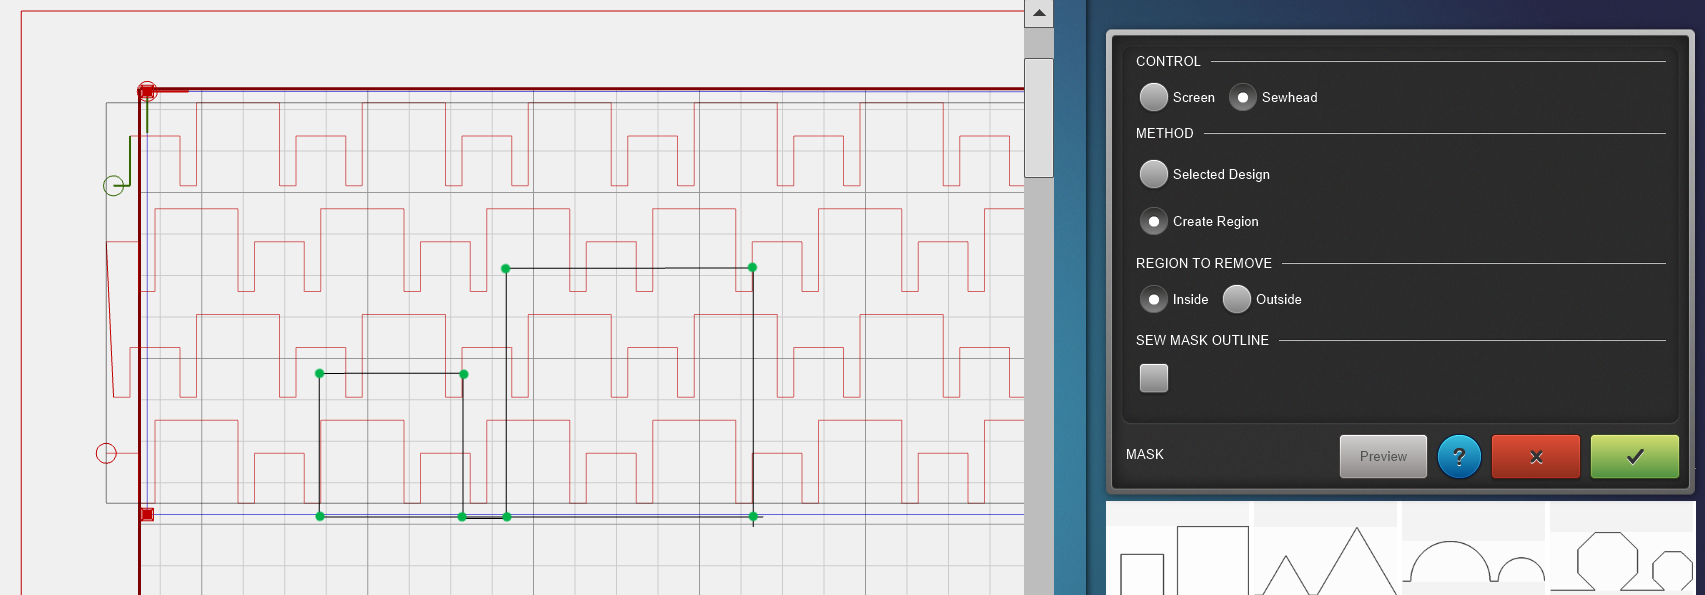
Use the preview button to see if the correct area is removed from the design.
Check, Check, Double Check
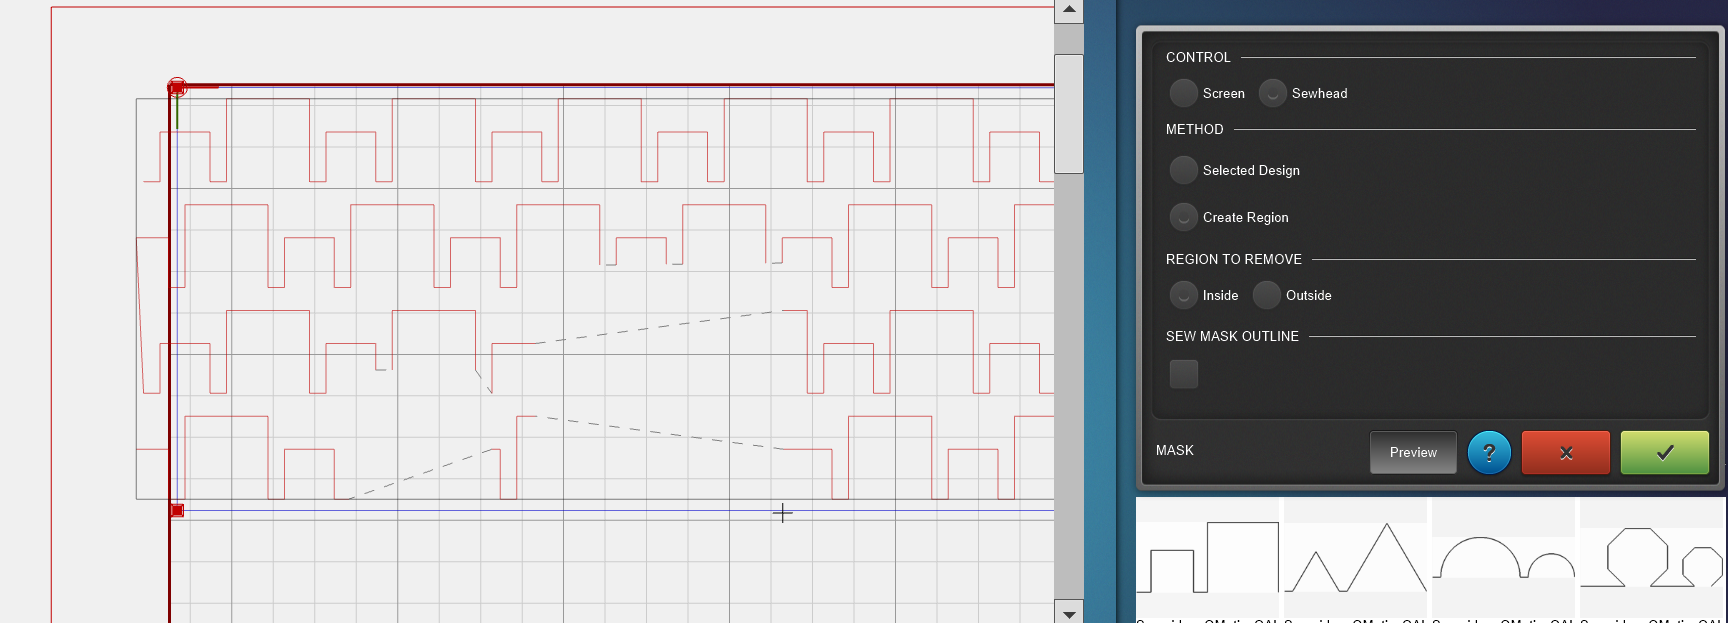
To check if everything is set up correctly, you can move the sew head to the edge of a yellow square. Then check the design on the screen, where do you see the cursor? Is it also on the edge of the design on the computer screen? Check for the top and the bottom of the row as well. Does the design cover the top? Does it not go over the bottom of the row?
Start Quilting
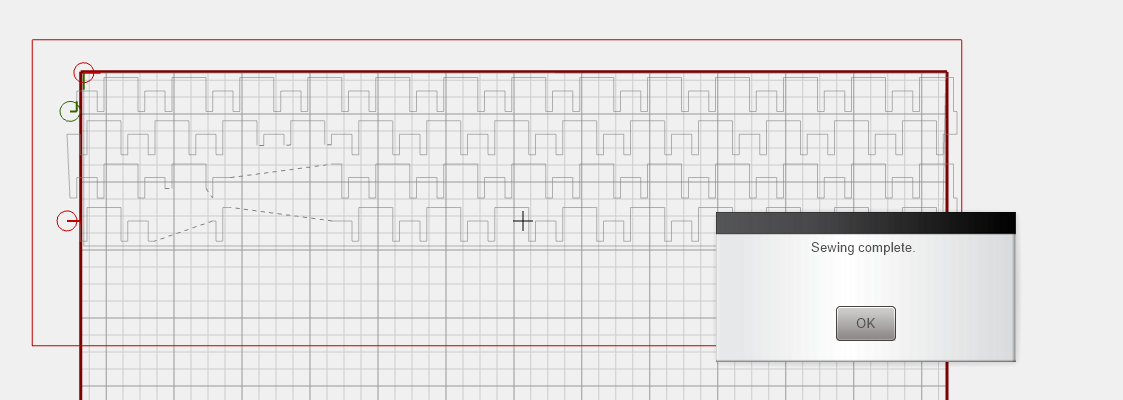
Now that everything is checked, you can press the start button and let the Q-matic do its magic.
After quilting a small part of the design, I like to stop the machine and check the tension on the back of the quilt. If everything looks good, we can go ahead!
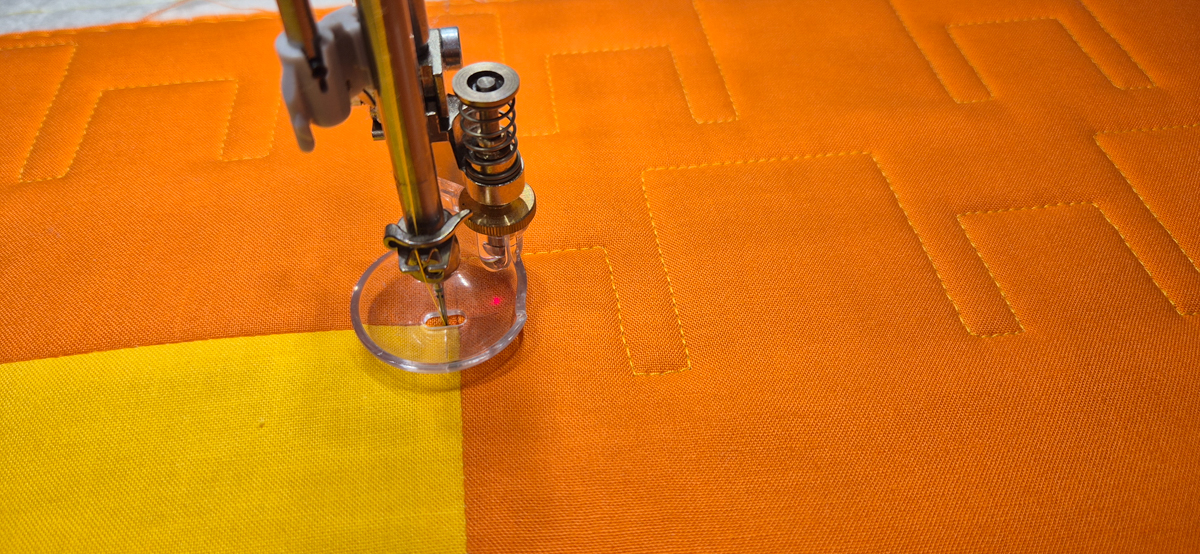
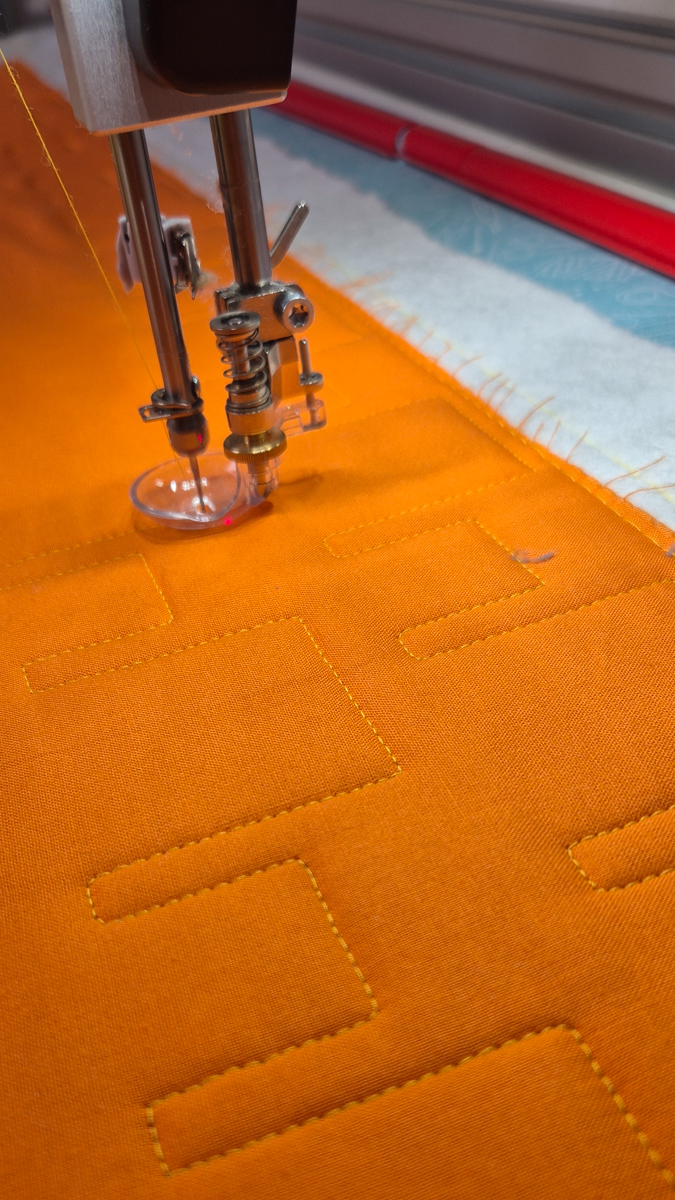
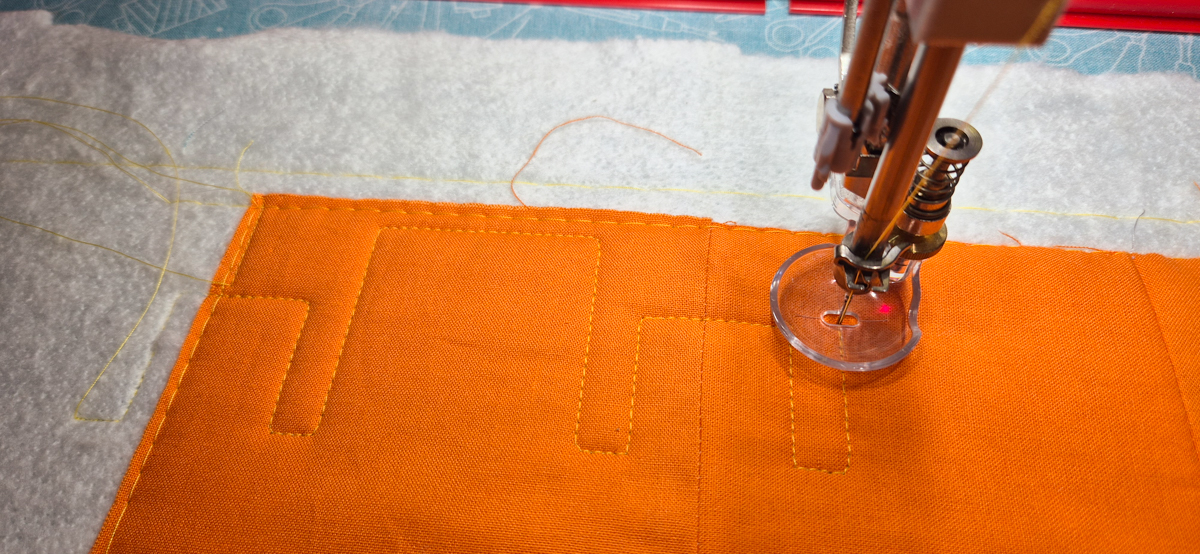
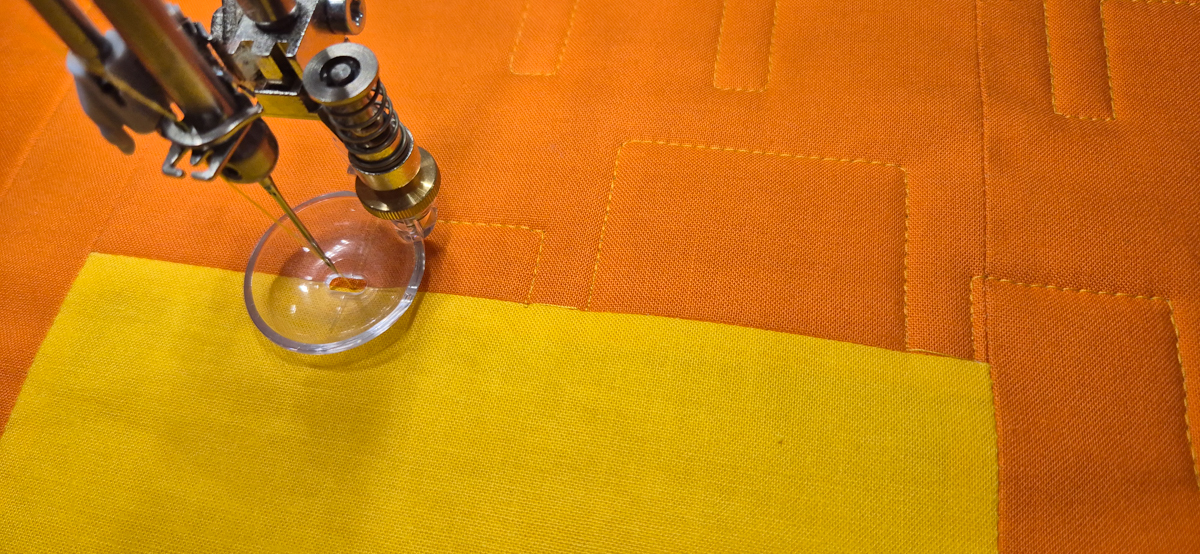
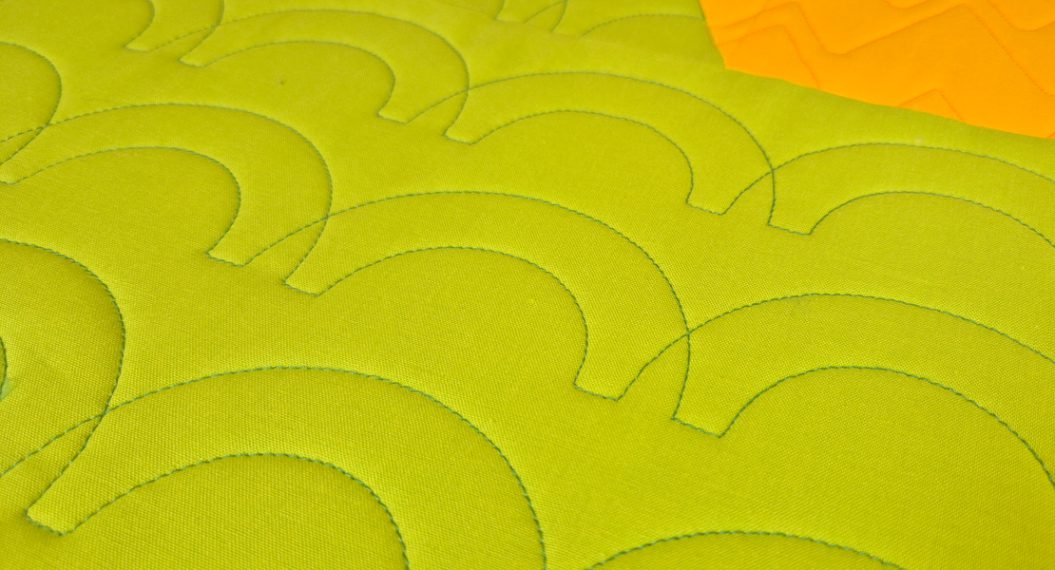
My design starts at the top right. You can see in the image below that the first row and half of the second row are done. The machine stopped and reached the first yellow square.
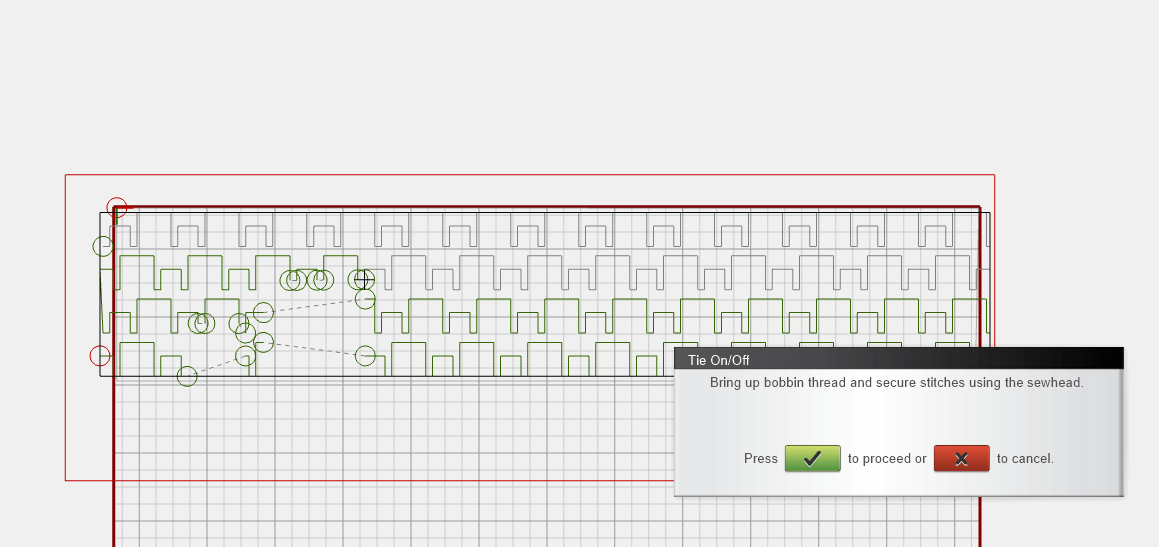
I like to use the Tie On and Tie Off options from the Sew Settings. Now the machine will do extra stitches on the spot when it is stopping and going to the next point. That way, I don’t have to do any tying off loose threads after quilting. I can just clip the travel stitches, and I’m done.
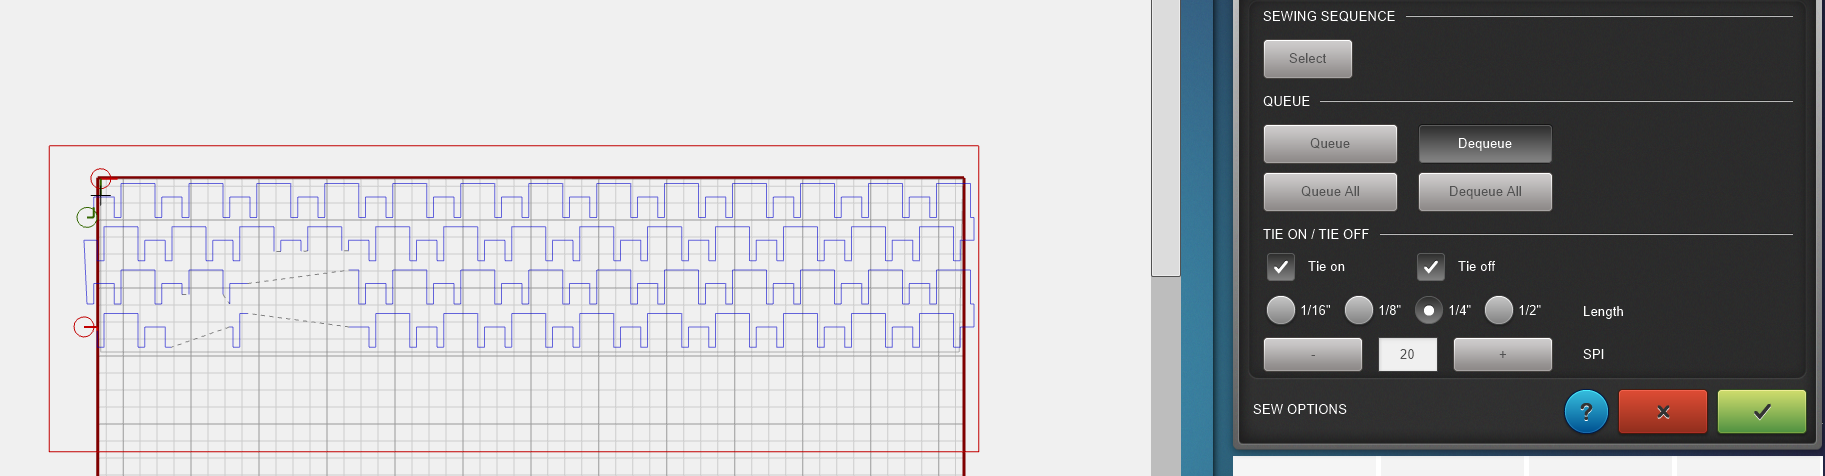
Because of this setting, every time the machine stops, I can just press proceed. There will be a travel stitch between each stop and starting point.
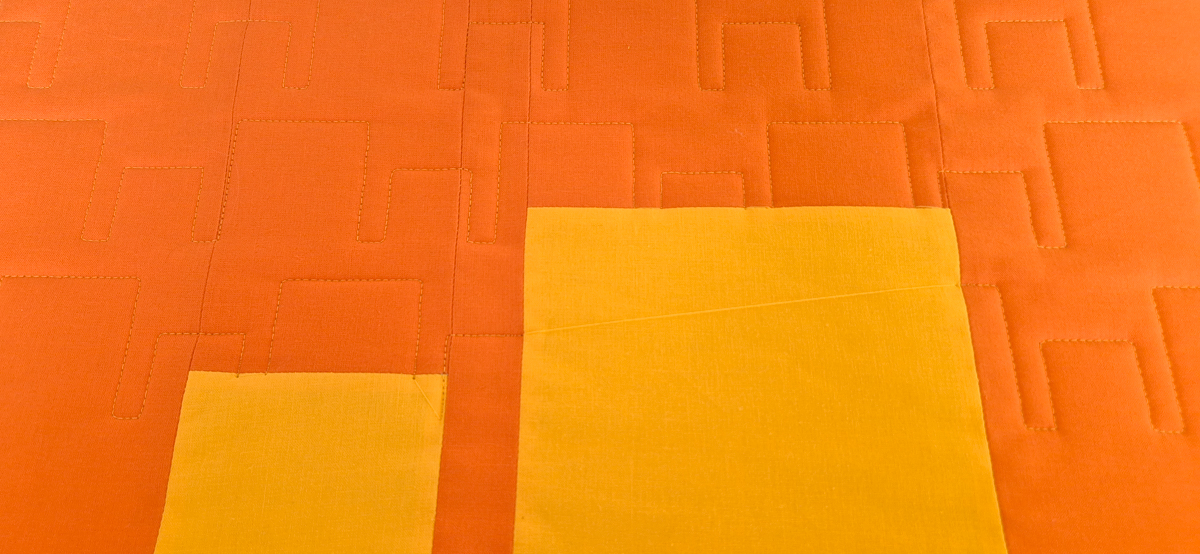
Watching the machine get to work is so satisfying after setting everything up. Here’s what my row looked like after the Big Q was done with it.
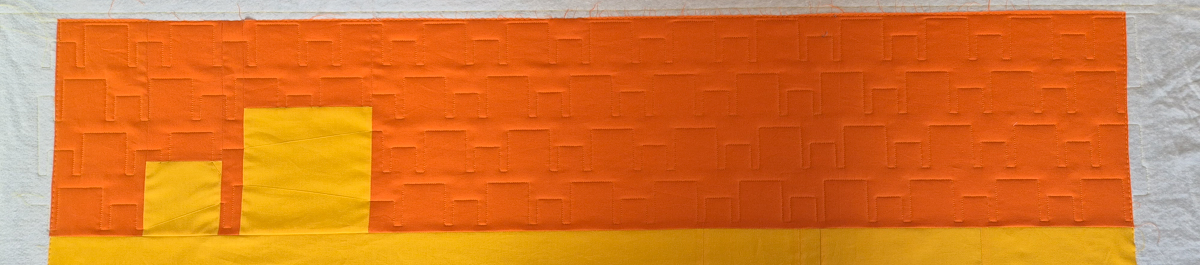
That is our very first row done! Have fun with the first row of the Q-matic Quilt Along. And remember, it doesn’t have to be perfect. The main thing about this QAL is that we get to practice and learn new skills.
See you in two weeks for row 2!
Irene
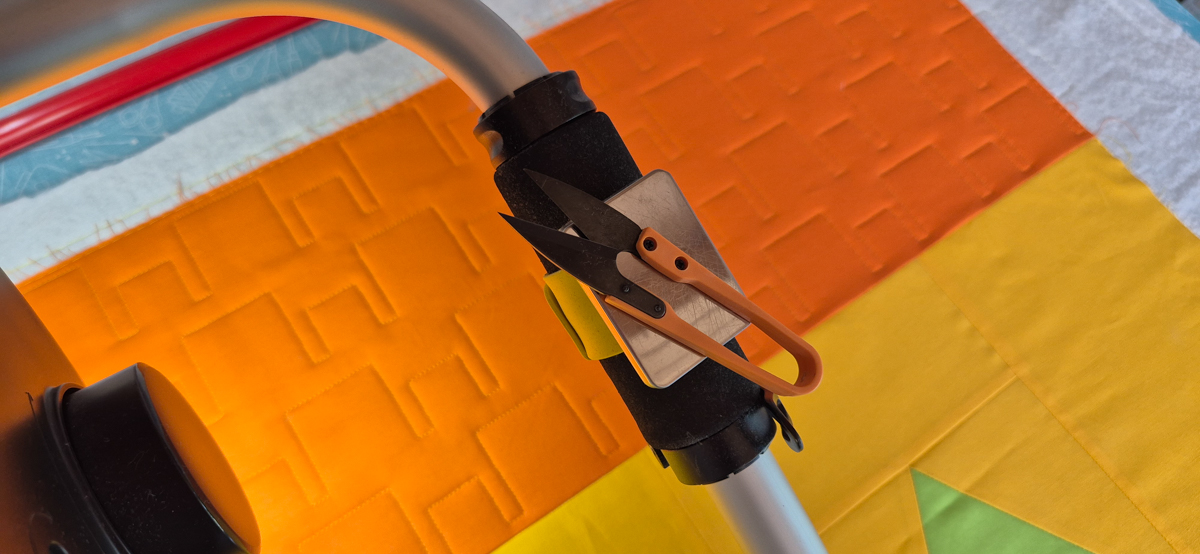
P.s. Don’t you think my snips match this row perfectly 😀
Used Products
What you might also like
One comment on “Q-matic Quilt Along, Part Three: Quilting Row One”
Leave a Reply
You must be logged in to post a comment.
I had trouble when it came time to reverse sew. I tried numerous times to get the 2nd & 4th rows to reverse sew but nothing I did seemed to work. I linked & unlinked the rows & sometimes it would work but often times not. Also, many times I got the design to turn red on the screen, but it wouldn’t move. I finally got the process to work, but not sure how I did it. I will repeat the lesson several times to see if I understand the process.