Embellishing Fabric with Endless Embroidery
Endless Embroidery is one of my favorite BERNINA embroidery features because it allows you to take existing stitches or embroidery designs and create new, decorative motifs. Endless Embroidery was developed to help sewists multi-hoop designs to run them continuously across projects like quilt borders or skirt hems. Although this is still a fantastic way to use Endless Embroidery, I prefer using Pinpoint Placement and the camera for multi-hooping with the B 990 because it’s so simple and quick to use. So how do I use Endless Embroidery, you ask? I love using Endless Embroidery to embellish fabric for all sorts of fun sewing projects!
Endless Embroidery is a quick way to lay out rows of designs for quilting or to get creative and make your own motifs using the designs and stitches available on the machine.
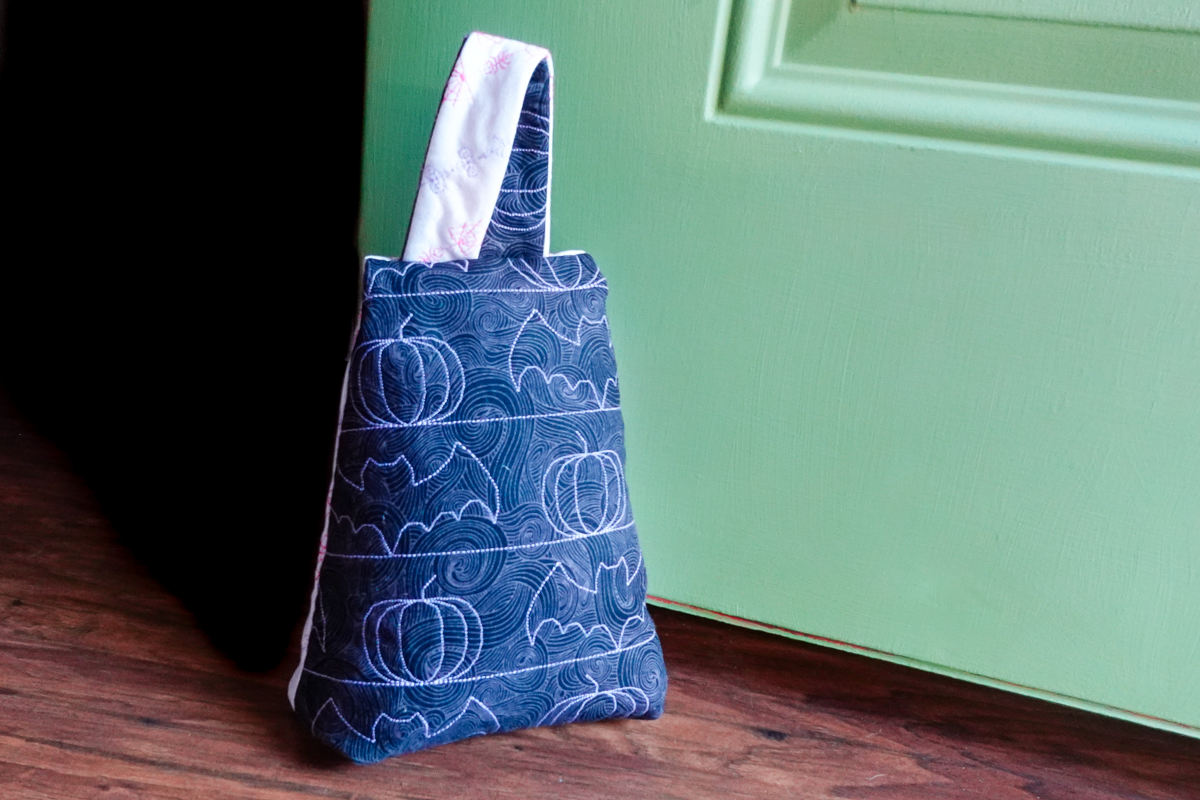
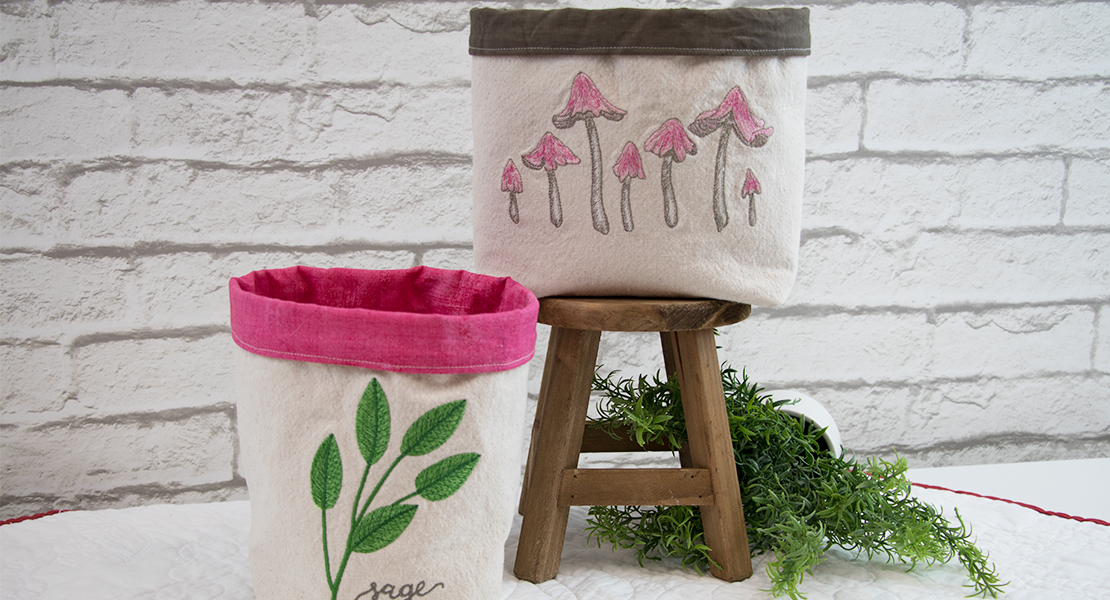
Today, we will build our own spooky season designs onto fabric that we can take to something fun, like a super cute doorstop. Don’t want a doorstop? That’s okay! Embellish the fabric now and choose another project for yourself afterward.
Let’s get stitching!
Materials to Make an Endless Embroidery Doorstop
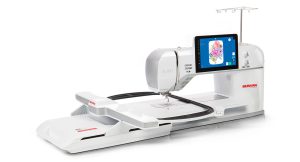
- BERNINA 990
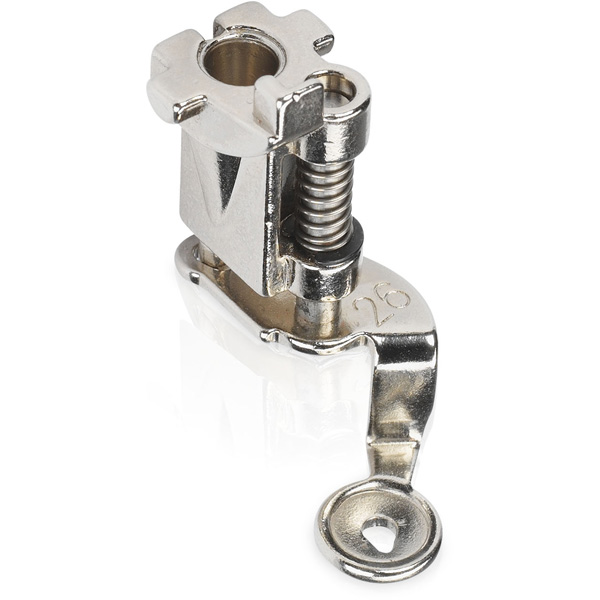
- Embroidery Foot #26L
- Giant Hoop
- 80/12 Embroidery needle
- Embroidery thread in various colors
- (2) 20” x 24” pieces of woven fabric like quilting cotton
- OESD Fuse & Fleece
- OESD Fusible Woven
- OESD Bobbin Thread in White
Step 1: Prepare Fabric & Machine
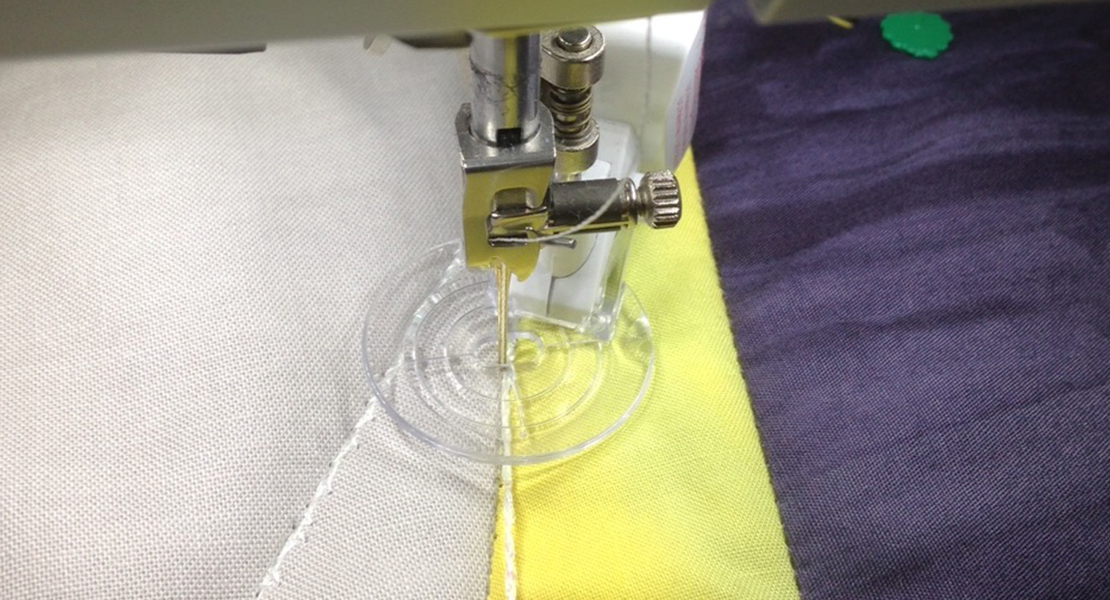
Set up your B 990 by installing a 80/12 embroidery needle, attaching the Embroidery Foot #26L, and selecting the proper foot in the Presser Foot Selection Menu. Wind a bobbin with the bobbin thread and insert it into the machine. Attach the Straight/CutWork Stitch Plate as well as the Embroidery Module.
Prep the quilting cotton by fusing a 20” x 24” piece of Fusible Woven to the wrong side of each piece of fabric. Next, fuse a 20” x 24” piece of Fuse & Fleece to the wrong side of each piece of fabric, covering the fusible woven.
Hoop one piece of fabric, right-side up, in the Giant Hoop.
As always, do not put the hoop on the machine until the B 990 prompts you to do so.
Step 2: Building the Quilting Design
Start in Sewing Mode.
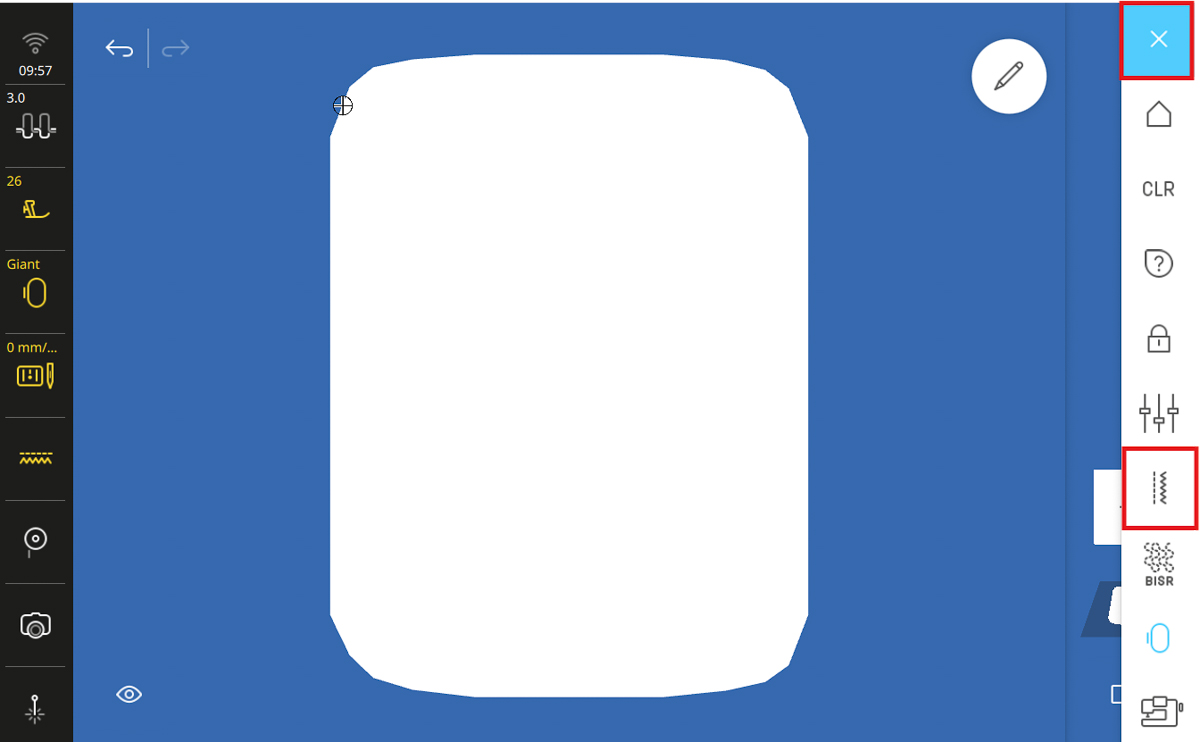
Go to the View Toolbar and turn off the foot view. This will give us a better view of our combination as we create it.
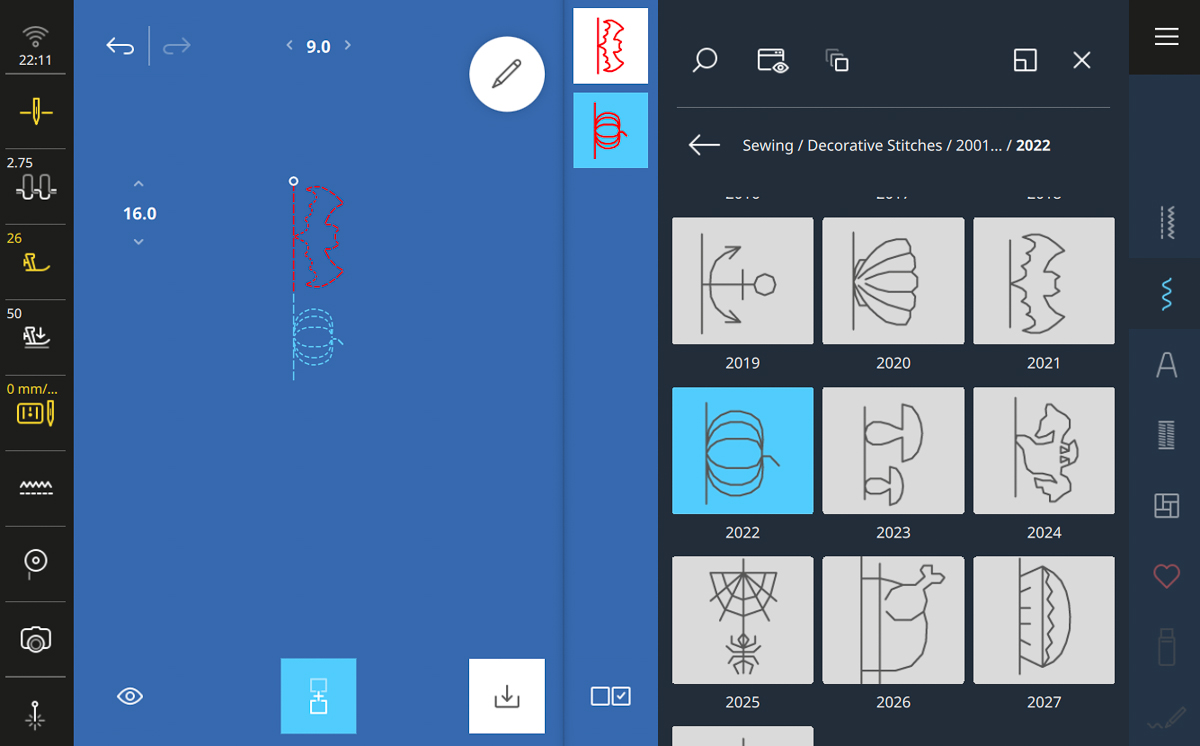
Select Combi Mode at the bottom center of the screen. Select Decorative Stitch #2021, then #2022
Open the Edit Menu and select Triple Stitch. Select the first stitch and make it triple as well.
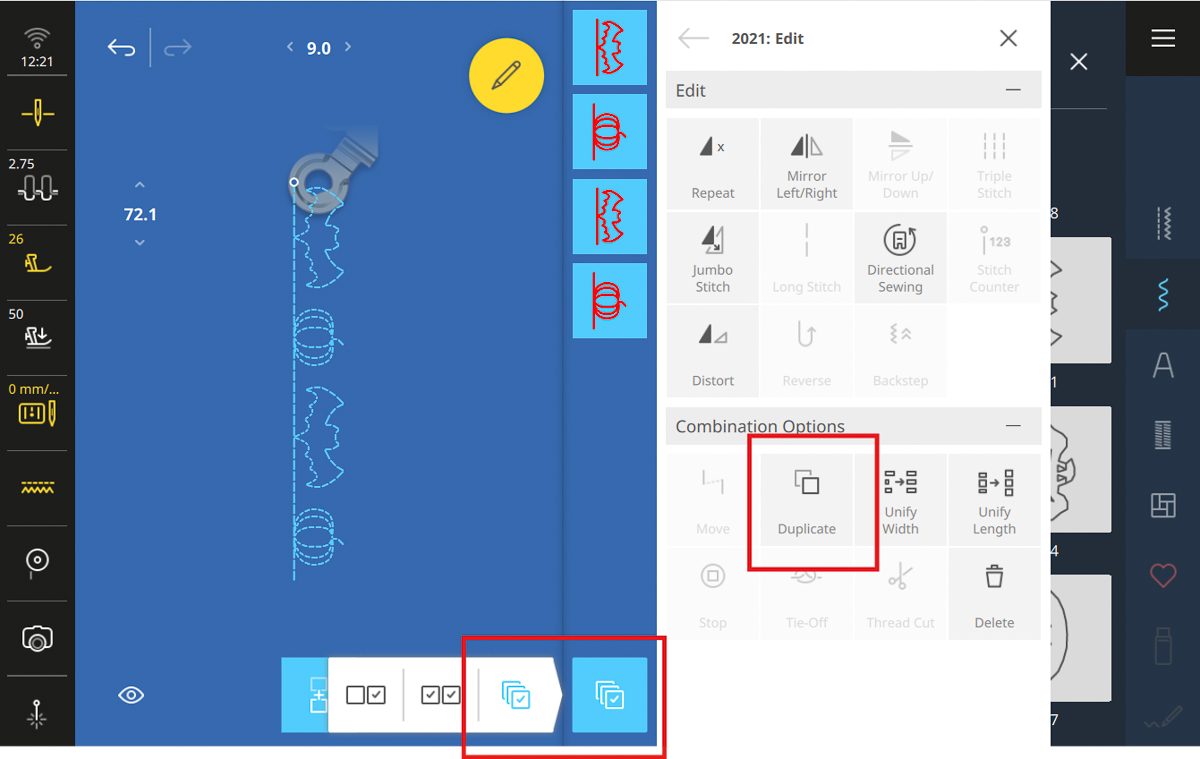
Open the Selection Options Menu and Select All. Tap Duplicate.
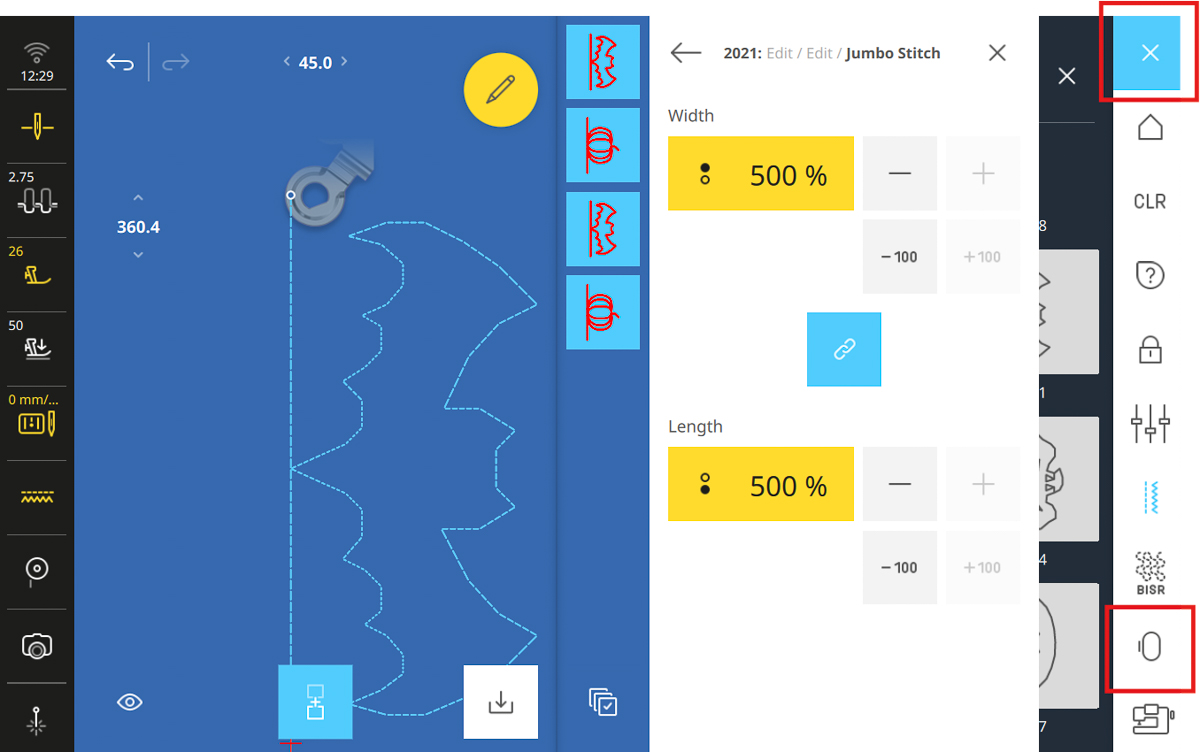
Select Jumbo Stitch and, with all stitches still selected, increase to 500%.
Go to the Main Menu and select Embroidery Mode.
Open the Personal Folder.
Here you will see the Combi Mode stitch we created in Sewing Mode. Isn’t it so great that you can build a combination in Sewing Mode and embroider it so easily?
Select the sewing stitch design.
In the Hoop Selection screen, select the Giant Hoop, then close out of the Hoop Selection Menu.
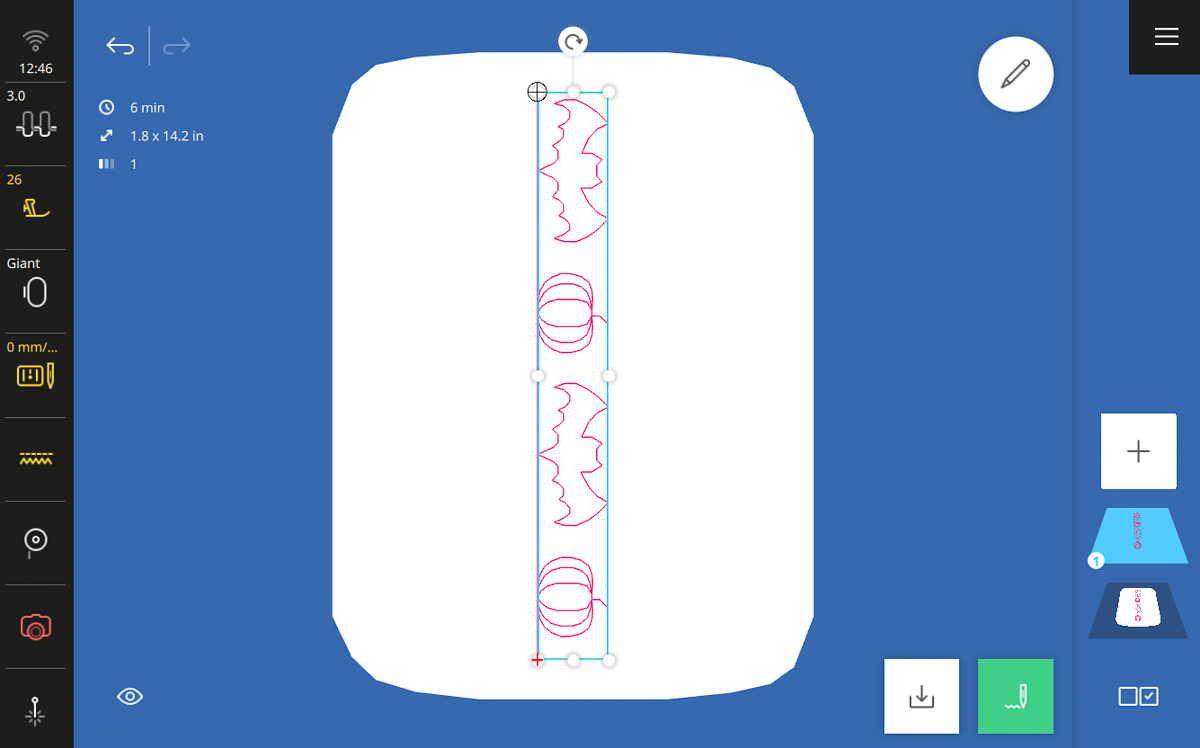
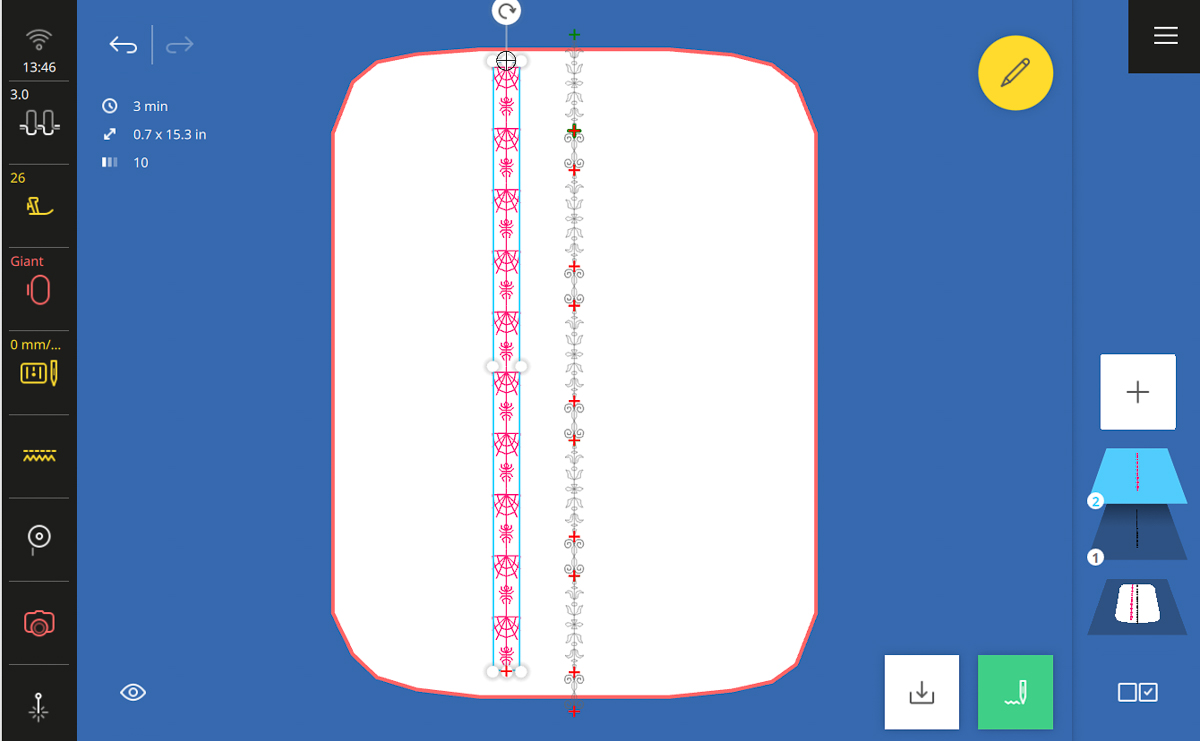
Select Rotate from the Edit Menu; rotate the design to 270 degrees.
Select Duplicate. Drag the second design under the first, leaving a gap between the two. With the second design selected, tap Mirror Left/Right.
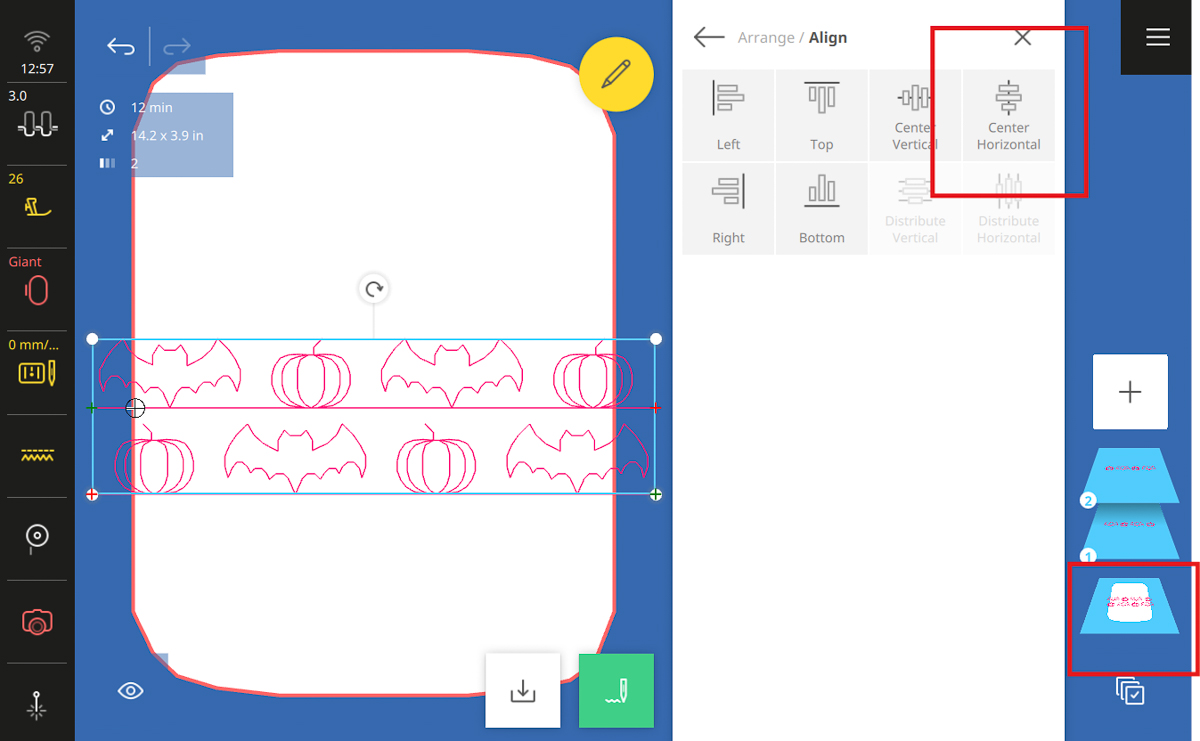
Select the bottommost layer. Open Align and select Center Horizontal.
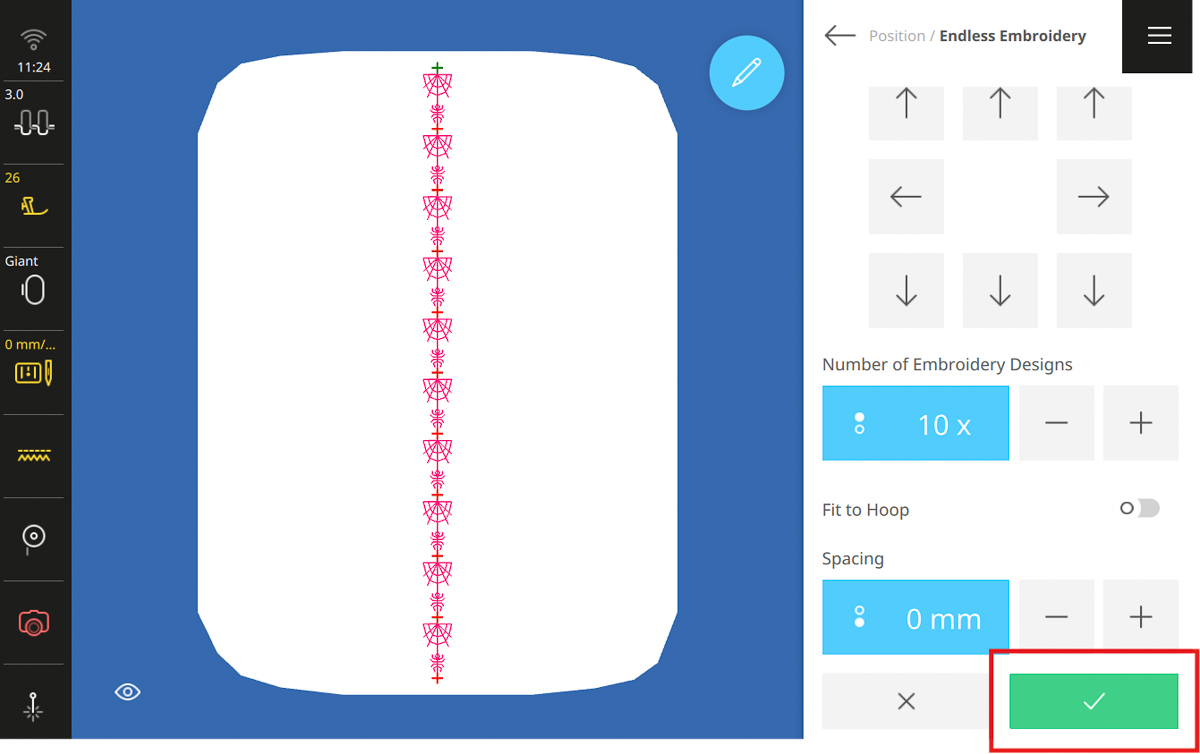
Back in the Edit Menu, select Endless Embroidery. This will fill the hoop with the selected designs without going outside of the hoop. You also have control over the spacing of these designs, which can provide a lot of creative control.
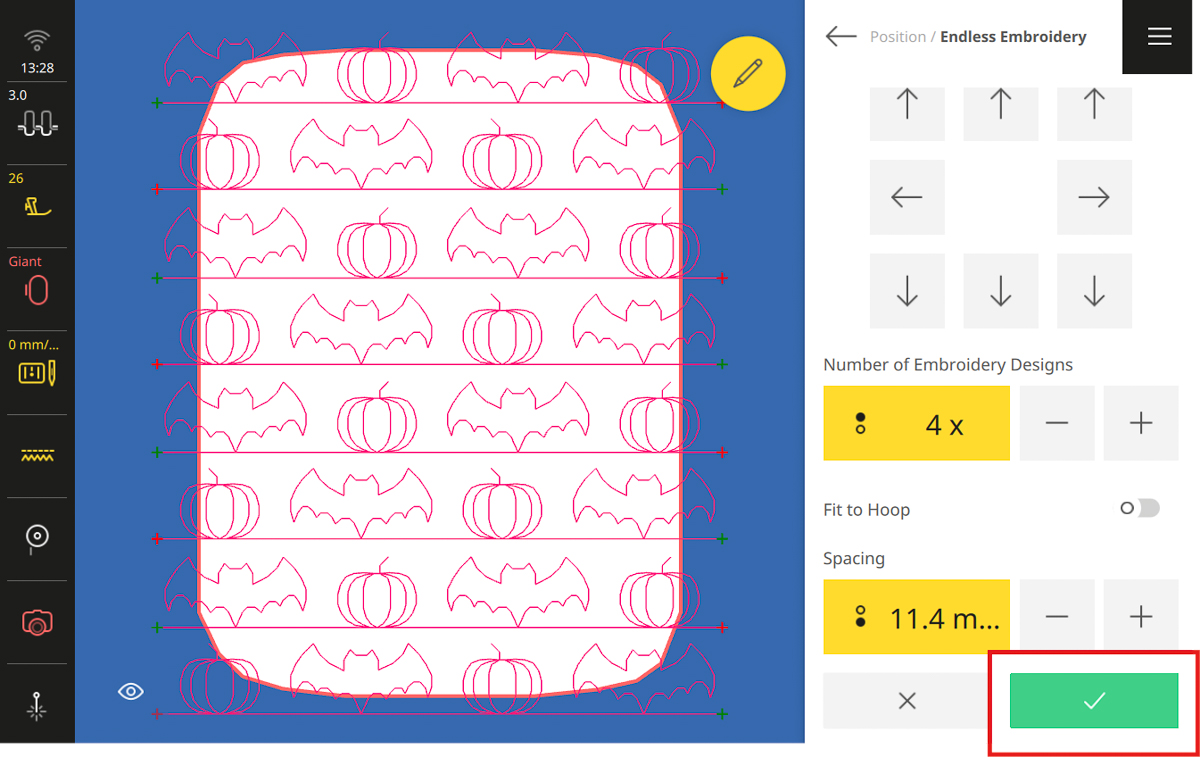
Increase the spacing of the designs as necessary so the spacing of the Endless Embroidery matches the spacing of the original two designs.
Increase the Number of Embroidery Designs until the entire hoop is covered in designs. It’s okay if the design falls outside the hoop.
Deselect all the Reference Marker Arrows. These are used for alignment when multi-hooping, which we won’t be doing today.
Tap the green checkmark to confirm.
Select the Stitchout icon, then select the following:
- Quilt Settings: Off
- Basting: None
- Thread Away Mode: On
- Thread Cutting: On Jump Stitch
- Thread Cut Length: 6 mm
- Presser Foot: 26
- Color: Reduce Thread Changes
- Fabric Thickness: 4 mm
Tap the green checkmark to confirm.

The machine will prompt you to attach the hoop.
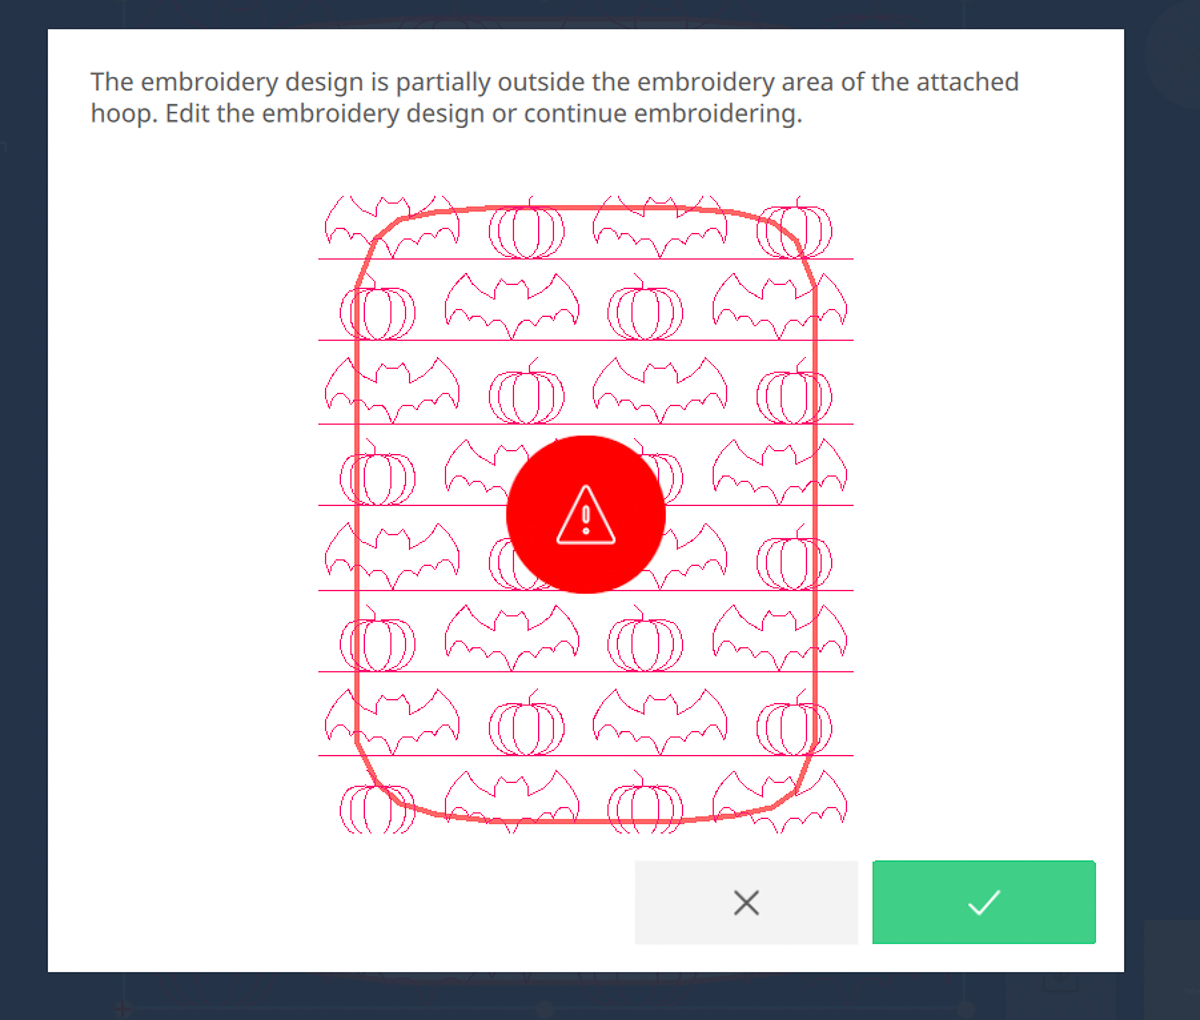
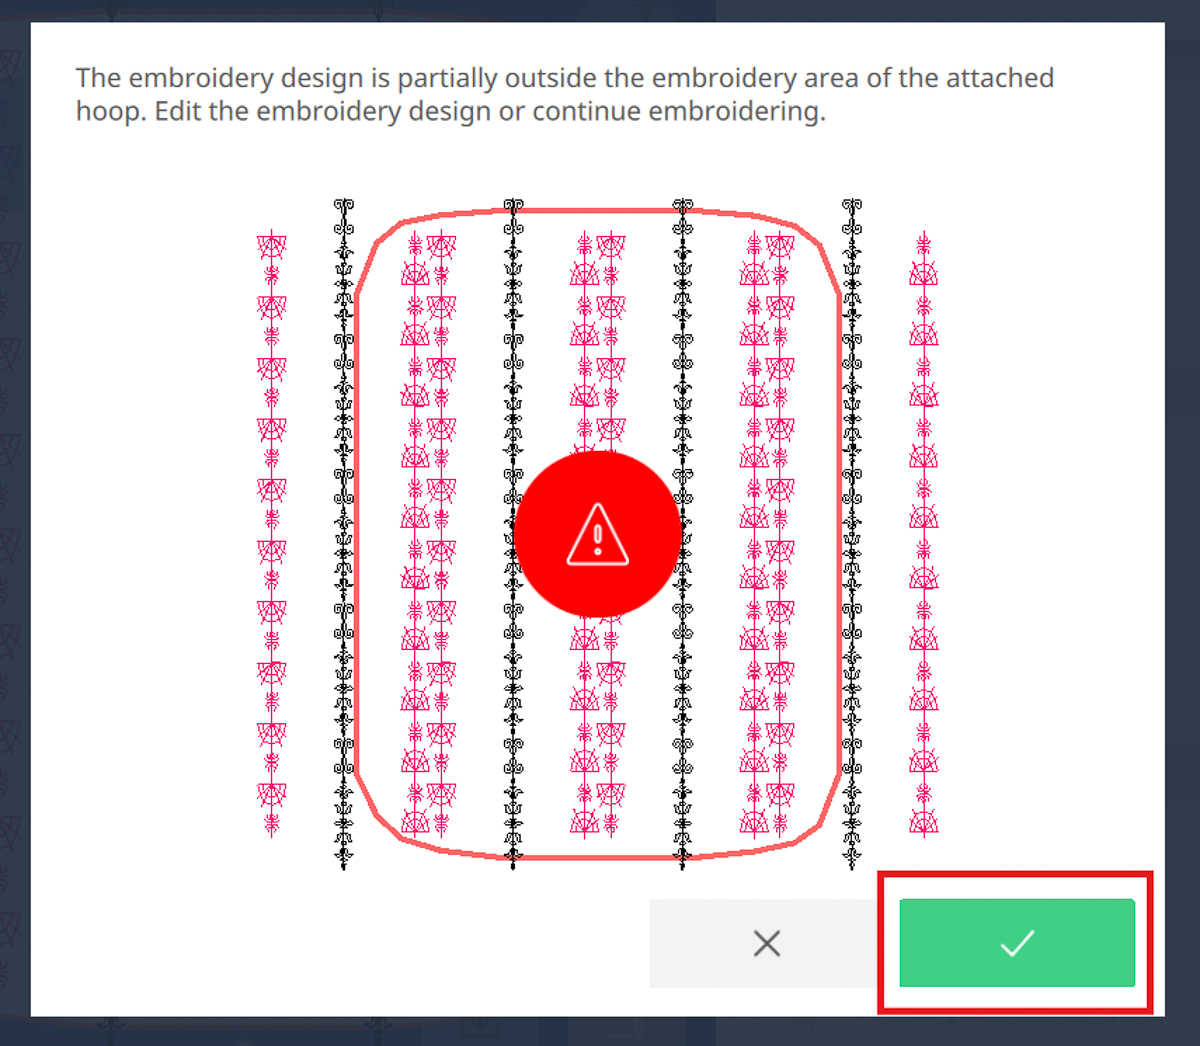
Once you attach the hoop, there will be a warning about the design falling outside of the hoop. Did you know all BERNINA embroidery machines can still stitch the design, even when the design falls outside of the hoop? They can! It’s great for quilting or for uninterrupted stitching on the fabric base, as we do today.
A warning will pop up that says, “Edit the embroidery design or continue embroidering.” If you do not want your embroidery design to be cut off, you would select the “x” and edit/move the design as necessary. However, today, we want to stitch out the cut-off design as it is, so tap the green checkmark.
Stitch out the design. Every time the design comes to the edge of the hoop, simply clear the warning and restart the stitching.
When the design is finished stitching out, tap Finish Embroidering and un-hoop the fabric. Set the fabric aside for now.

Step 3: Building the Embroidery Design
Hoop the next piece of fabric, right-side up, and set aside while we build the next design.
Go back to the Edit Screen. Delete the design from the screen.
Go to the Main Menu and select Sewing Mode.
Exit out of Combi Mode.
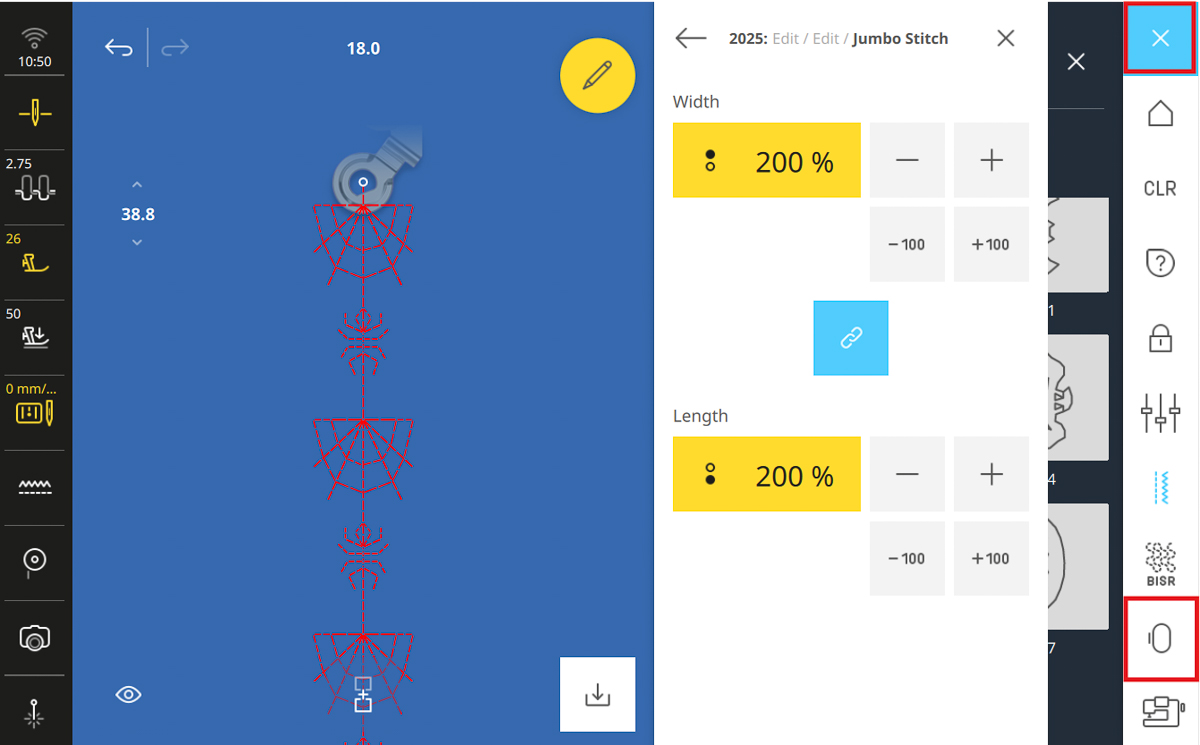
Select Stitch #2025 and open the Edit Menu. Select Jumbo Stitch and increase the size to 200%.
Go to the Main Menu and change to Embroidery Mode.
Open the Personal Folder and select the stitch created in Sewing Mode (there is only one stitch because we did a sewing stitch instead of building a combination). We will use Endless Embroidery to build the next design.
Open the Hoop Selection Menu and select Giant Hoop.
Open the Edit Menu. Select Endless Embroidery.
Ensure all the Reference Marker Arrows are deselected.
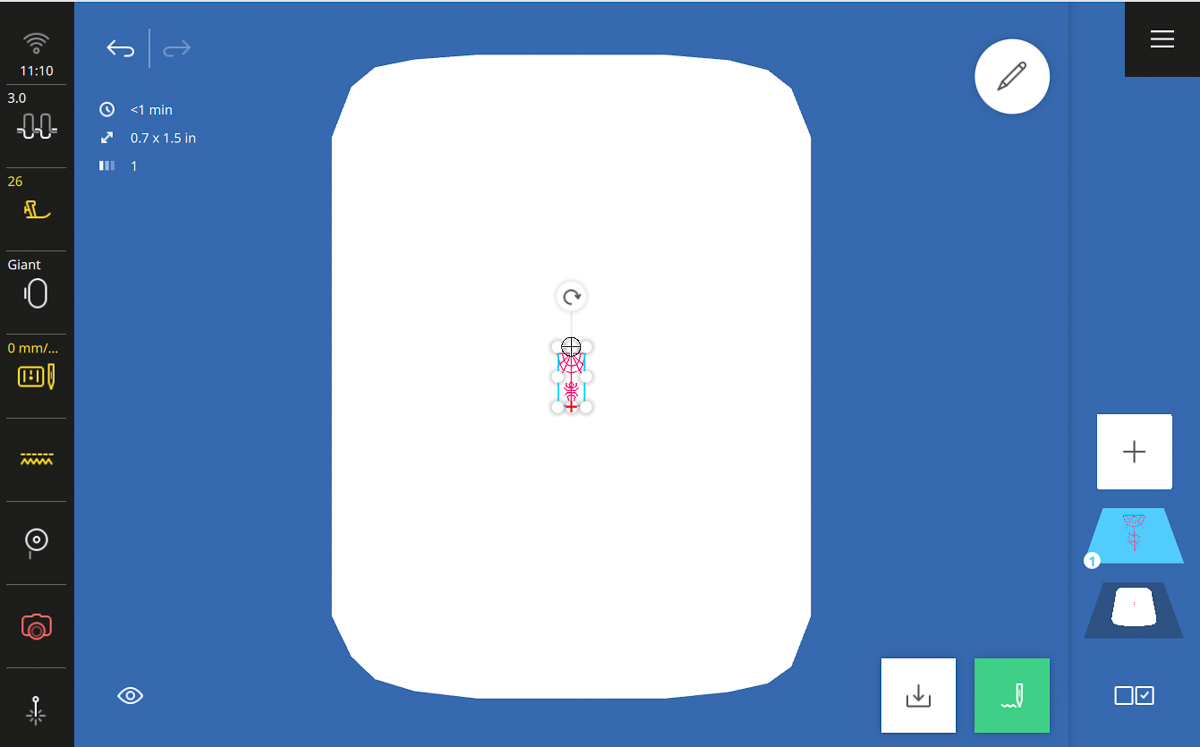
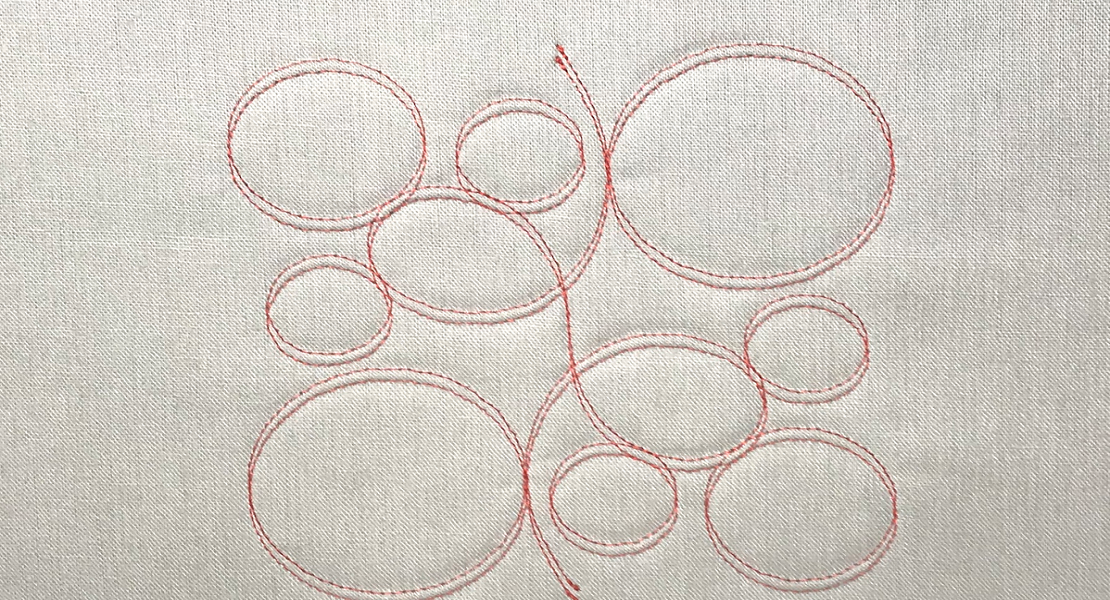
The hoop will fill with the maximum number of stitches and zero spacing between the stitches. This is perfect for this design, so tap the green checkmark to confirm.
Tap the Save icon. Type “Webs” and hit the green checkmark.
Save the “Webs” design to your Personal Folder by tapping the green checkmark.
Delete the design from the hoop.
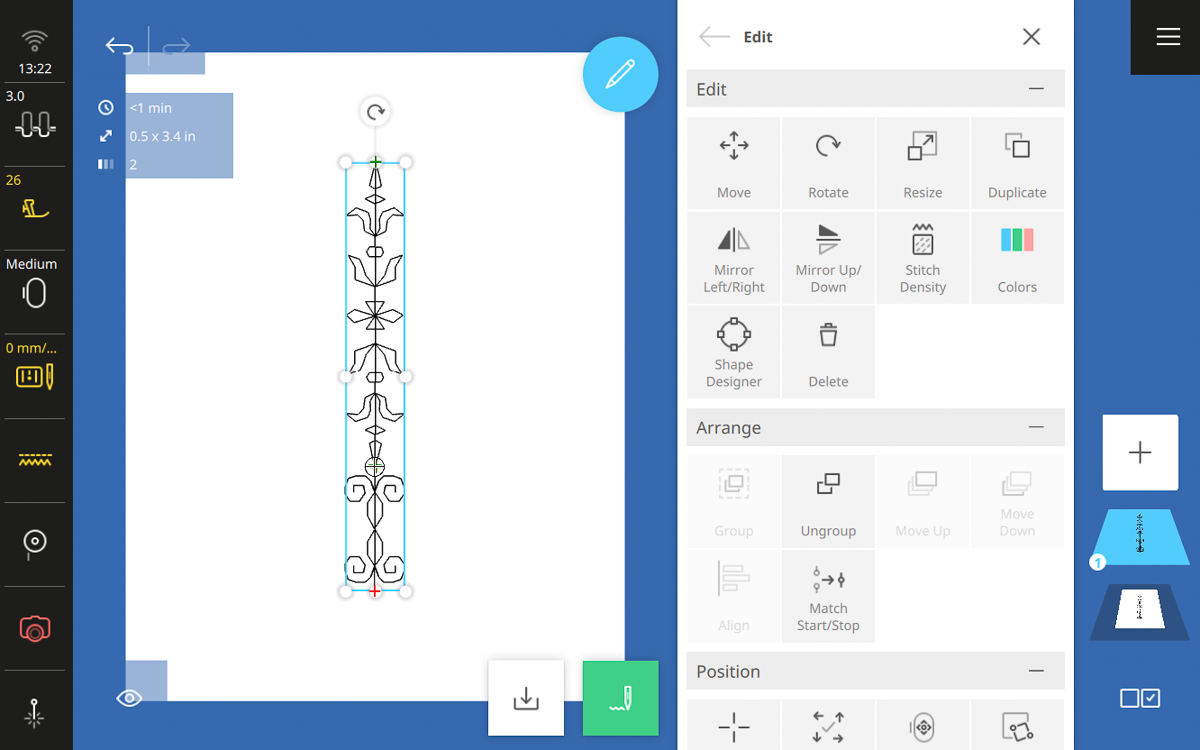
Tap Add Design, then select the Sewing Stitches folder, Decorative Stitches folder, Folder #801, and stitch #807.
Tap Add Design, then select the Decorative Stitches folder, Folder 1201, and stitch #1223.
In the Layer Bar, select the bottom layer to Select All.
Open the Edit Menu and select Match Start/Stop to align the stitches. Then, tap Group to join them permanently.
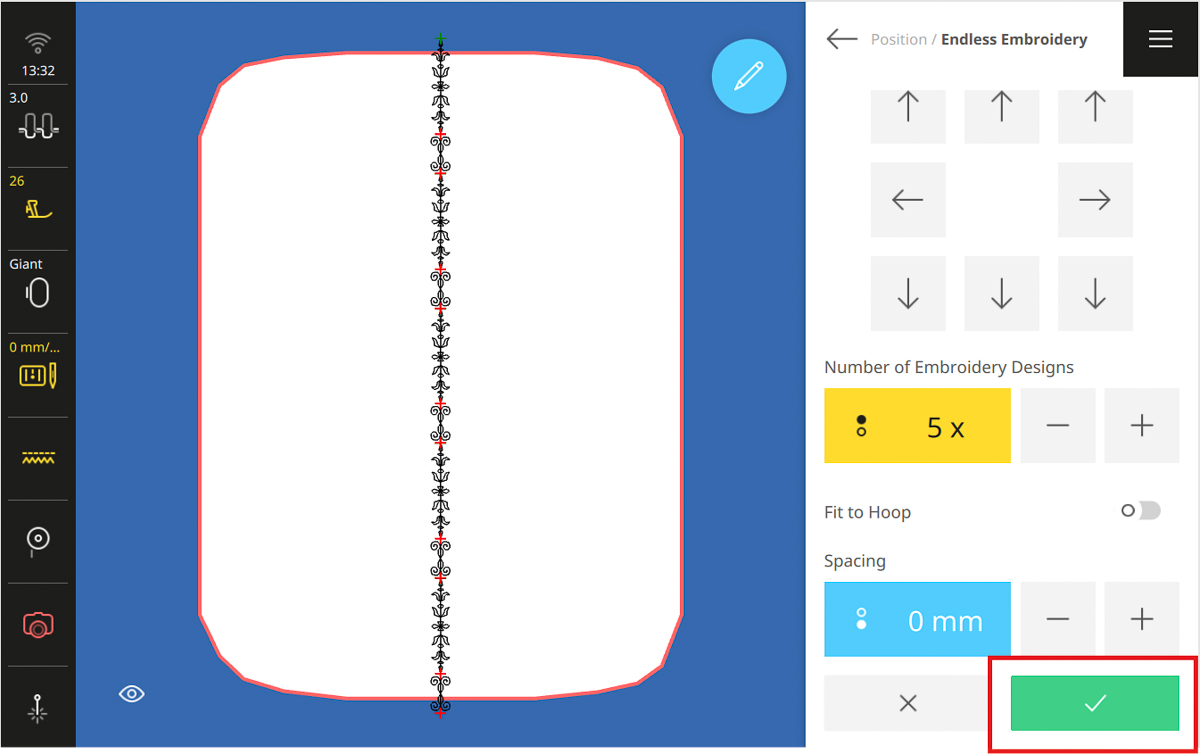
Open the Hoop Selection Menu and select the Giant Hoop.
Tap Endless Embroidery and ensure the Reference Markers are deselected.
Increase the Number of Embroidery Designs to 5 and keep the spacing at 0. Tap the green checkmark to confirm.
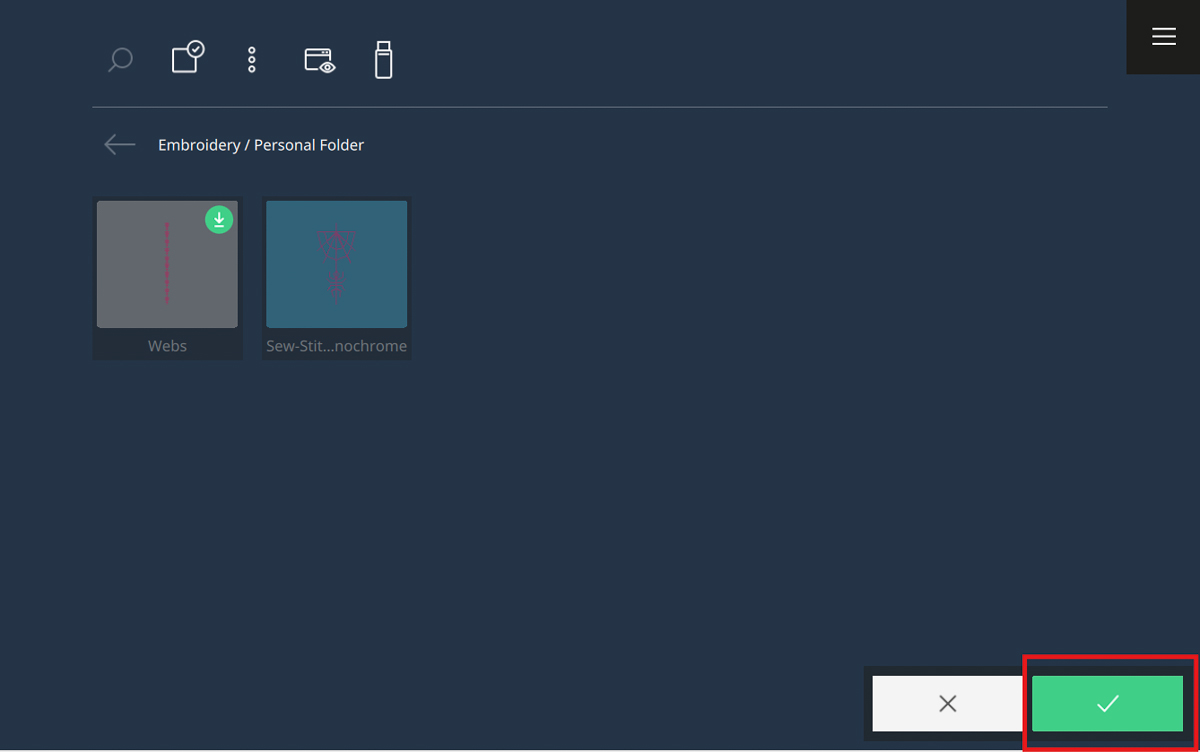
Tap Add a Design. From the Quick Access bar, tap the heart icon to open the Personal Folder.
Select the Webs design.
Drag the Webs motif to the left of the center design, leaving a big gap. Don’t worry about getting the two designs even at this stage.
Open the Edit Menu.
Select Duplicate, then Mirror Up/Down. Drag the duplicated Web design to the right of the center design, leaving a big gap. Don’t worry about getting the design even or lined up.
Open the Selection Options Menu at the bottom of the Layer Bar and Select All.
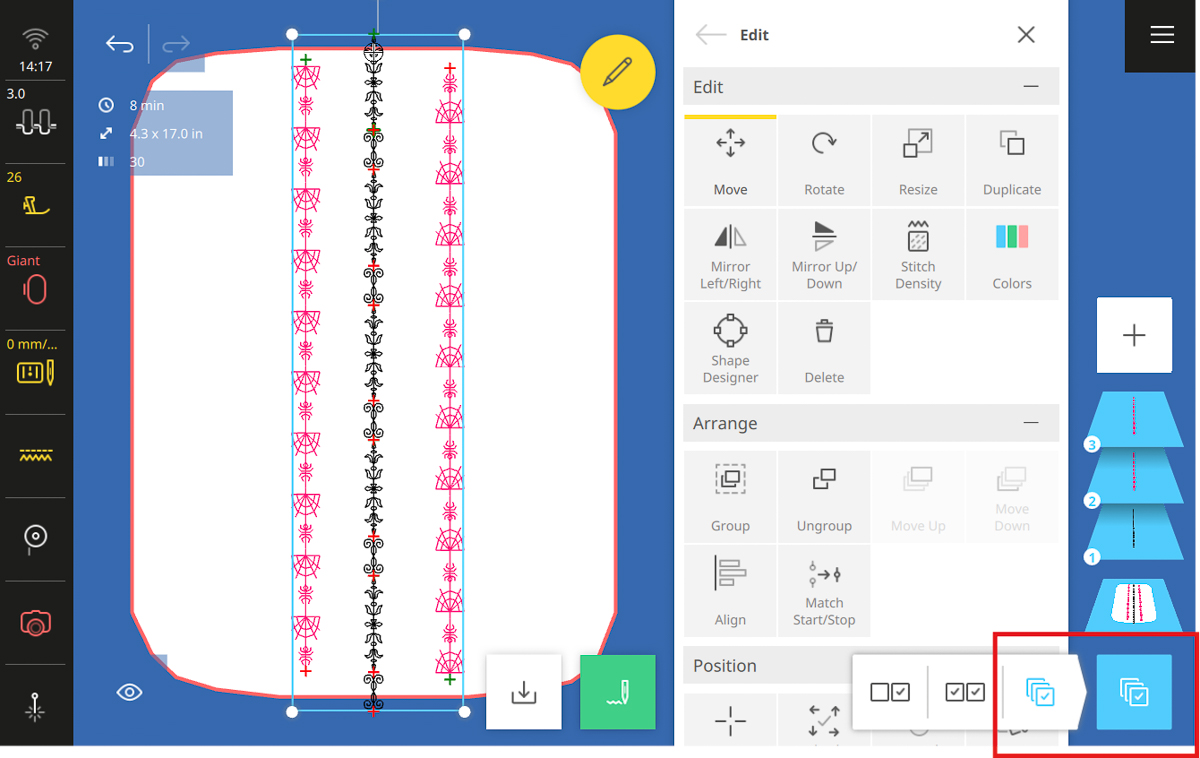
Tap Align. Select Center Vertical and Distribute Horizontal.
Go back in the Edit Menu and select Rotate, then rotate 90 degrees.
Open Endless Embroidery. Ensure all the Reference Marks are still deselected. Increase the number of designs to 4 and decrease the spacing to -1.5mm. Tap the green checkmark to confirm.
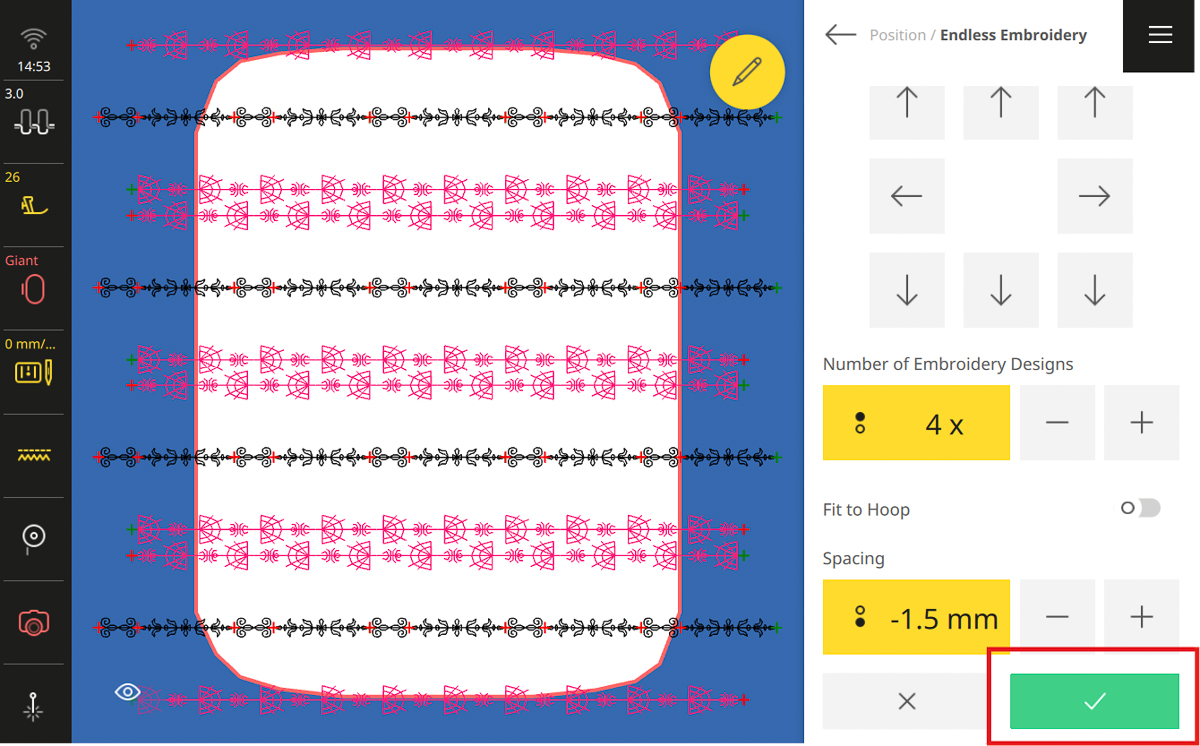
Rotate the design to 90 degrees. Close the Edit Menu.
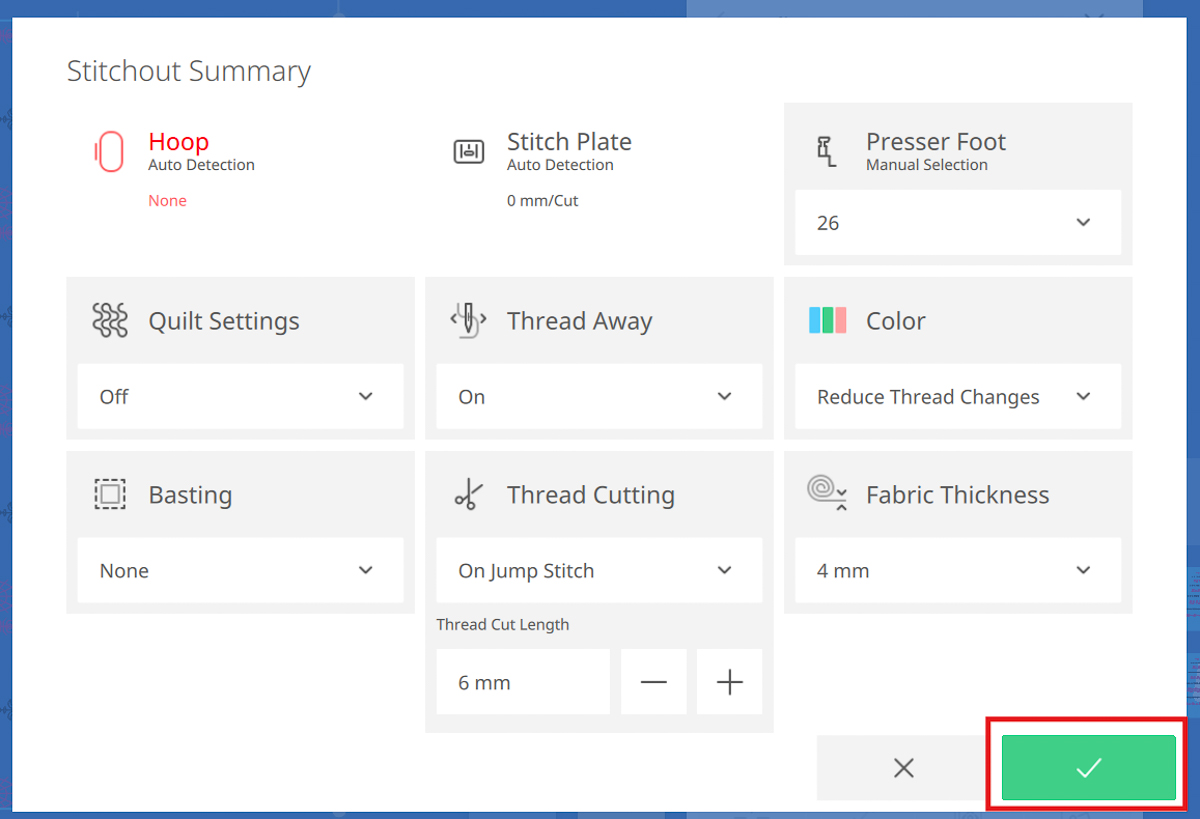
Tap the Stitchout icon, then select the following:
- Quilt Settings: Off
- Basting: None
- Thread Away Mode: On
- Thread Cutting: On Jump Stitch
- Thread Cut Length: 6 mm
- Presser Foot: 26
- Color: Reduce Thread Changes
- Fabric Thickness: 4 mm
Tap the green checkmark to confirm.
Once again, tap the green checkmark to confirm that it’s okay for the design to fall outside the hoop.
Thread the machine with the color you want for the black designs, since this will stitch out first.
Begin stitching Color 1. Remember, every time the design comes to the edge of the hoop, you will have to clear the warning and restart the machine.
Once Color 1 is finished, re-thread the machine with Color 2 and continue stitching.
When the stitching is done, tap Finish Embroidering.
Remove the hoop from the machine and un-hoop the fabric.
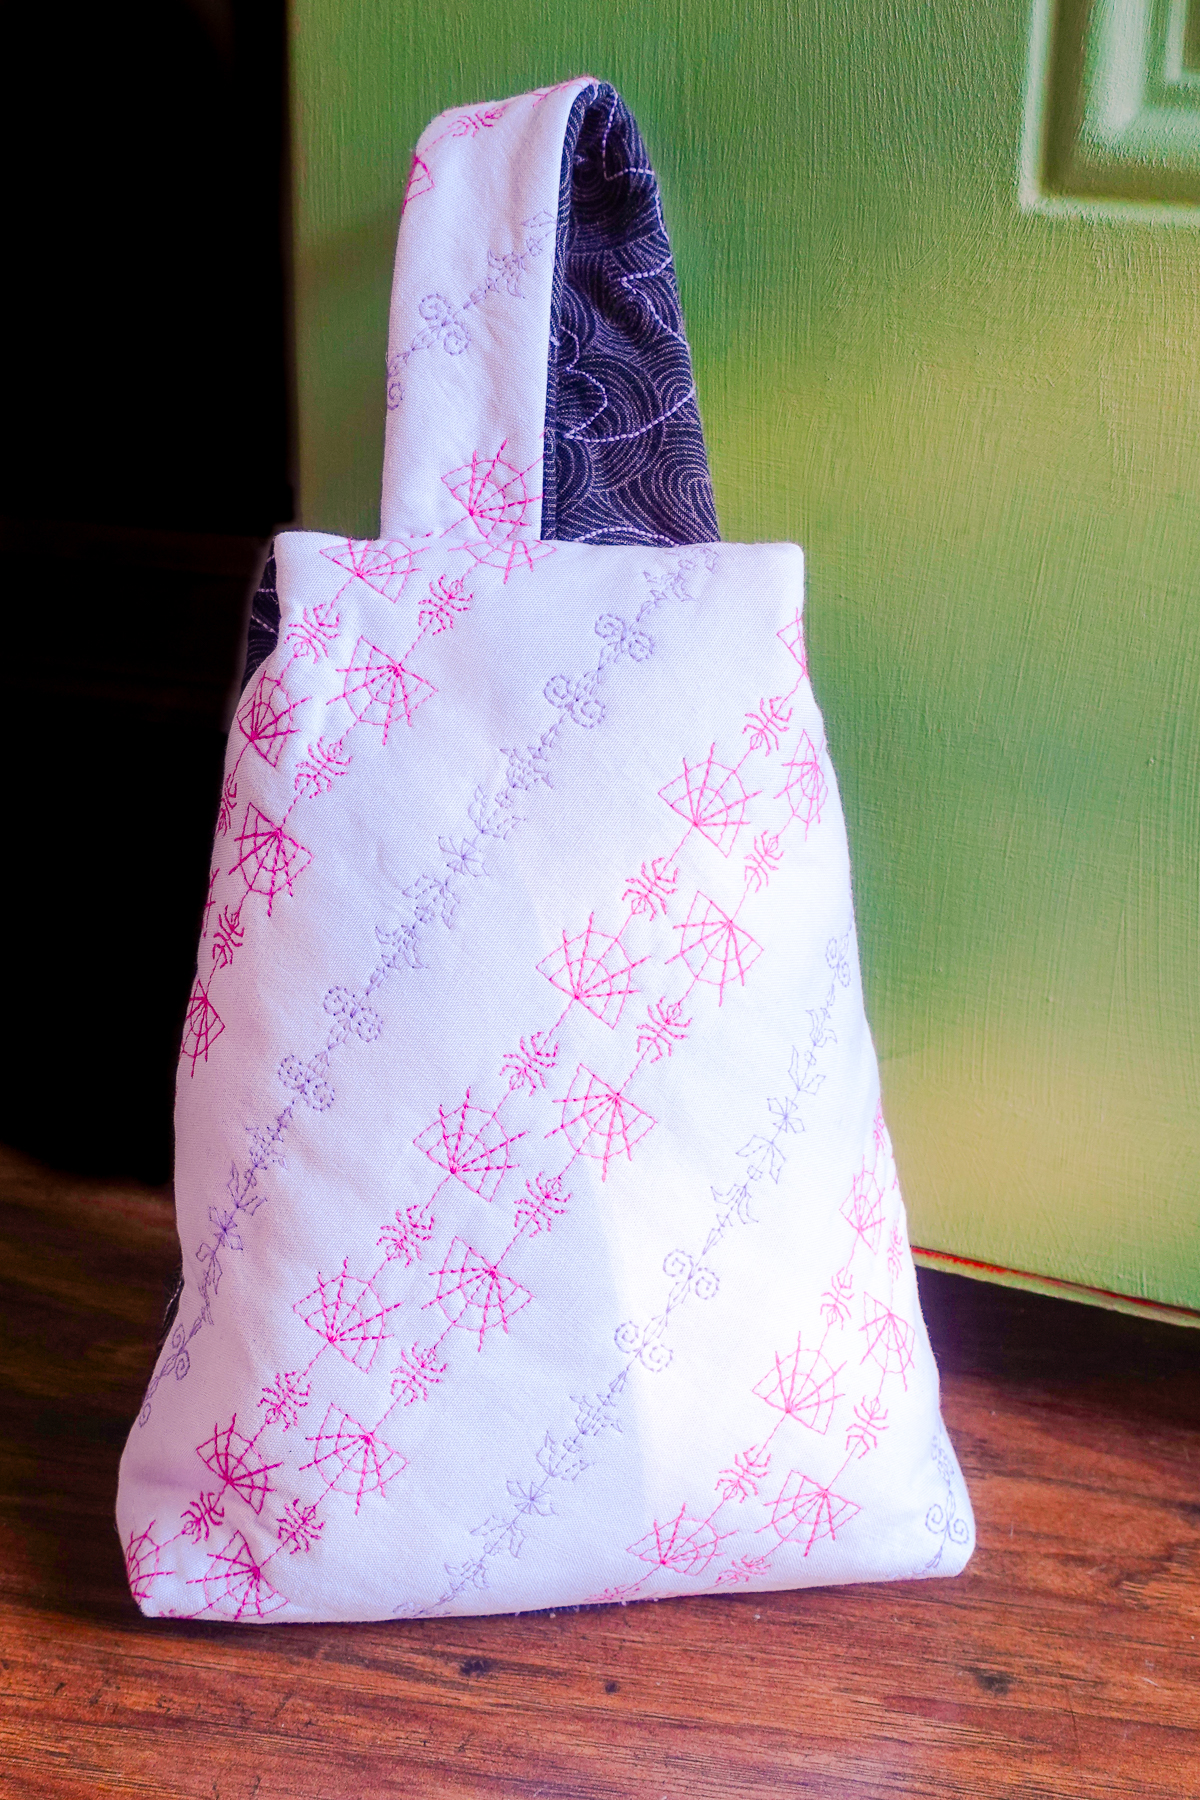
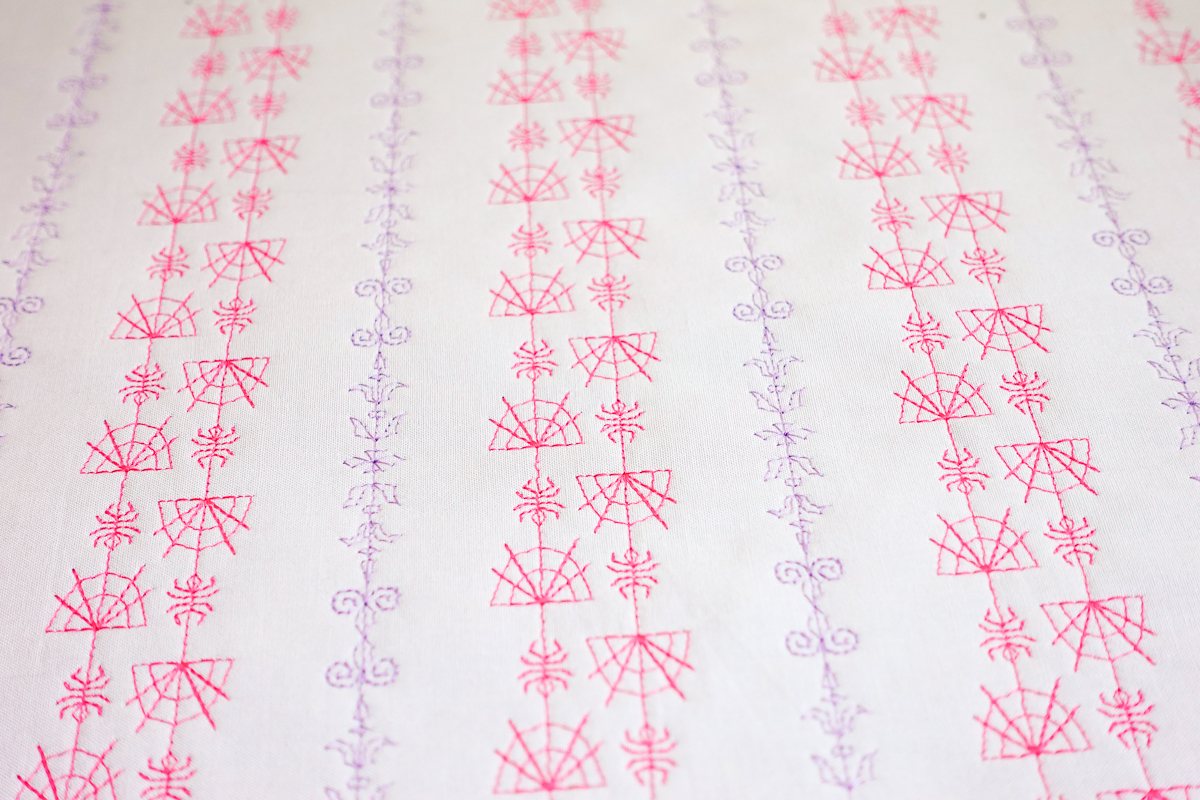
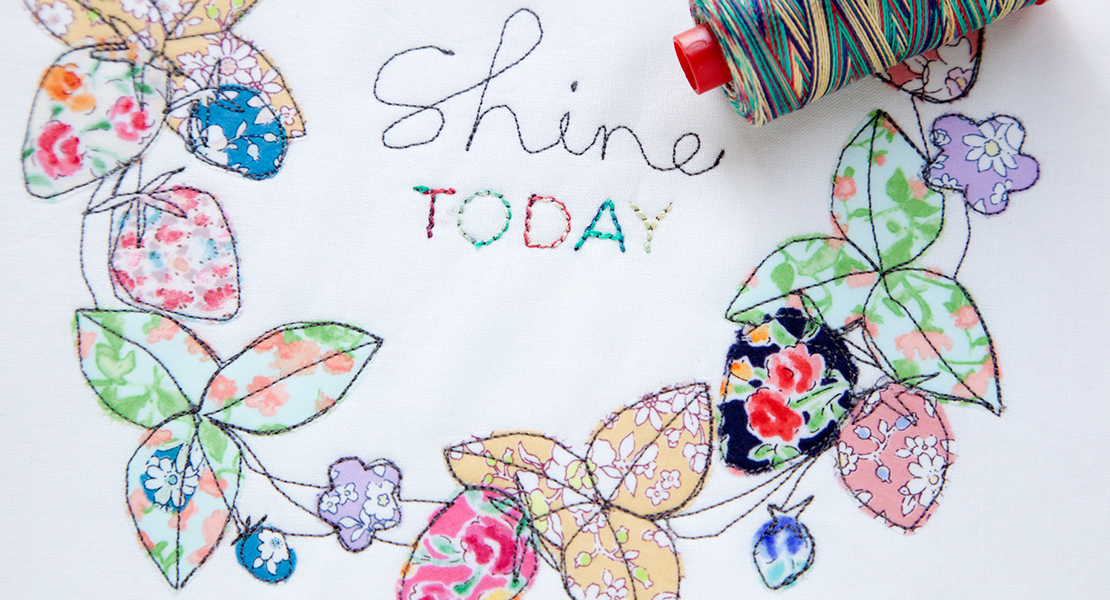
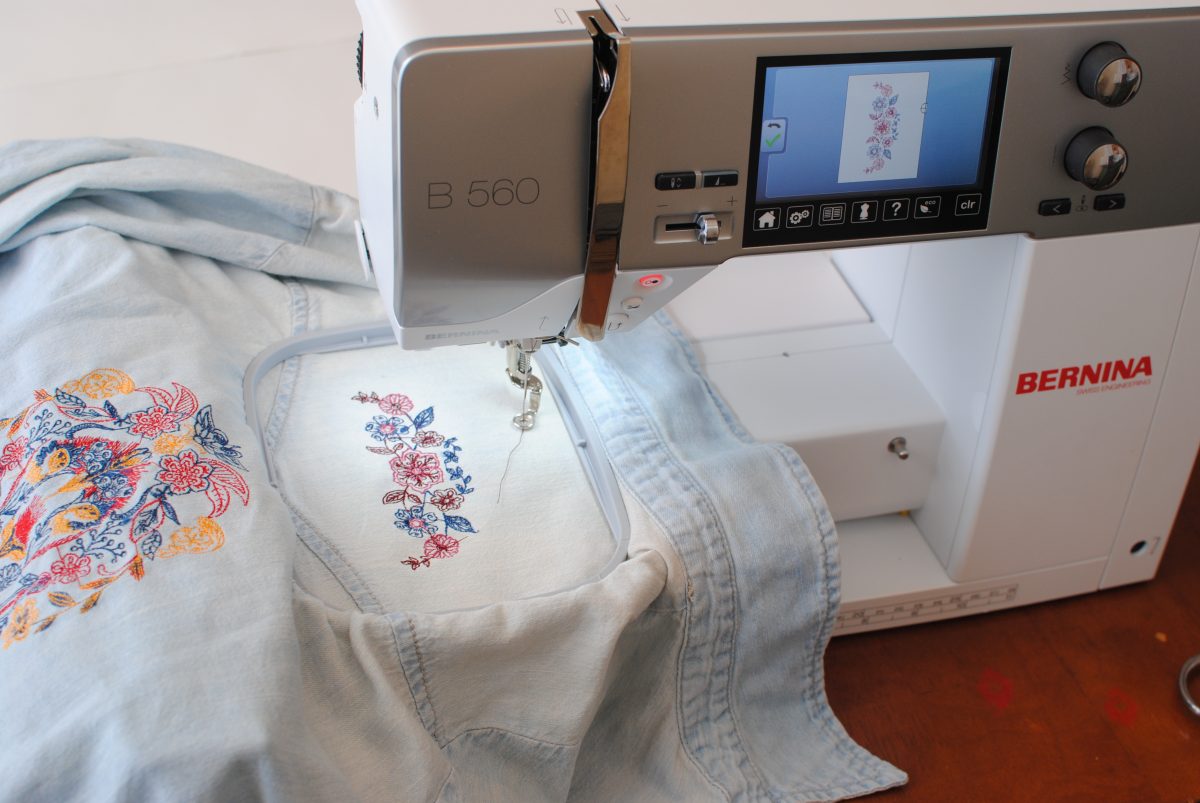
Now all the embroidering is done! How great does this fabric look now? Great work creating your own embellished fabric with Endless Embroidery.
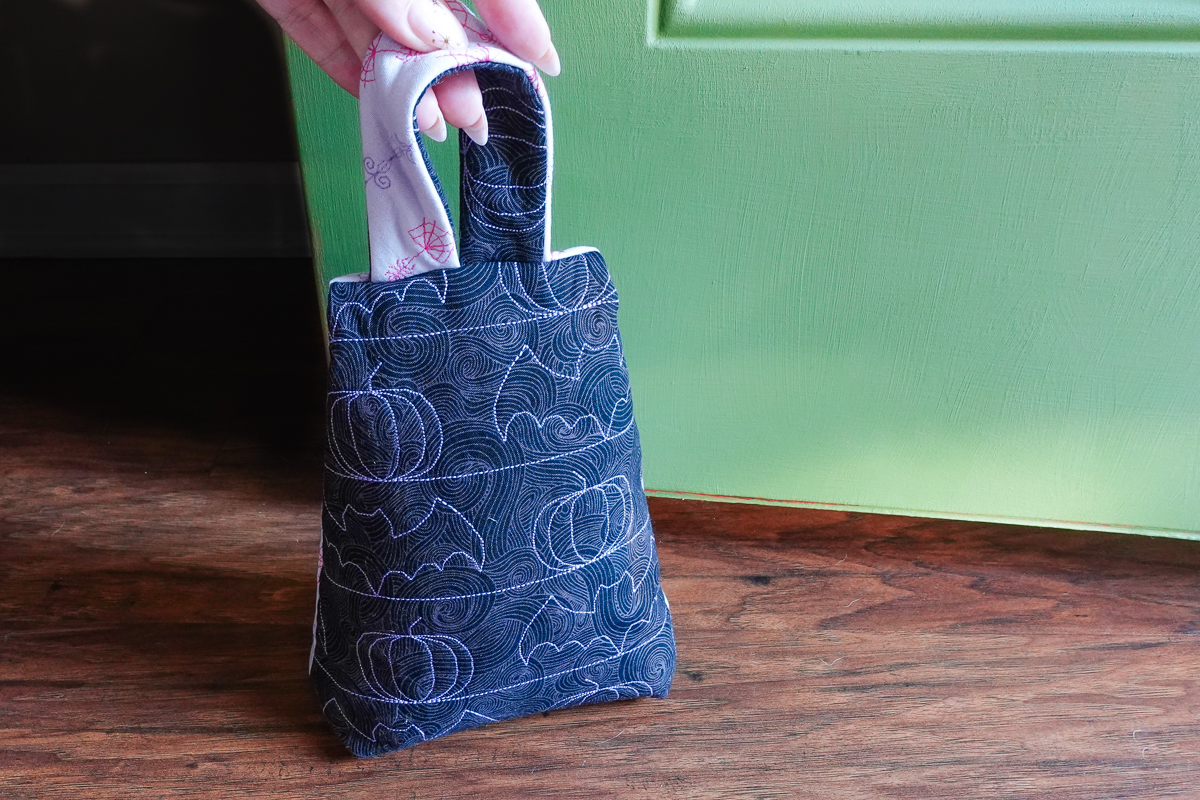
I used my embellished fabric to create a festive doorstop for our front door. I used this video tutorial from Notches Sewing to make the doorstop you see here. DIY Daisy also has a very cute doorstop tutorial that would look fantastic with some Endless Embroidery.
These quick and fun projects are my favorite to have up my sleeve for all sorts of gift-giving occasions. With so many creative options, I can’t wait to see all the ways you embellish your fabric with Endless Embroidery!
Used Products
What you might also like


3 comments on “Embellishing Fabric with Endless Embroidery”
-
-
I would like to add some embroidery toa project I am working on. The Endless Embroidery tutorial is going to be so helpful. Thanks.
-
Can Endless Embroidery be done on a Bernina 790 Pro?
Leave a Reply
You must be logged in to post a comment.
I am making a scrappy queen size quilt.