Jumbo Piping on the Overlocker and Sewing Machine
Piping comes in many sizes. Choose an extra-large piping to make a bold statement on your next home dec project! Which machine is the best choice for making jumbo-sized piping? We decided to try this technique on an overlocker (serger) and a sewing machine. Both make it easy … you decide which works best for you!
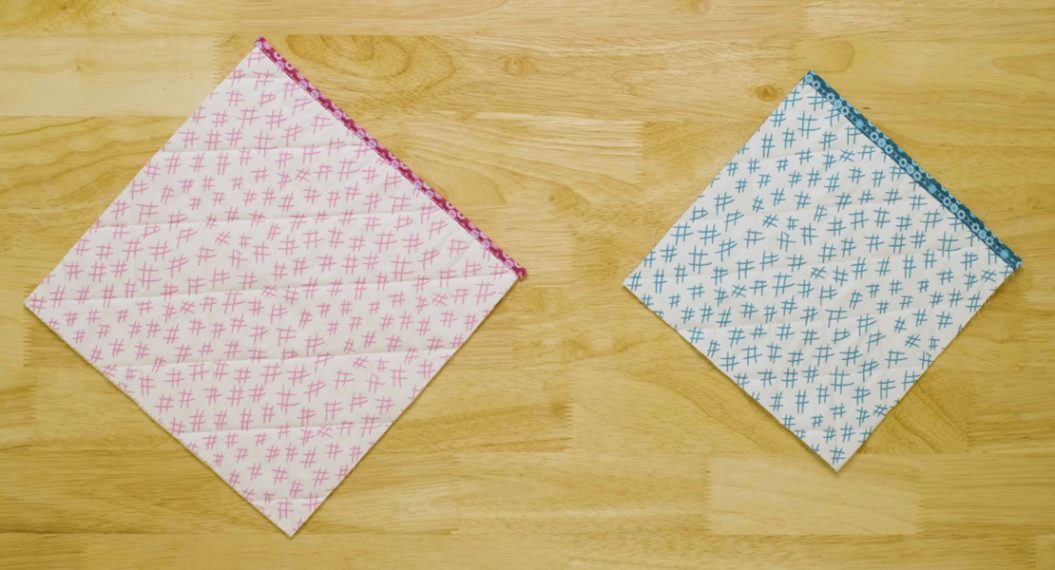
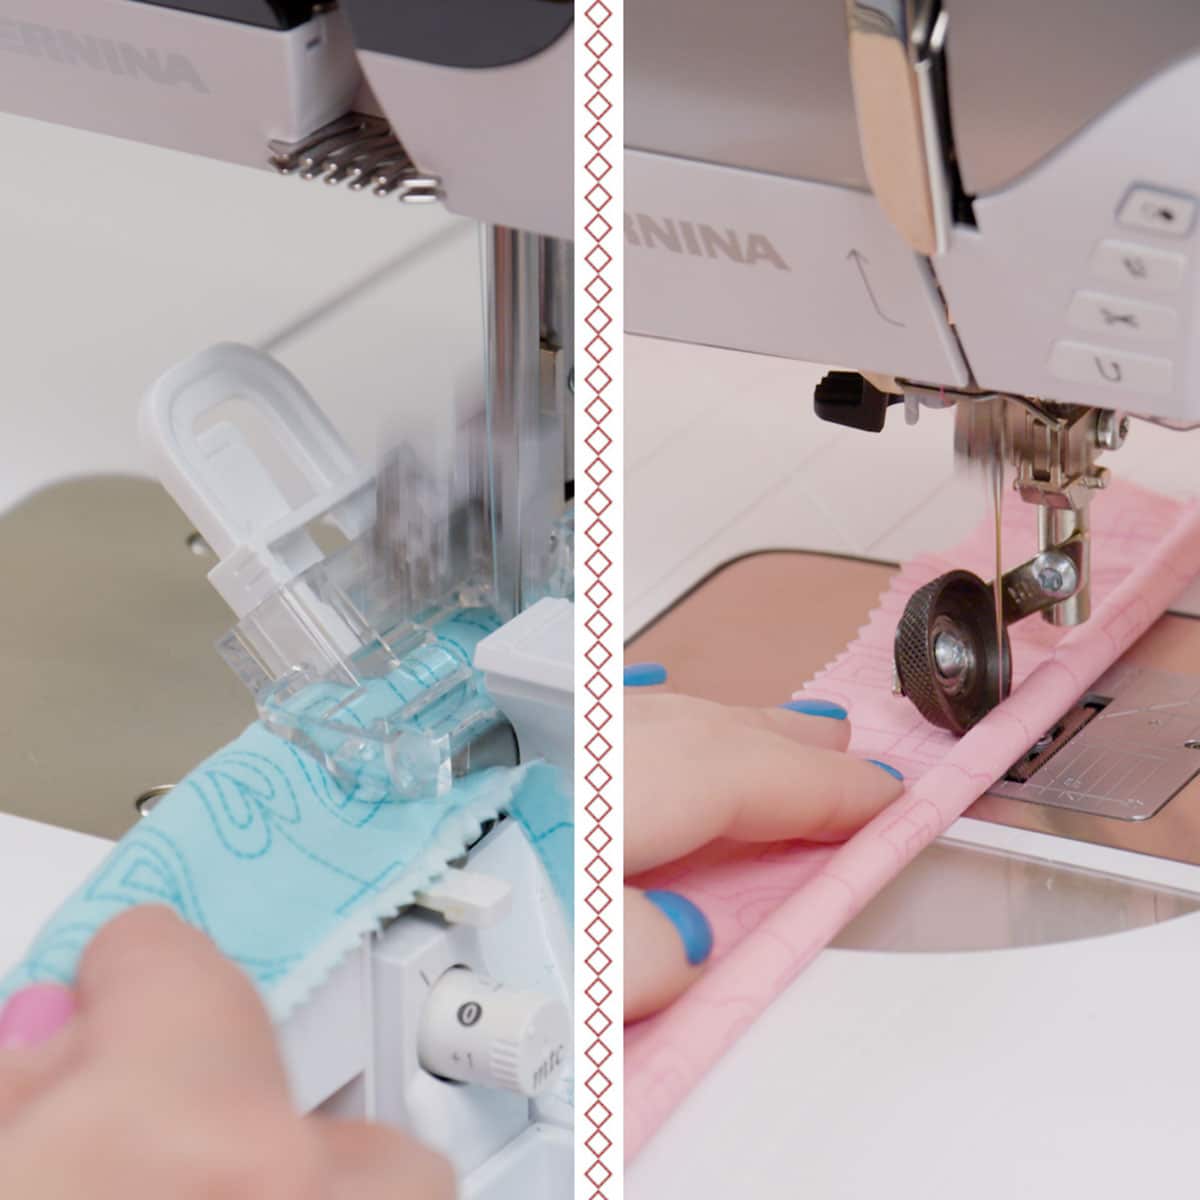
Let’s take a look side by side.
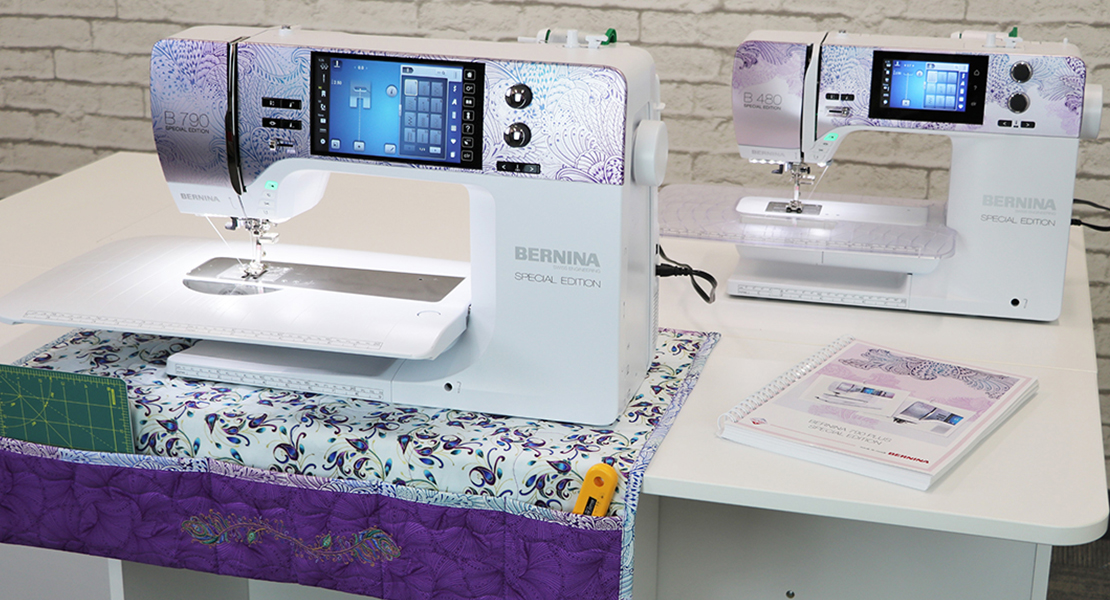
Machines Featured

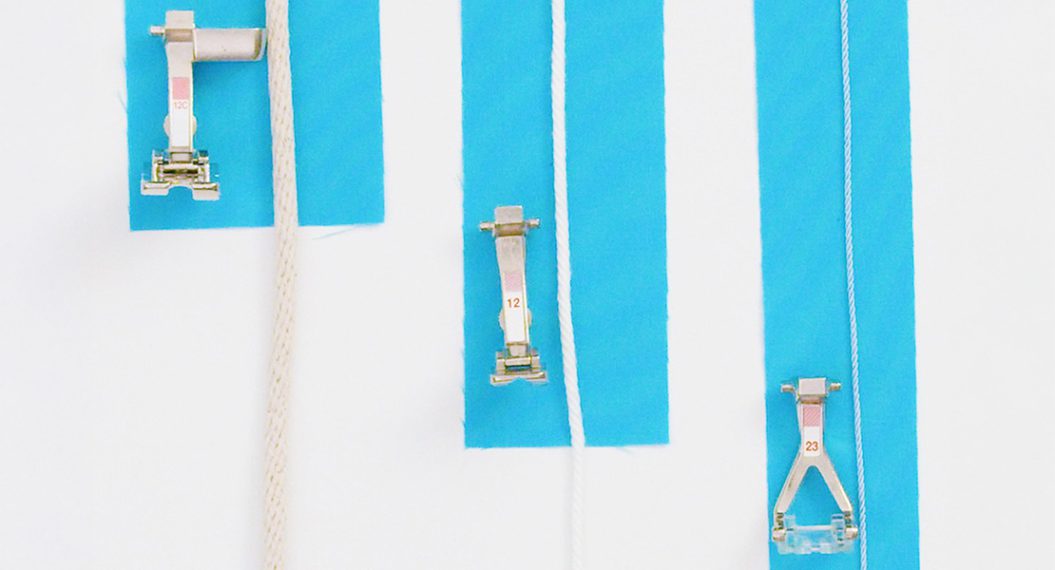
First Things First: Feet
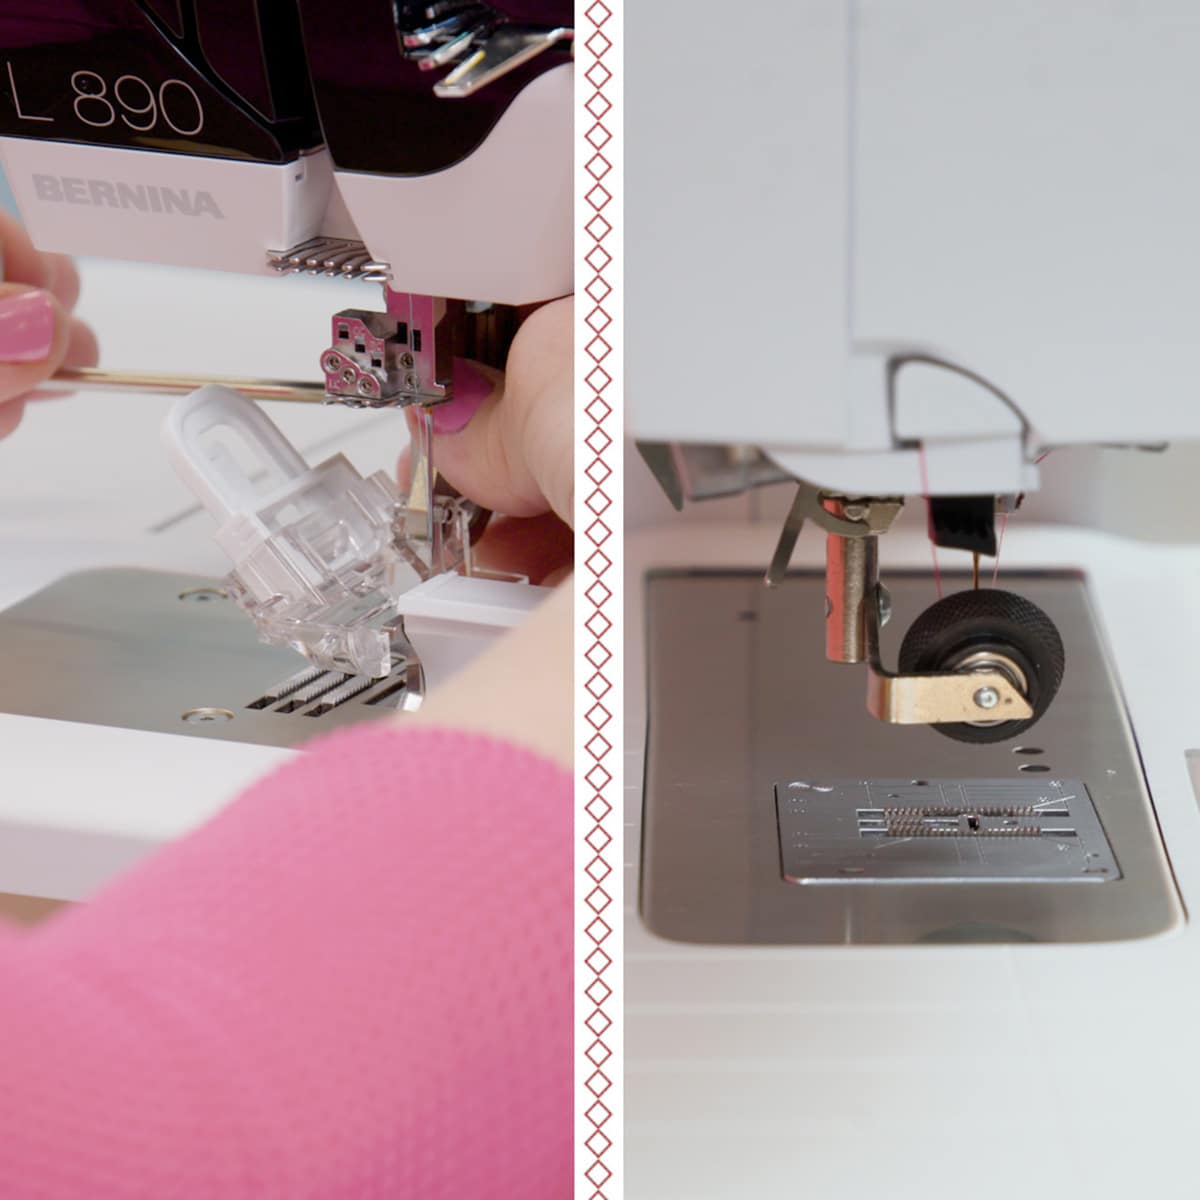
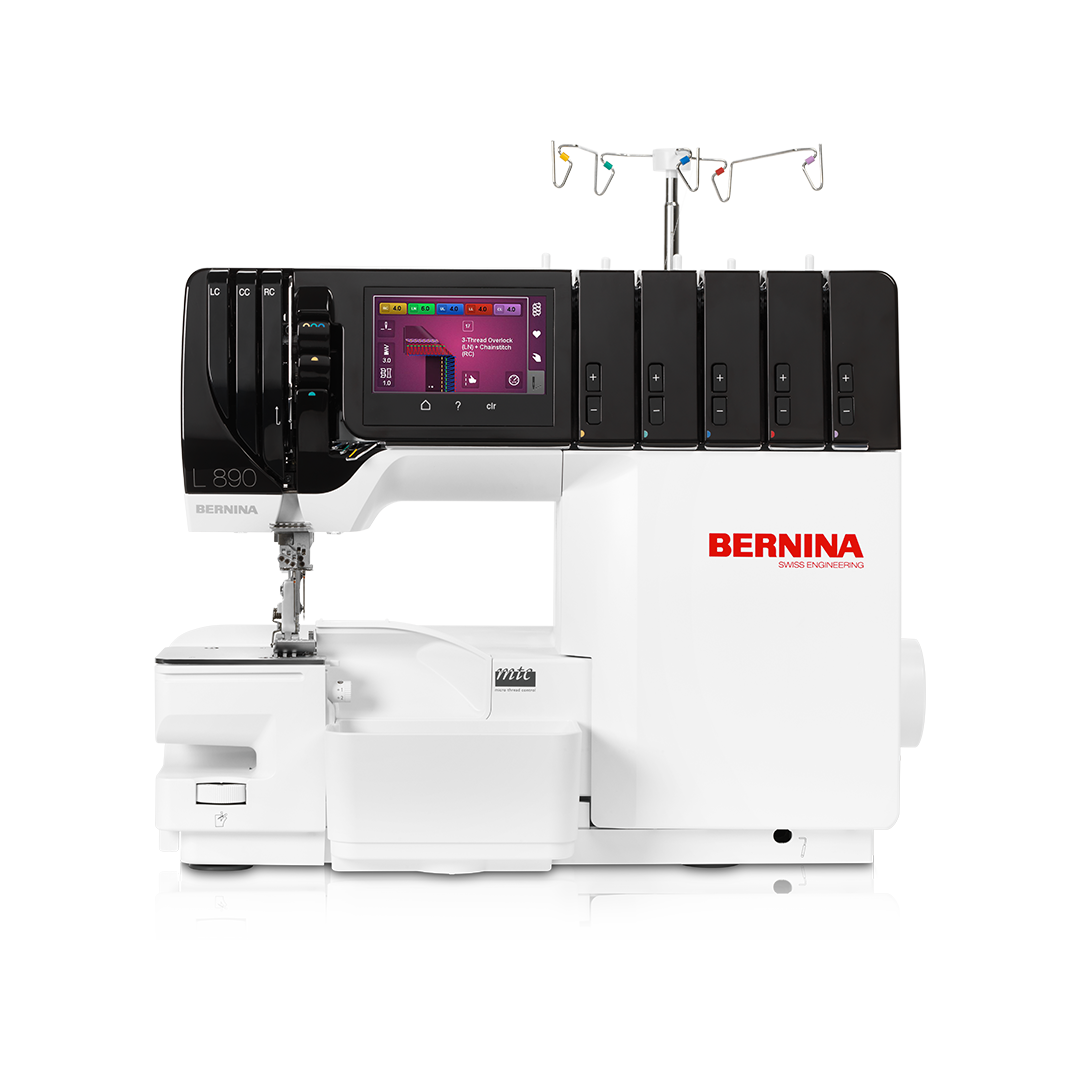
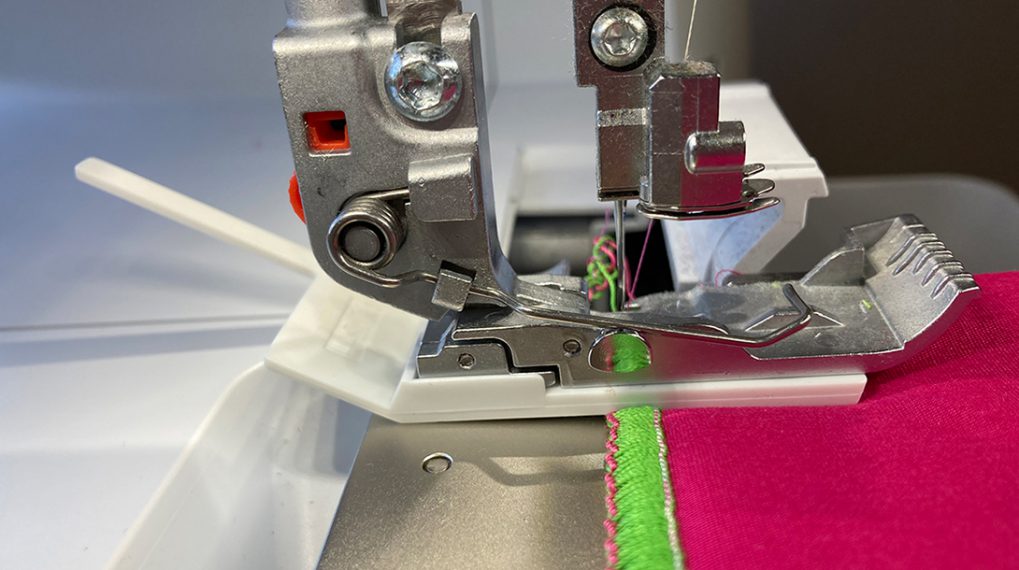
Serger – XL Piping Foot
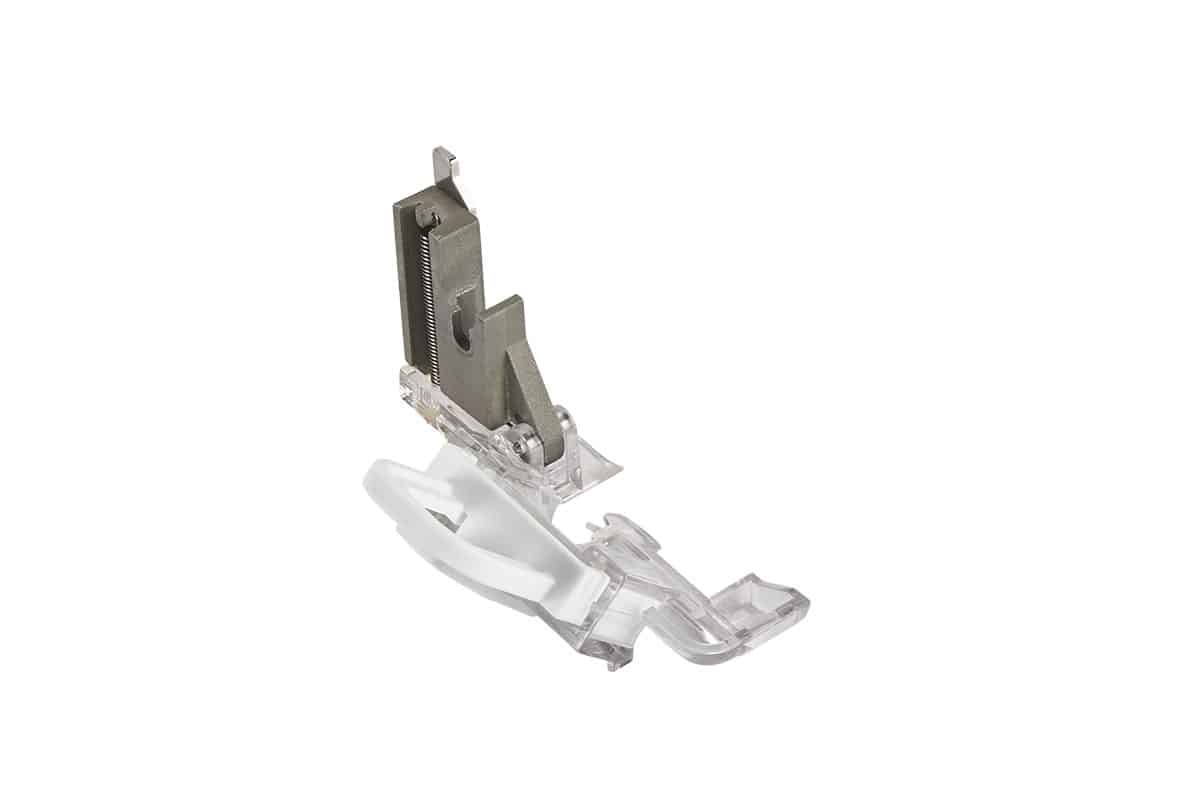
The XL Piping Foot can be used on the L 850, L 860, and L 890. There is not an “L” or “C” designation. To attach, remove the presser foot shaft from the machine and attach the XL Piping Foot in its place using the included torx screwdriver. Click here for a video tutorial on how to attach the foot.
Cording 6, 8, and 10 mm in diameter can be used with this foot. Adjust the Height Compensating Tool on the foot to increase or decrease the size of the groove underneath the foot.
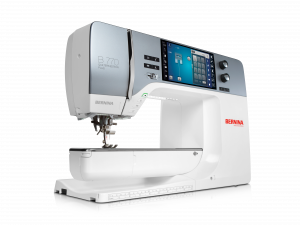
Sewing Machine – Leather Roller Foot #55

The Leather Roller Foot #55 is an excellent choice for sewing large piping at the sewing machine. There is a roller in the place of a presser foot sole. The roller rolls right next to the cord and any size cording can be used.
Set Up for Success: Machine Settings
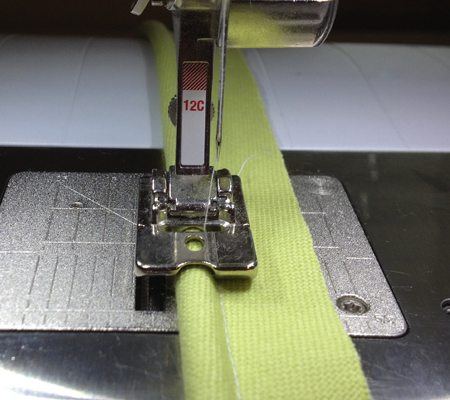
Overlocker
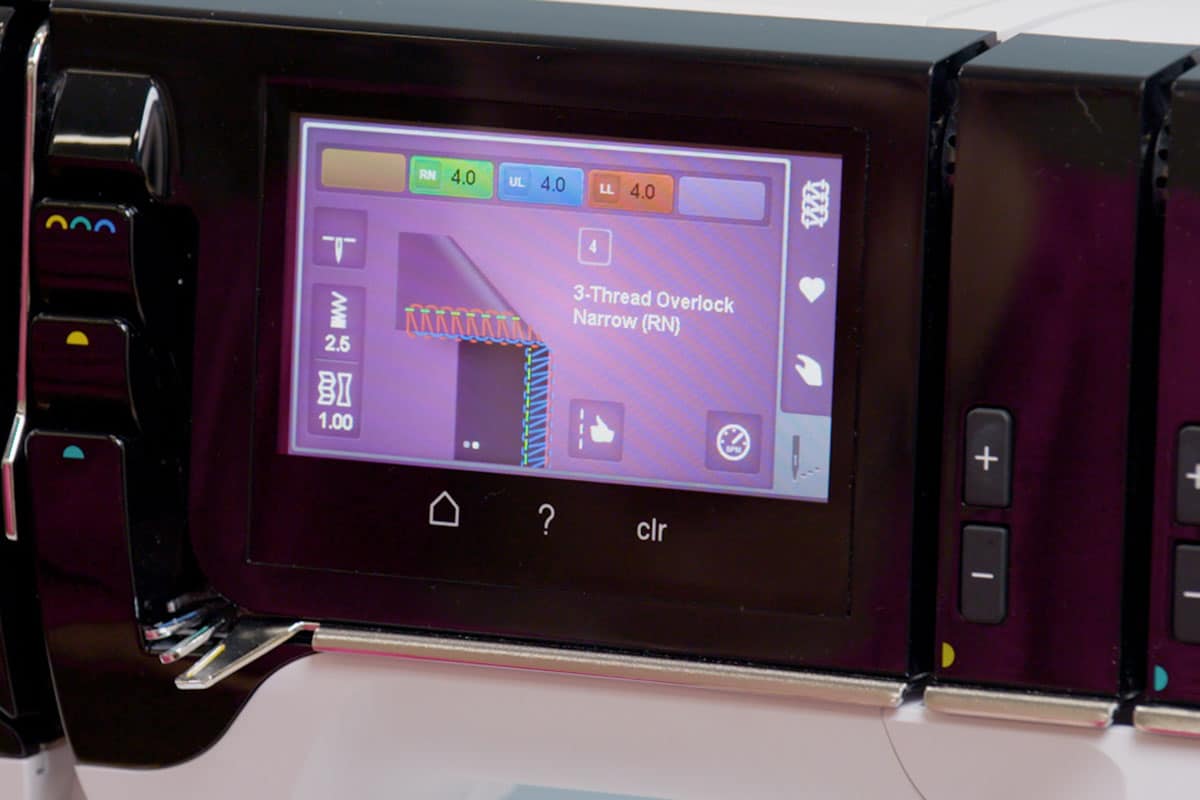
The 3-thread Overlock Narrow (RN) stitch is used for creating the covered cording. Increase the Stitch Length to 3-4 mm to reduce bulk, if desired. Increase the Cutting Width to 9 mm. Place the cord in the foot’s groove and adjust the Height Compensating Tool on the foot to allow for smooth movement of the cord. We are using 10 mm cord, so the tool is set to the highest position.
Sewing Machine

At the sewing machine, attach the presser foot and select it. The B 770 QE PLUS will show the presser foot on the screen. Then choose the Straight stitch #1. Move the needle to the far left position. Increase the Stitch Length to 3.00.
Tried and True: Techniques


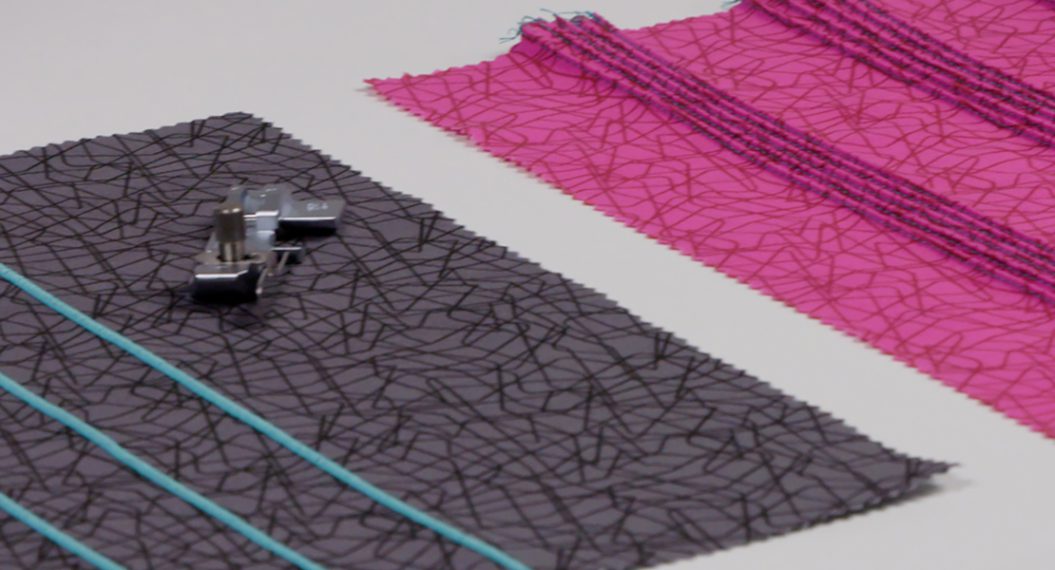
Overlocker
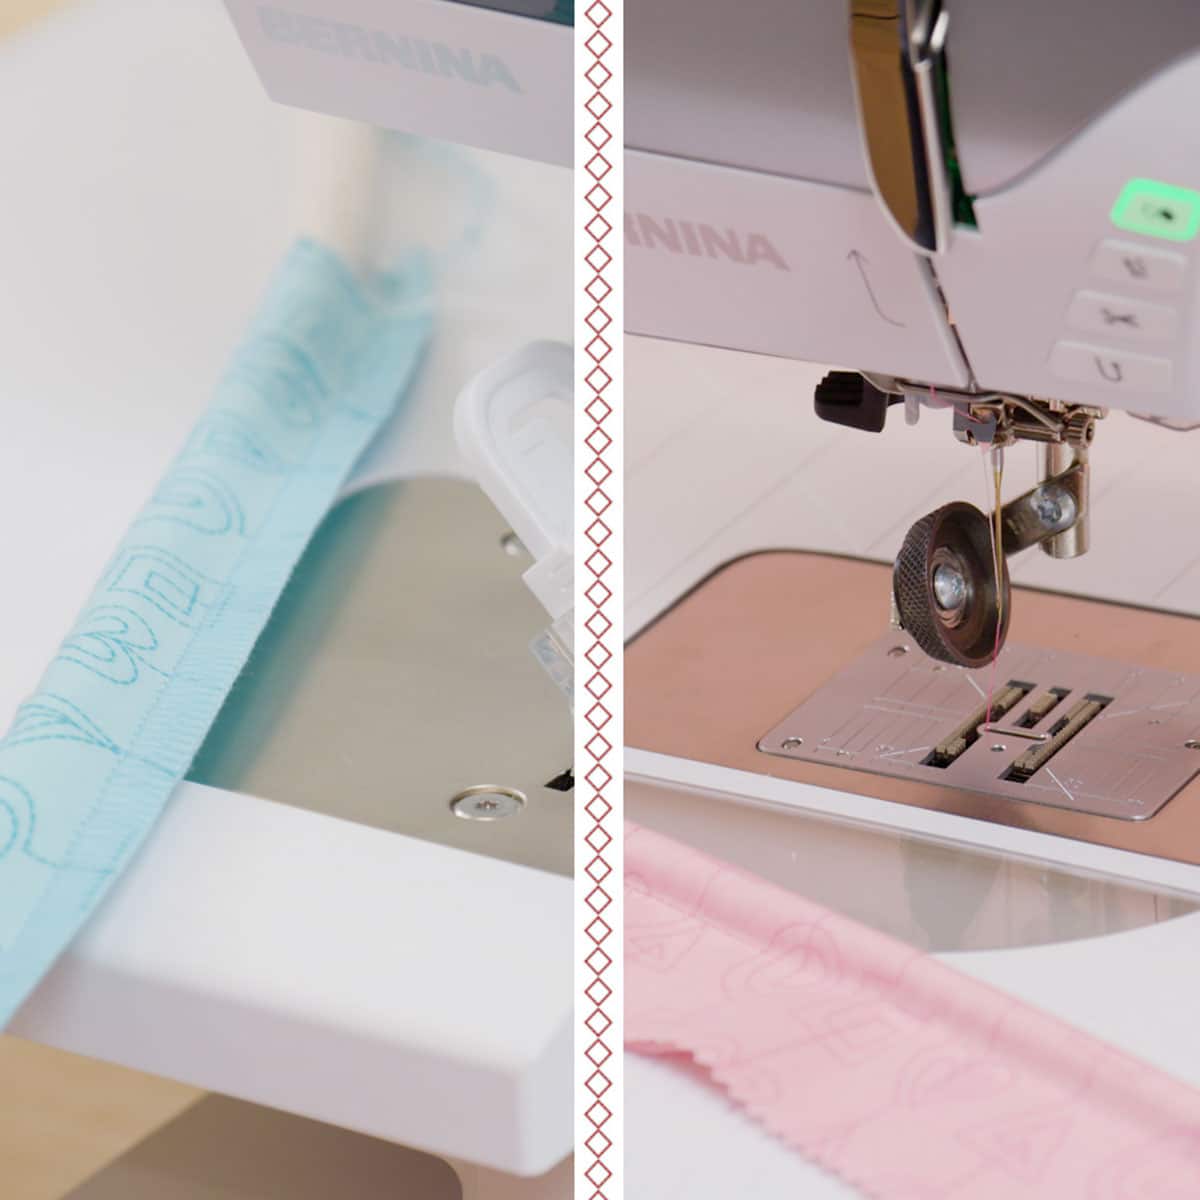
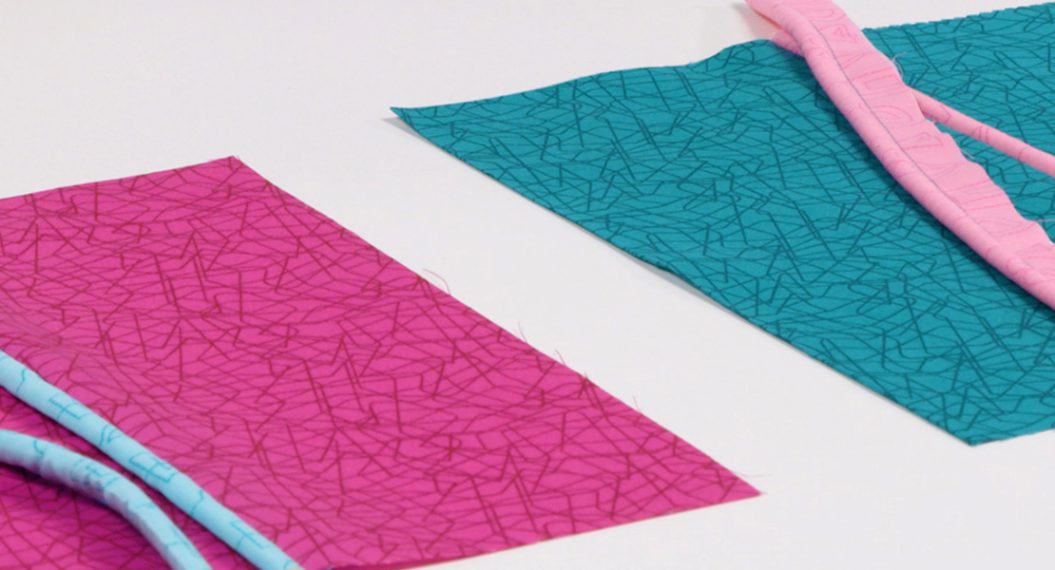
Place the cording under the foot with about 1″ extending behind. Wrap the fabric strip around the cord, wrong sides together with the raw edges on the right side. Place just in front of the knife. Lower the foot using the Free Hand System Lever.
Sew at a moderate pace, trimming the fabric as you go along.
Sewing Machine
Wrap the fabric strip around the cord wrong sides together. Leave about 1″ of cord extending from the end. Place so that fabric’s raw edges are on the left of the roller and the cord is to the right of the roller. The needle is close to, but not ON, the cord. The wheel will ride along the seam allowance. Use the Free Hand System Lever to lower the presser foot.
Sew at a moderate pace, being careful to keep the needle from stitching into the cording.
Fabric Tips
For best results, cut the fabric on the bias for smoother wrapping around the cord. The width of the fabric should be at least the diameter of the cord plus two seam allowances. On the overlocker, you can be a little more generous, as the knife will trim any extra fabric.
Sum of it All: Results
So what do you think—which variation was easiest for you?
Both machines give beautiful results!
Overlocker
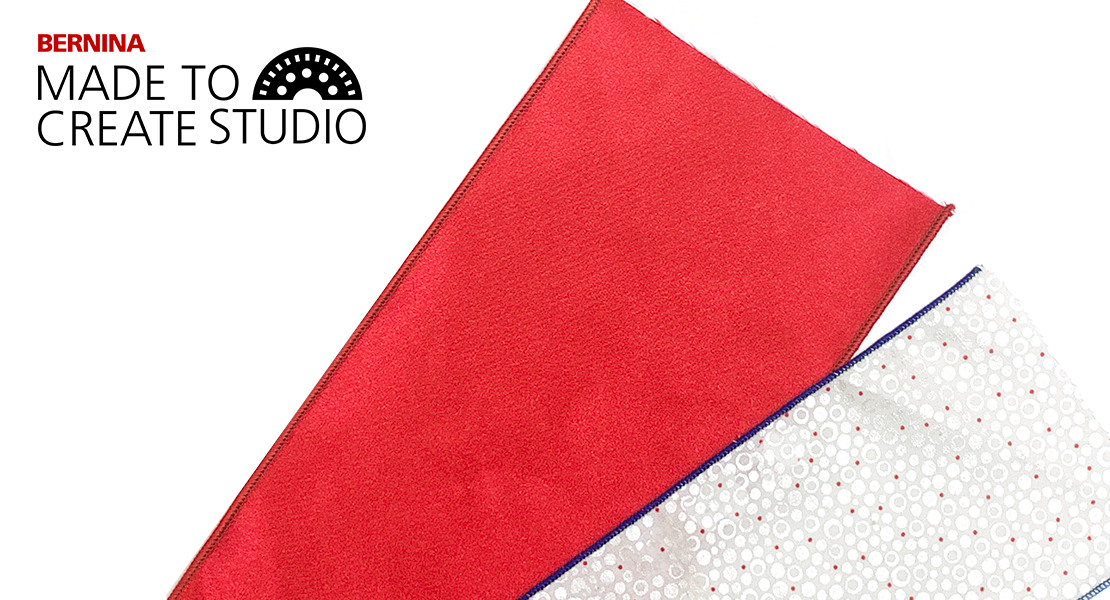
We love how the cord is guided under the foot as it is covered with fabric. The advantage of using the overlocker for this technique is that the seam allowance is trimmed and ready to insert into a project. A tip to remember is that you may need to increase the size of the groove when inserting the covered cord between two layers of fabric. In this example, we are already at the maximum size, so we will use the Leather Roller Foot #55 at the sewing machine to insert the covered cord into our project. Because we increased the Cutting Width to 9 mm, there is a nice wide seam allowance for the Leather Roller Foot to ride along.
Sewing Machine
The Leather Roller Foot #55 is a great choice when working with different sizes of cording at the sewing machine. It’s also the foot we reach for when sewing in jumbo trims. Did you know that you can also use it for quilting? For more ideas, be sure to check out the Big Book of Feet!
We love the flexibility of doing creative things on all of our BERNINA machines! What will you make next on YOURS?