Embroidering 18th Century Tie-On Pockets
There is something magical about combining historical clothing with modern technology. As a costume designer and historian, I’m constantly seeking ways to honor traditional construction methods while embracing the tools that make my work more efficient and beautiful.
My latest project perfectly captures this balance: recreating 18th-century tie-on pockets adorned with machine embroidery on my BERNINA 770 QE PLUS Kaffe Edition. This is my first-ever embroidery project, and I had two goals when starting this:
- My first goal was to familiarize myself with the process of embroidery. It can feel really daunting at first, but the B 770 QE PLUS made the whole thing so enjoyable and user-friendly. I picked 18th-century pockets because they are pretty easy to self-draft, and I think everyone should have one or two!
- My second goal was to utilize an embroidery motif that this beautiful machine comes with, so anyone who has this or a similar machine with similar embroidery might try it for themselves! This machine, in particular, comes with many pre-programmed embroidery options I will touch on in a bit!

A Brief History of the Pocket
Before pockets were sewn into garments, and then surreptitiously removed from women’s clothing in mass production, they lived a separate existence entirely!
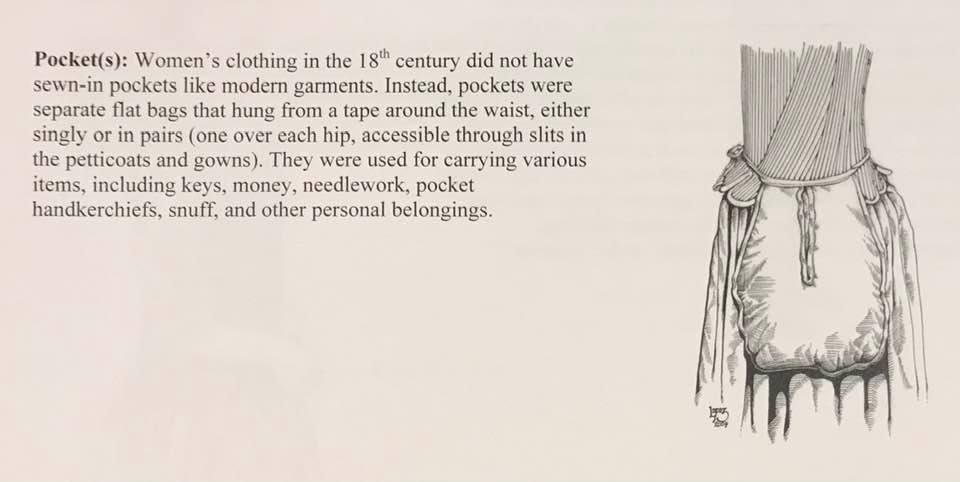
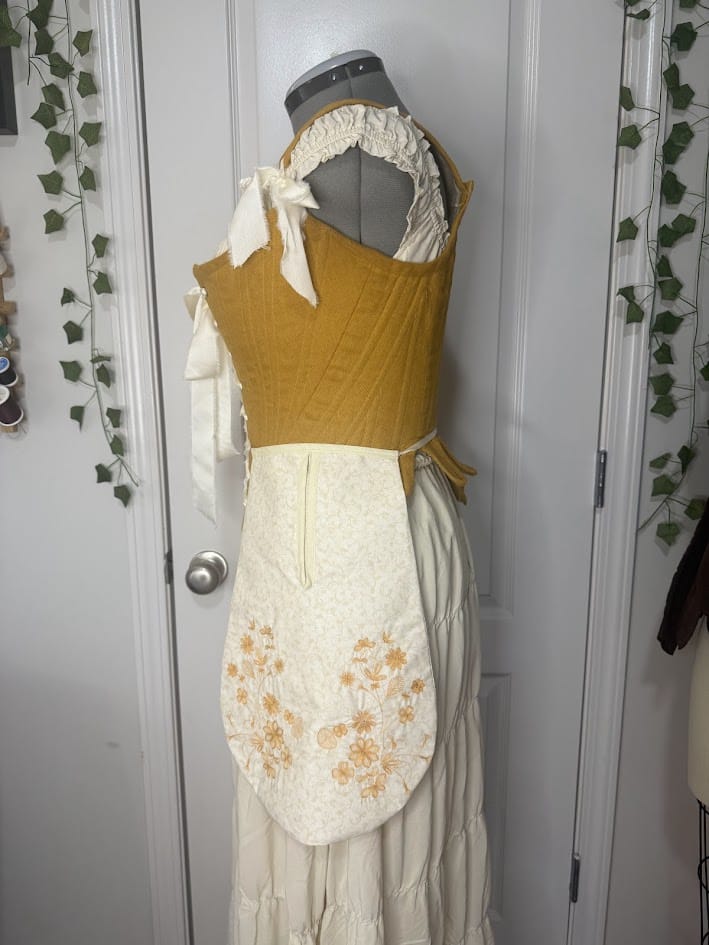
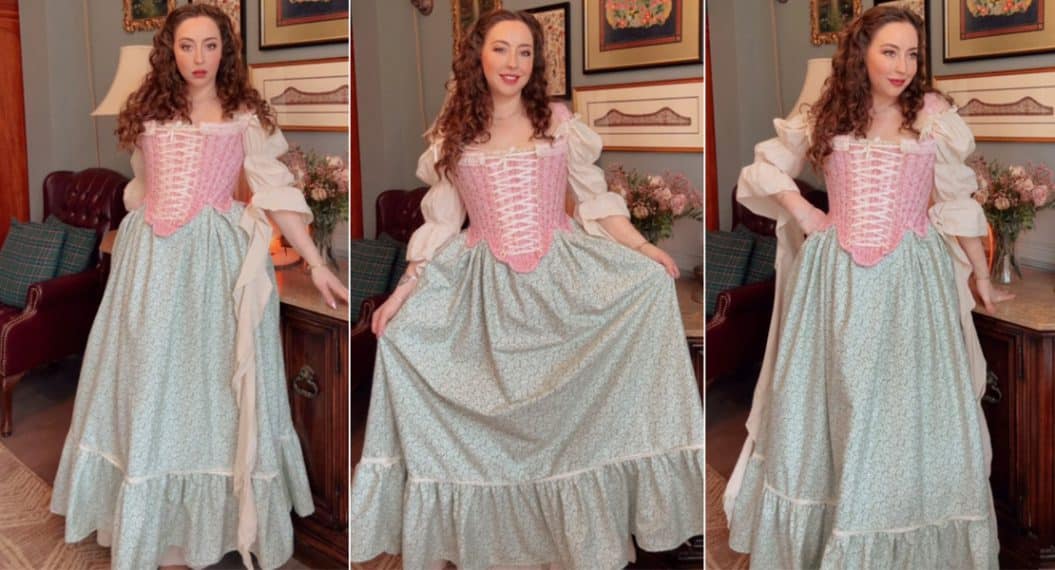
Throughout the 18th century, women wore their pockets as independent accessories. The pockets were tied around the waist beneath their petticoats. One would access the pocket through slits in their skirts at the side of their waists.
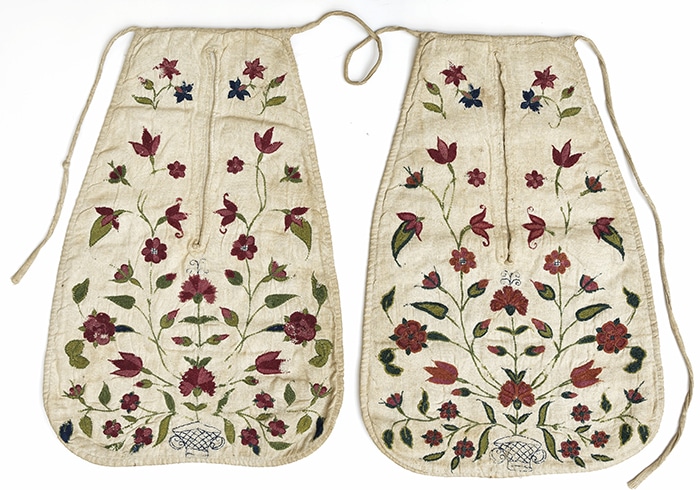
These weren’t just utilitarian pouches either —some of these pockets were beautifully decorated textile objects that reflected their owner’s taste or sewing skills.
Original pockets from this era frequently featured elaborate embroidery in floral motifs, pastoral scenes, and decorative borders lovingly hand-worked in silk thread. These embellishments transformed everyday accessories into works of art. I think they’re quite fabulous!
For this project, I wanted to capture that spirit of ornamentation while exploring what my B 770 QE PLUS could bring to historical reproduction while learning a new skill!
True Pocket Stories
The two stories below come from a wonderful book called “A ‘Pocket’ History of Women’s Lives 1660-1900 by Barbara Burman and Ariane Fennetaux, and it is a great book if you’re interested in further reading on the subject of pockets!
Frances Burk, 1765 (Petty Theft) In 1765, a servant in a London Household named Frances Burk was caught when her pocket “appeared pretty bulky,” according to her mistress Ann Clough. When asked to show what was inside, Frances revealed she’d stolen a silk handkerchief, a pair of stays, a linen apron, three-quarters of a yard of flowered cotton, and a linen bib—all stuffed into her pocket. This case appears in court records and is cited in the book “The Pocket: A Hidden History of Women’s Lives, 1660-1900” by Barbara Burman and Ariane Fennetaux.
Jane Griffith, 1777 (The Duck Smuggler) Even better—in 1777, Jane Griffith saw an opportunity and stuffed two live ducks that belonged to Thomas Wainwright into her pockets! Can you imagine walking around with live ducks in your pockets!? This is also documented in court records from the Old Bailey.
These stories show that the capacious nature of 18th-century pockets made them perfect for concealing all sorts of things—both the mundane items of daily life and, occasionally, stolen goods. The fact that pockets were worn under skirts and accessed through slits made them essentially the perfect invisible hiding places and great purveyors of women’s secrets!
Why the B 770 QE PLUS is Perfect for Historical Projects
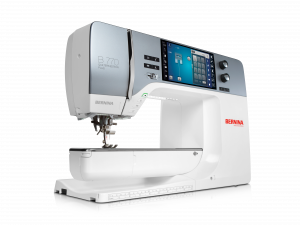
When I first received my BERNINA 770 QE PLUS as a BERNINA Ambassador, I immediately recognized its potential for costume and historical work. Here’s why this machine has become indispensable for my period reproduction projects:
The Large Embroidery Area
This machine features a generous embroidery field that allows for larger-scale embroidery work. For pockets that typically measure 12-18 inches in length, this workspace was ideal. If I wanted and the design worked in the space, I could embroider the entire decorative motif in a single hooping, ensuring perfect placement and eliminating the risk of misalignment that can occur when joining multiple hooped sections.
Built-In Embroidery Designs
The B 770 QE PLUS Kaffe Edition includes eight embroidery fonts, 339 embroidery designs, with 64 inspired by Kaffe Fassett. The variety of built-in designs means I didn’t need to source or digitize patterns—I could start stitching immediately, and we can all easily stitch together!
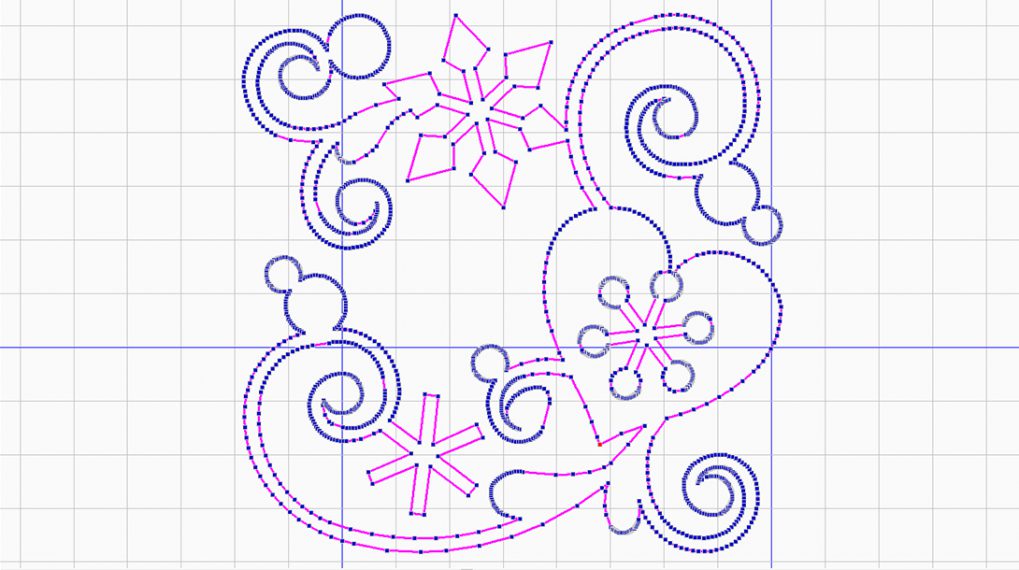
I found several floral motifs that beautifully evoked the organic, flowing aesthetic of 18th-century embroidery. I selected a climbing floral pattern with delicate leaves and blooms that would have been equally at home in an 18th-century sewing work basket. The embroidery is delicate and sweet and perfect for my first try!
The Embroidery Editing Features
Here’s where this machine truly shines for historical work: the editing capabilities. Using the machine’s touchscreen, I could:
- Rotate and mirror the design to create symmetrical layouts typical of period pockets
- Adjust the size to scale the motif appropriately for my pocket dimensions
- Change thread colors to match my chosen palette of historically-inspired shades
These editing tools give me the creative control to make the design truly my own while maintaining period-appropriate aesthetics.
Thread Tension Perfection
The automatic thread tension system adjusted beautifully to my lightweight cotton fabric, producing even, professional stitches without puckering or pulling. This is crucial when working with natural fibers that can distort easily.
The Precision Knee Lever
While not embroidery-specific, I found the knee lever incredibly useful when switching between embroidery and construction work. After completing the embroidery, I used the machine’s sewing functions to construct the pockets, and the knee lever allowed me to keep both hands free for guiding the fabric—essential when working with the curved seams and gathered tops typical of tie-on pockets. Honestly, once you start using the knee lever, it quickly becomes second nature and a safety net!
The Construction Process
For those interested in recreating this project, here’s my approach but you can also reference this wonderful article by the Victoria and Albert Museum
Materials
- Lightweight linen or cotton, or linen/cotton blend for the pocket body
- Linen tape or twill, or ribbon tape for ties
- Bias binding for the pocket if you enjoy that detail. I did not use bias binding, but I am thinking of it for my next pocket!
- Embroidery thread in period-appropriate colors, I chose a beautiful AMANN golden yellow, which matched the print detail in my fabric beautifully
- Stabilizer of your choice or what works best with your project – for this, I tried out the OESD StabilStick tearaway stabilizer
Process
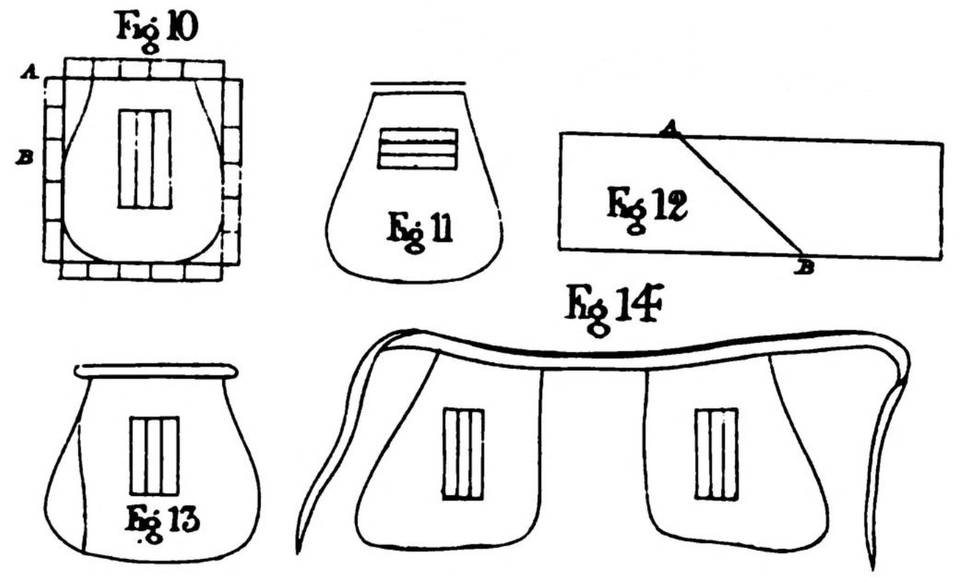
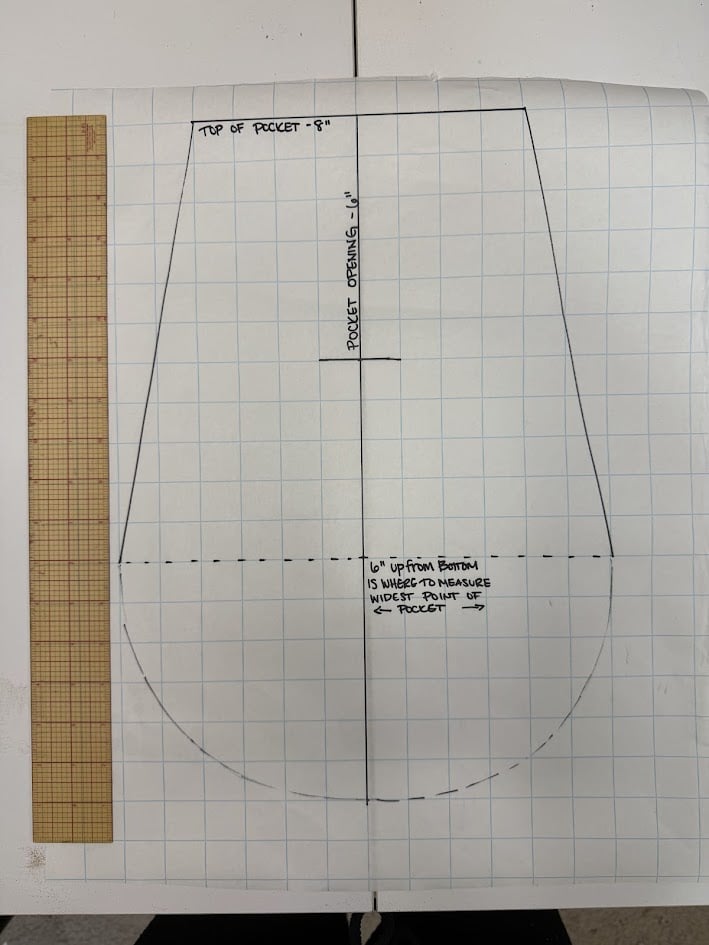
- Pattern and Fabric Prep: I drafted my pocket pattern based on extant examples, creating a slightly teardrop shape measuring approximately 18 inches long and 12 inches wide at the widest point. I made a cross with these measurements, and then I traced out the general curve of the pocket to my liking. Feel free to adjust your pocket size to your individual needs! Then trace this onto your fabric, but don’t cut out the pocket yet, either, in case you need more room to make adjustments.
-
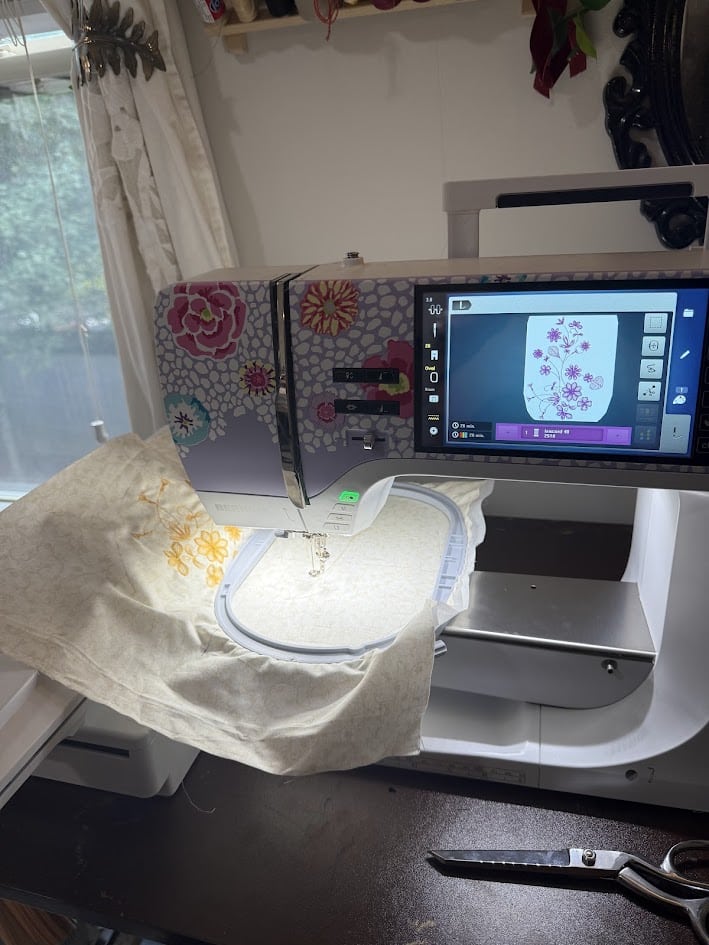
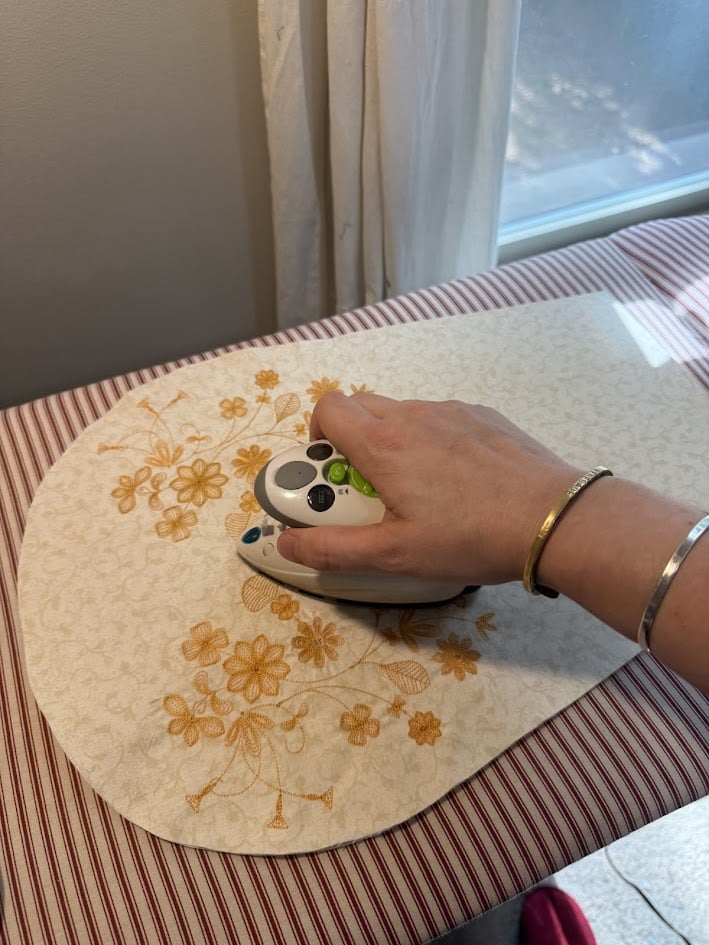
- Embroidery Placement: Using the positioning features, I placed my floral design on the front pocket piece, positioning it to be visible in the lower section of my drawn-out pocket. The machine’s on-screen preview was invaluable for visualizing the final placement. The placement of your embroidery will depend on the shape/size of your pocket and the design of your embroidery.

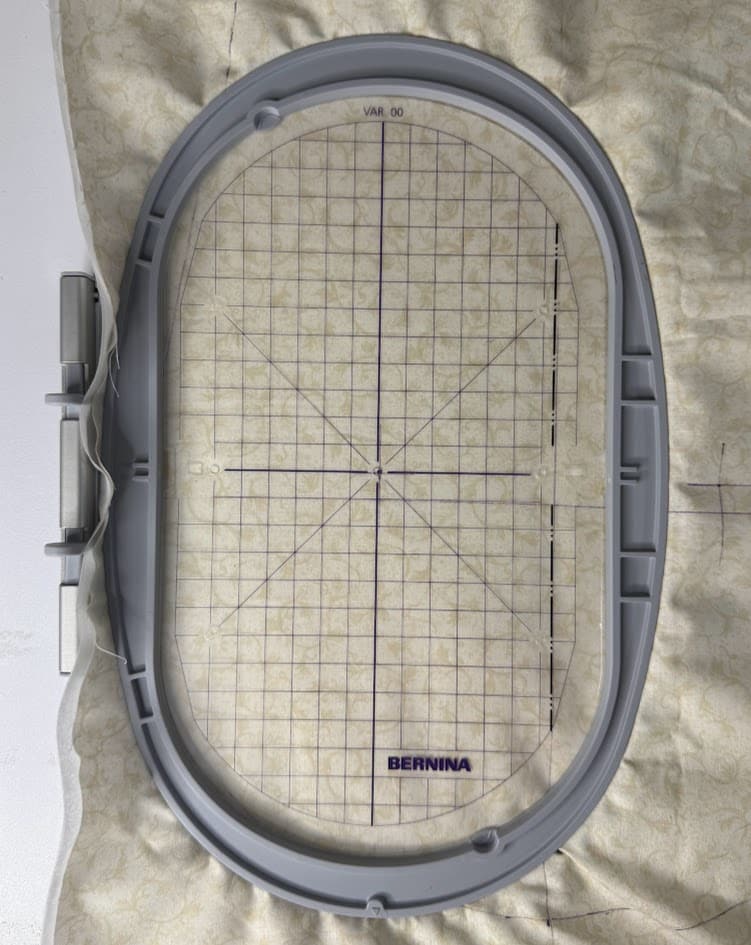
- Hooping: I stabilized my fashion fabric with a single layer of tearaway stabilizer and hooped carefully, ensuring the fabric was taut but not stretched or warped. The B770’s large hoop accommodated my pocket piece with room to spare.
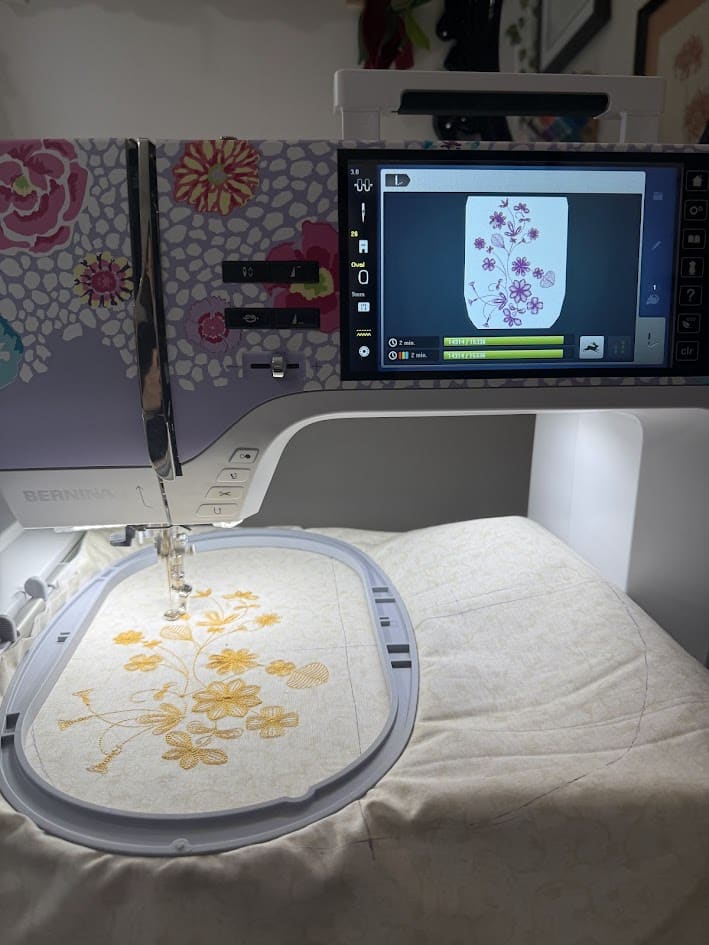
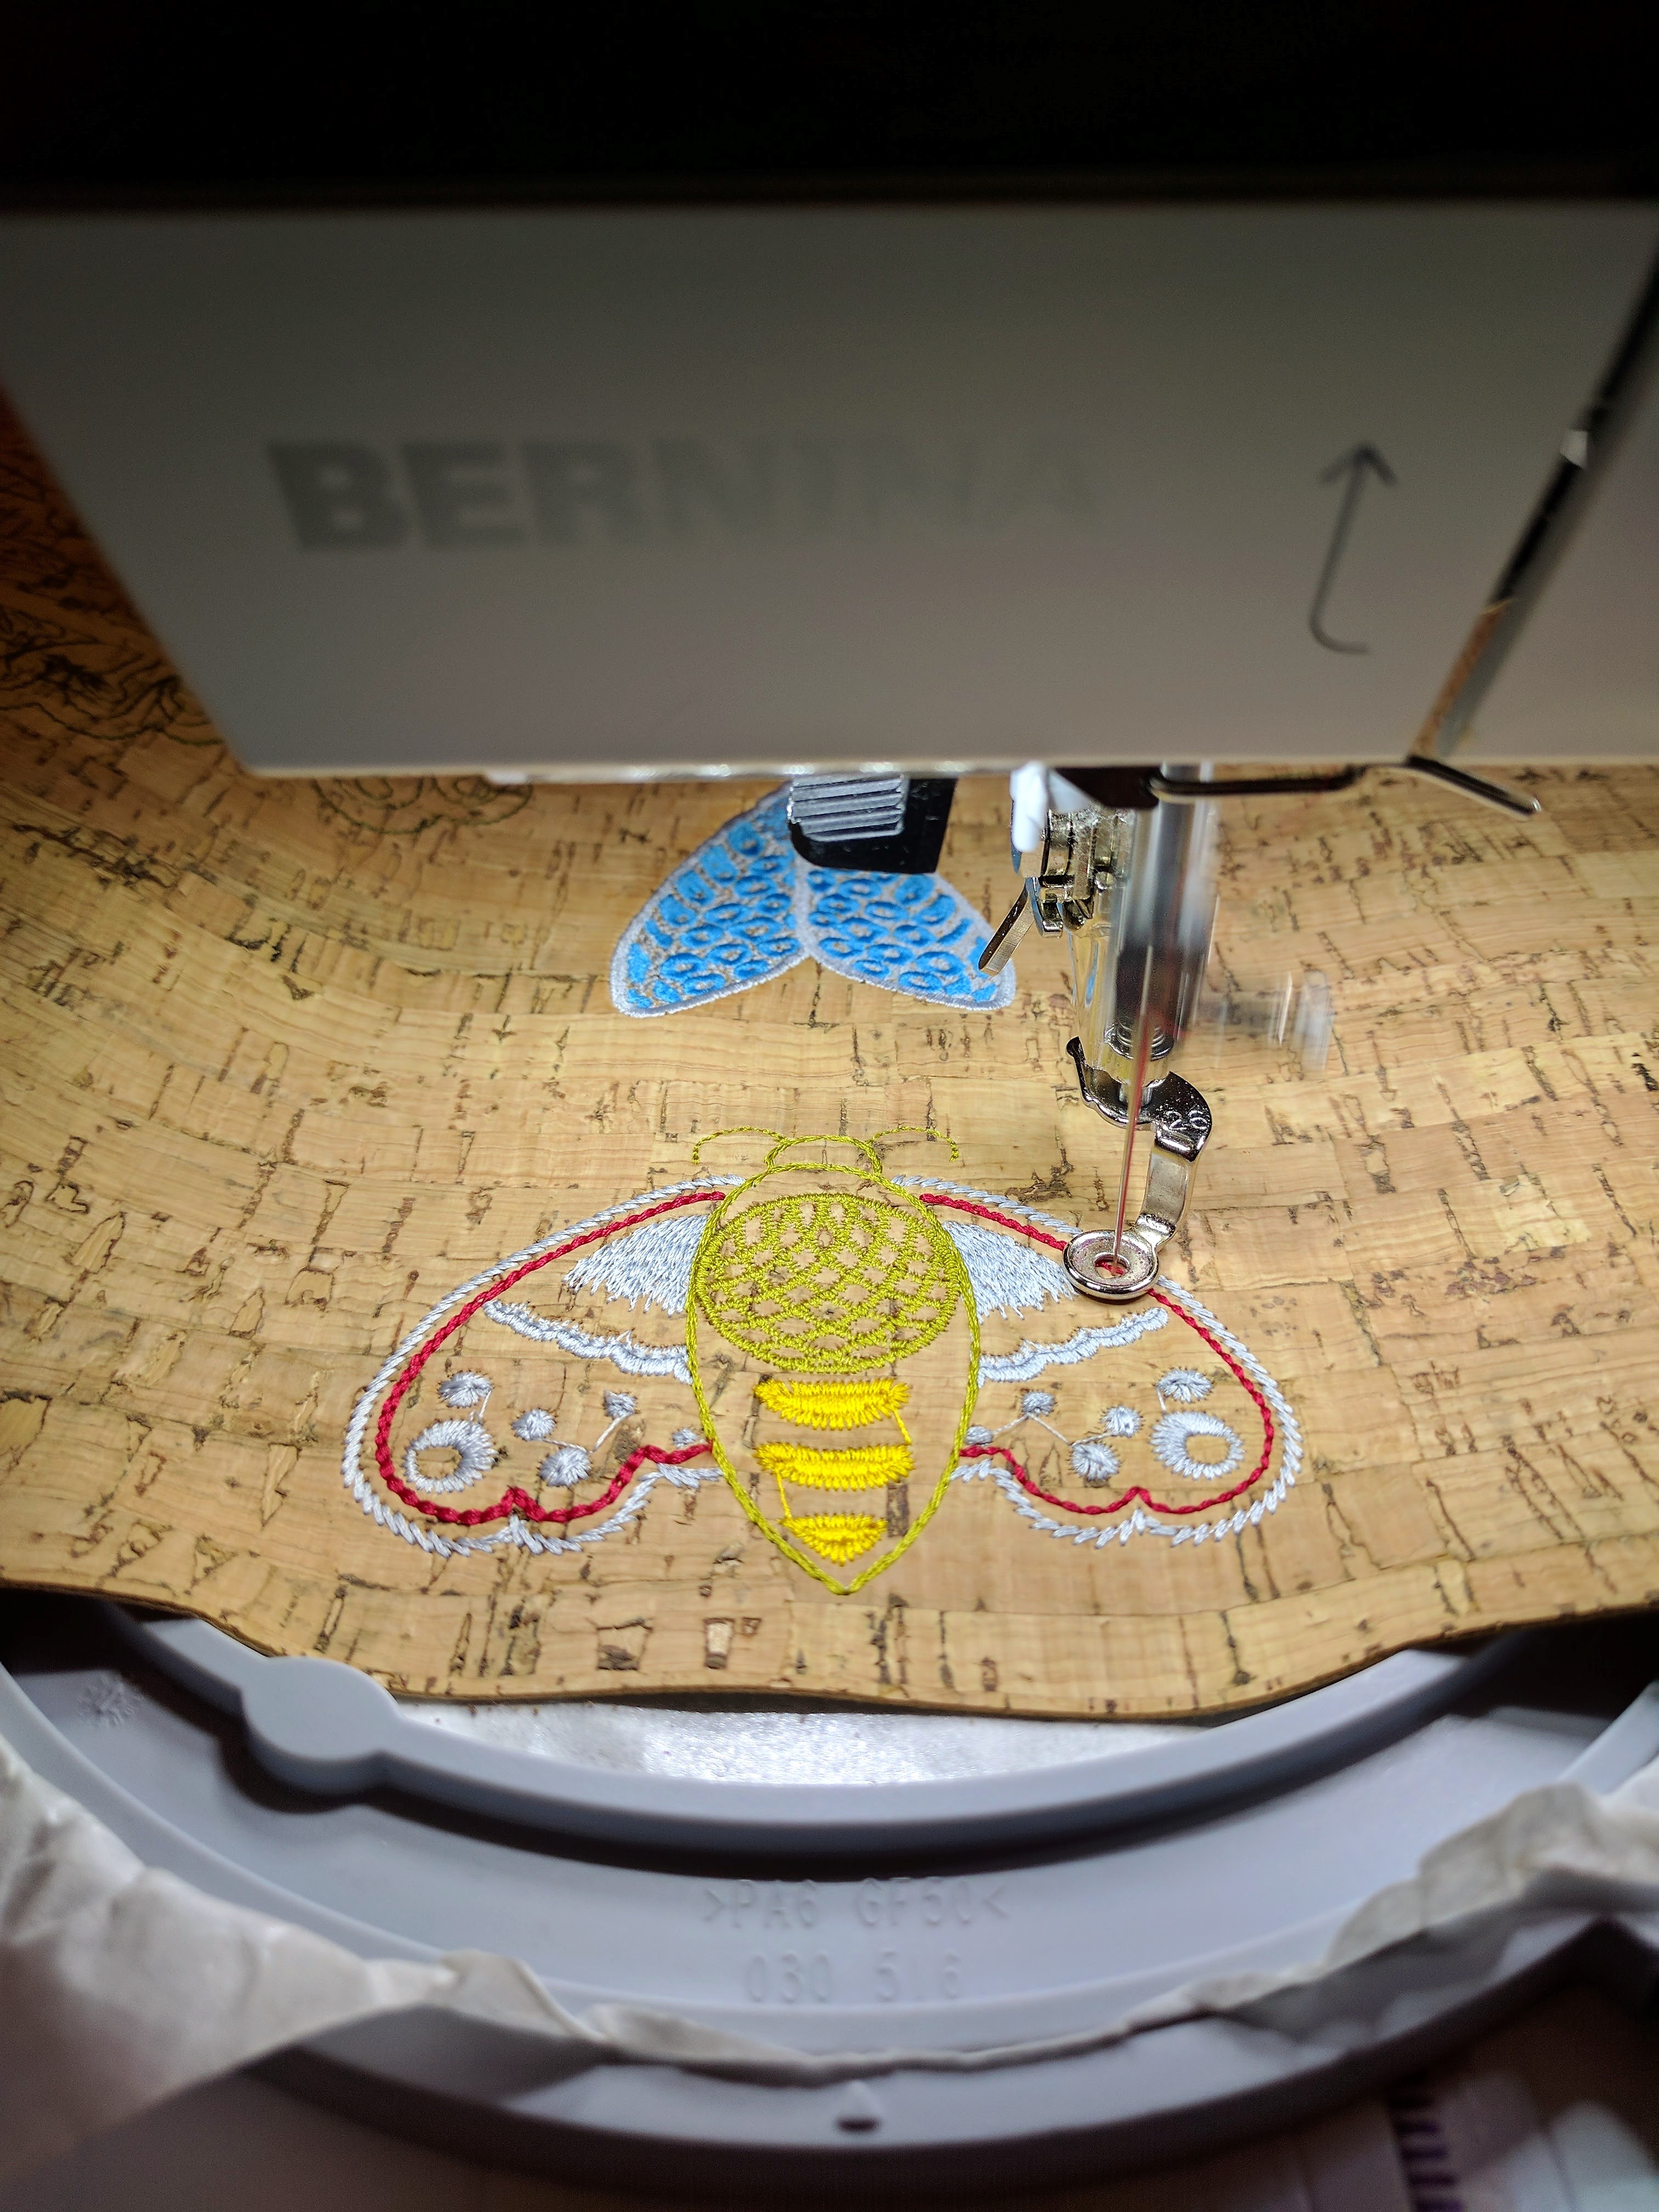
- Stitching: The embroidery process was mesmerizing to watch. The machine’s precision and speed meant that what would have taken hours by hand was completed in under 30 minutes. The stitch quality was impeccable. Each flower petal and leaf is rendered with crisp detail. I am always saying to myself that I will walk away to do something else at this time, but I always just end up sitting and watching the machine work!
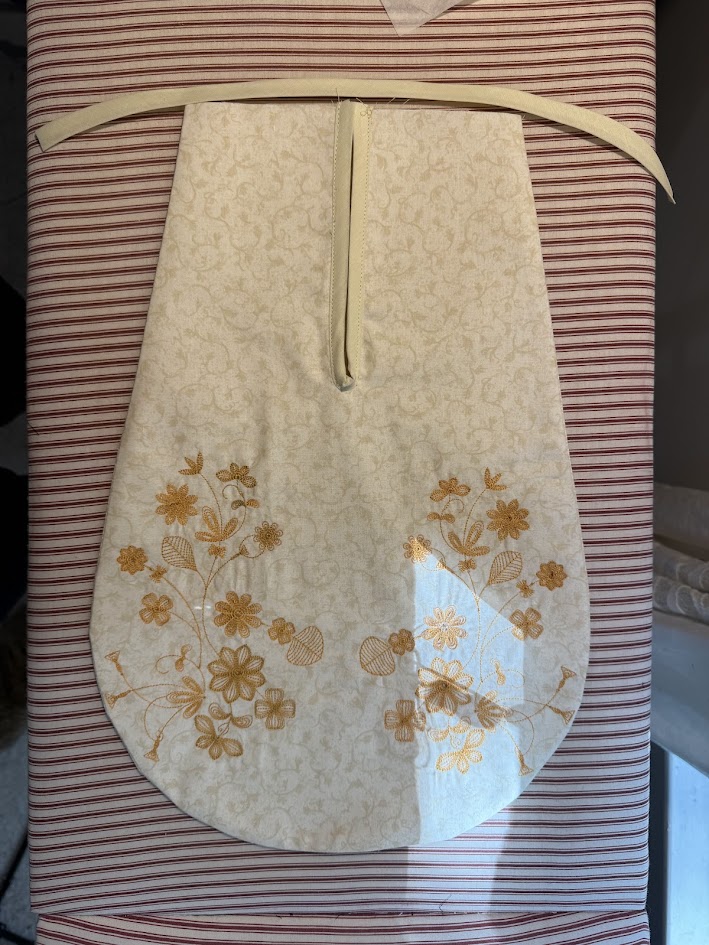
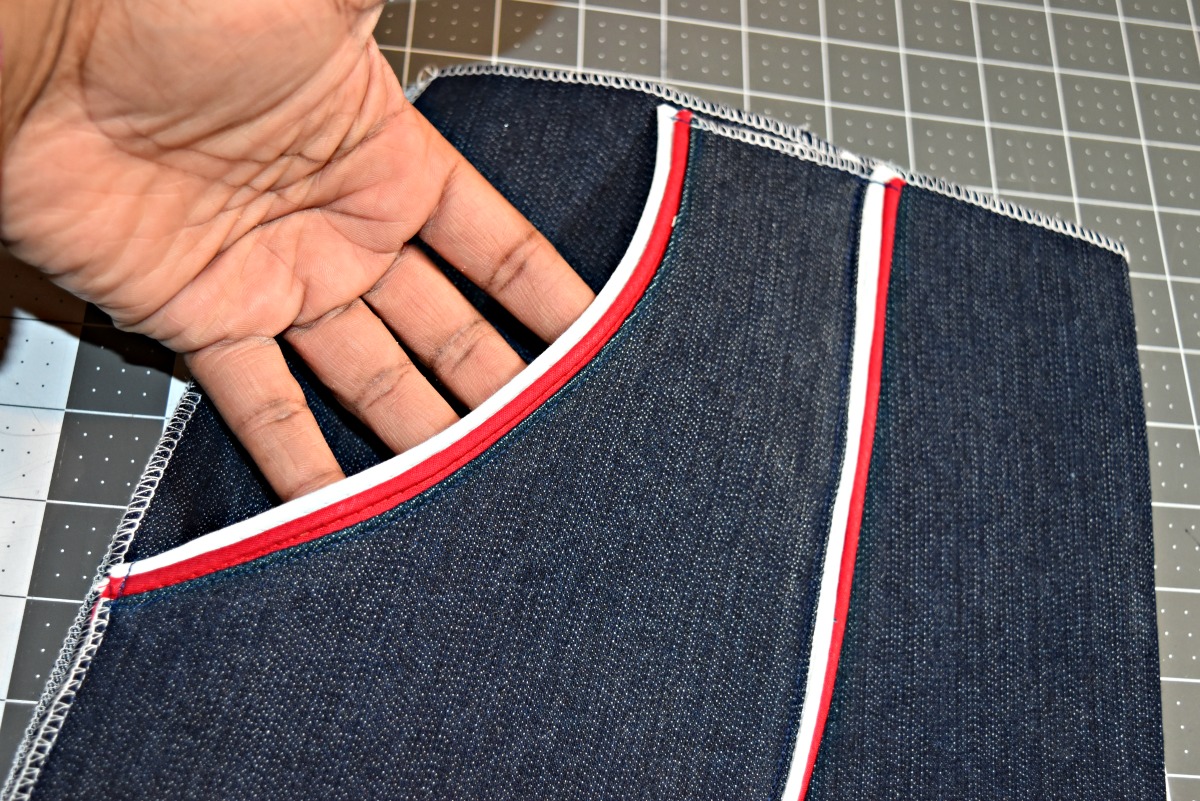
- Assembly: After completing the embroidery, I removed the stabilizer and pressed the piece carefully. Then I used the regular sewing functions on the B 770 QE PLUS to construct the pockets: stitching the front and back together, leaving the top open, finishing the edges, and attaching the waist ties.
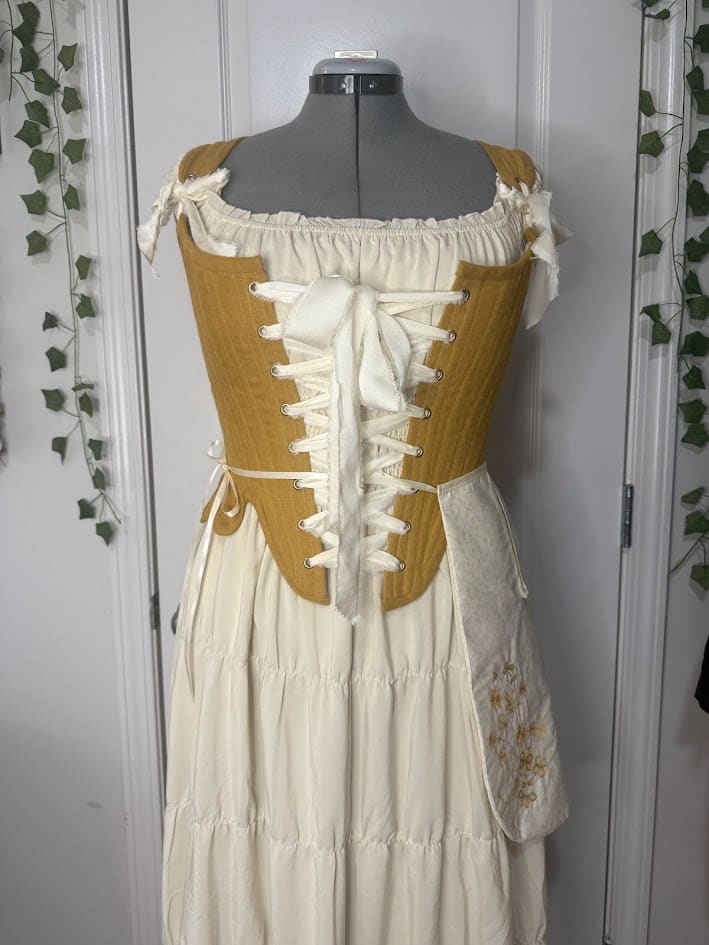
The Final Result
The completed pockets are a beautiful hybrid: historically accurate in shape and purpose, but elevated by the precision and artistry of modern machine embroidery. They would work equally well as a costume piece for 18th-century historical dress or as a unique handmade gift for someone who appreciates fashion history. They are perfect for someone who enjoys a good pocket!
What I love most about this project is that it demonstrates how modern sewing technology doesn’t diminish historical craft—it enhances it. The B 770 QE PLUS allowed me to achieve a level of decorative detail and consistency that would require extensive hand-embroidery skills and hours of work. After all, this means I can create more projects, experiment with more designs, and share these historical concepts with others without the barrier of needing to master complex hand skills first.
Tips for Your Own Historical Embroidery Projects
If you’re inspired to try combining historical sewing with modern embroidery, here are my recommendations:
- Research First: Look at museum examples to understand authentic proportions, placements, and design aesthetics. Many museums now have extensive online collections.
- Choose Appropriate Designs: Select embroidery motifs that reflect the period you’re recreating. Florals, scrollwork, and geometric patterns are safe choices for most historical eras.
- Mind Your Thread Colors: Historical dyes produced different color palettes than modern synthetic dyes. Slightly muted, complex colors often look more authentic than bright, pure hues.
- Test Your Stabilizer: Different weights of fashion fabrics and historical fabrics respond differently to stabilizers. Always test on a scrap first.
- Embrace the Hybrid Approach: You don’t have to choose between historical and modern techniques. Machine embroidery can coexist beautifully with hand-sewn buttonholes, hand-stitched hems, or other period construction methods.
Whether you’re a costumer, a historical reenactor, or simply someone who loves the aesthetic of period textiles, I encourage you to explore how your embroidery machine can breathe new life into historical designs.
These 18th-century pockets are just the beginning. I’m already planning stays with decorative stitching, quilted petticoats, quilted bum rolls, and perhaps a robe a la francaise with an intricate, floral embroidered front! Stay tuned to see what else is in store.
History and technology, hand in hand, creating something beautiful. Happy Sewing!
What projects are you working on? Share your projects in the comments!
Find me on Instagram and TikTok @jesscronindesigns for more historical costuming, behind-the-scenes peeks at my professional work, and sewing adventures.
Referenced Sources
Used Products
What you might also like


2 comments on “Embroidering 18th Century Tie-On Pockets”
-
-
I’m just here for the pictures of the Kaffe machine. Always fun to see the wonderful things this machine is capable of and that lavender faceplate with flowers is just beyond words. Have never regretted purchasing it. The thought of stuffing live ducks into pockets is hilarious and the icing on the cake.
Leave a Reply
You must be logged in to post a comment.
This is so fabulous! Wish I’d seen this post 10 years ago, as this tie-on pocket solution would have been ideal for my Victorian caroling dress that I made from Simplicity pattern 1818. There was definitely a slit opening on the side of that skirt already, no zipper or anything but it stayed closed anyway due to the extremely full skirt style. I carried a beaded purse with me on caroling gigs for my car keys, chapstick, pitch pipe etc and it was an annoying encumbrance that also bothered me because I knew it wasn’t period correct, but it was the best I could come up with at the time. I love your attitude about mixing traditional techniques with modern technology. I feel the same way. One of the ways I like to do that with my Bernina machines is to add small hand embellishments to decorative machine stitches or machine embroidery afterwards, like putting little French knots in the centers of your machine embroidered flowers, or adding beads here and there by hand, or weaving a narrow ribbon in and out of machine stitches. I find that those little hand stitched details go a long way to making the whole embroidery appear to be hand stitched, with a minimal time investment in super easy, beginner embroidery stitches. Even if I am stitching a line of embroidery stitches completely by hand, sewing a line of large straight stitches on the fabric with an unthreaded needle ahead of time gives me perfectly spaced needle holes to guide my hand stitching, a huge help since I don’t have much experience with hand embroidery and the hardest part for me is spacing my stitches evenly. Thanks for a great tutorial along with fascinating historical background. I can’t wait to see what you will share next!