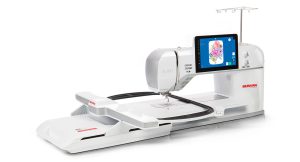
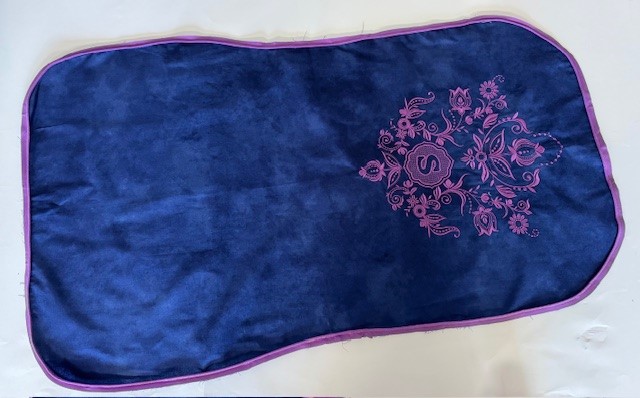
BERNINA 990 Red Chair Cover
It’s fun to customize your BERNINA sewing chair with an attractive and one-of-a-kind “loose” cover. It’s easy to make and personalize with some embroidery, piping, pleats, or gathered flounces to suit your style and the style of your sewing room.
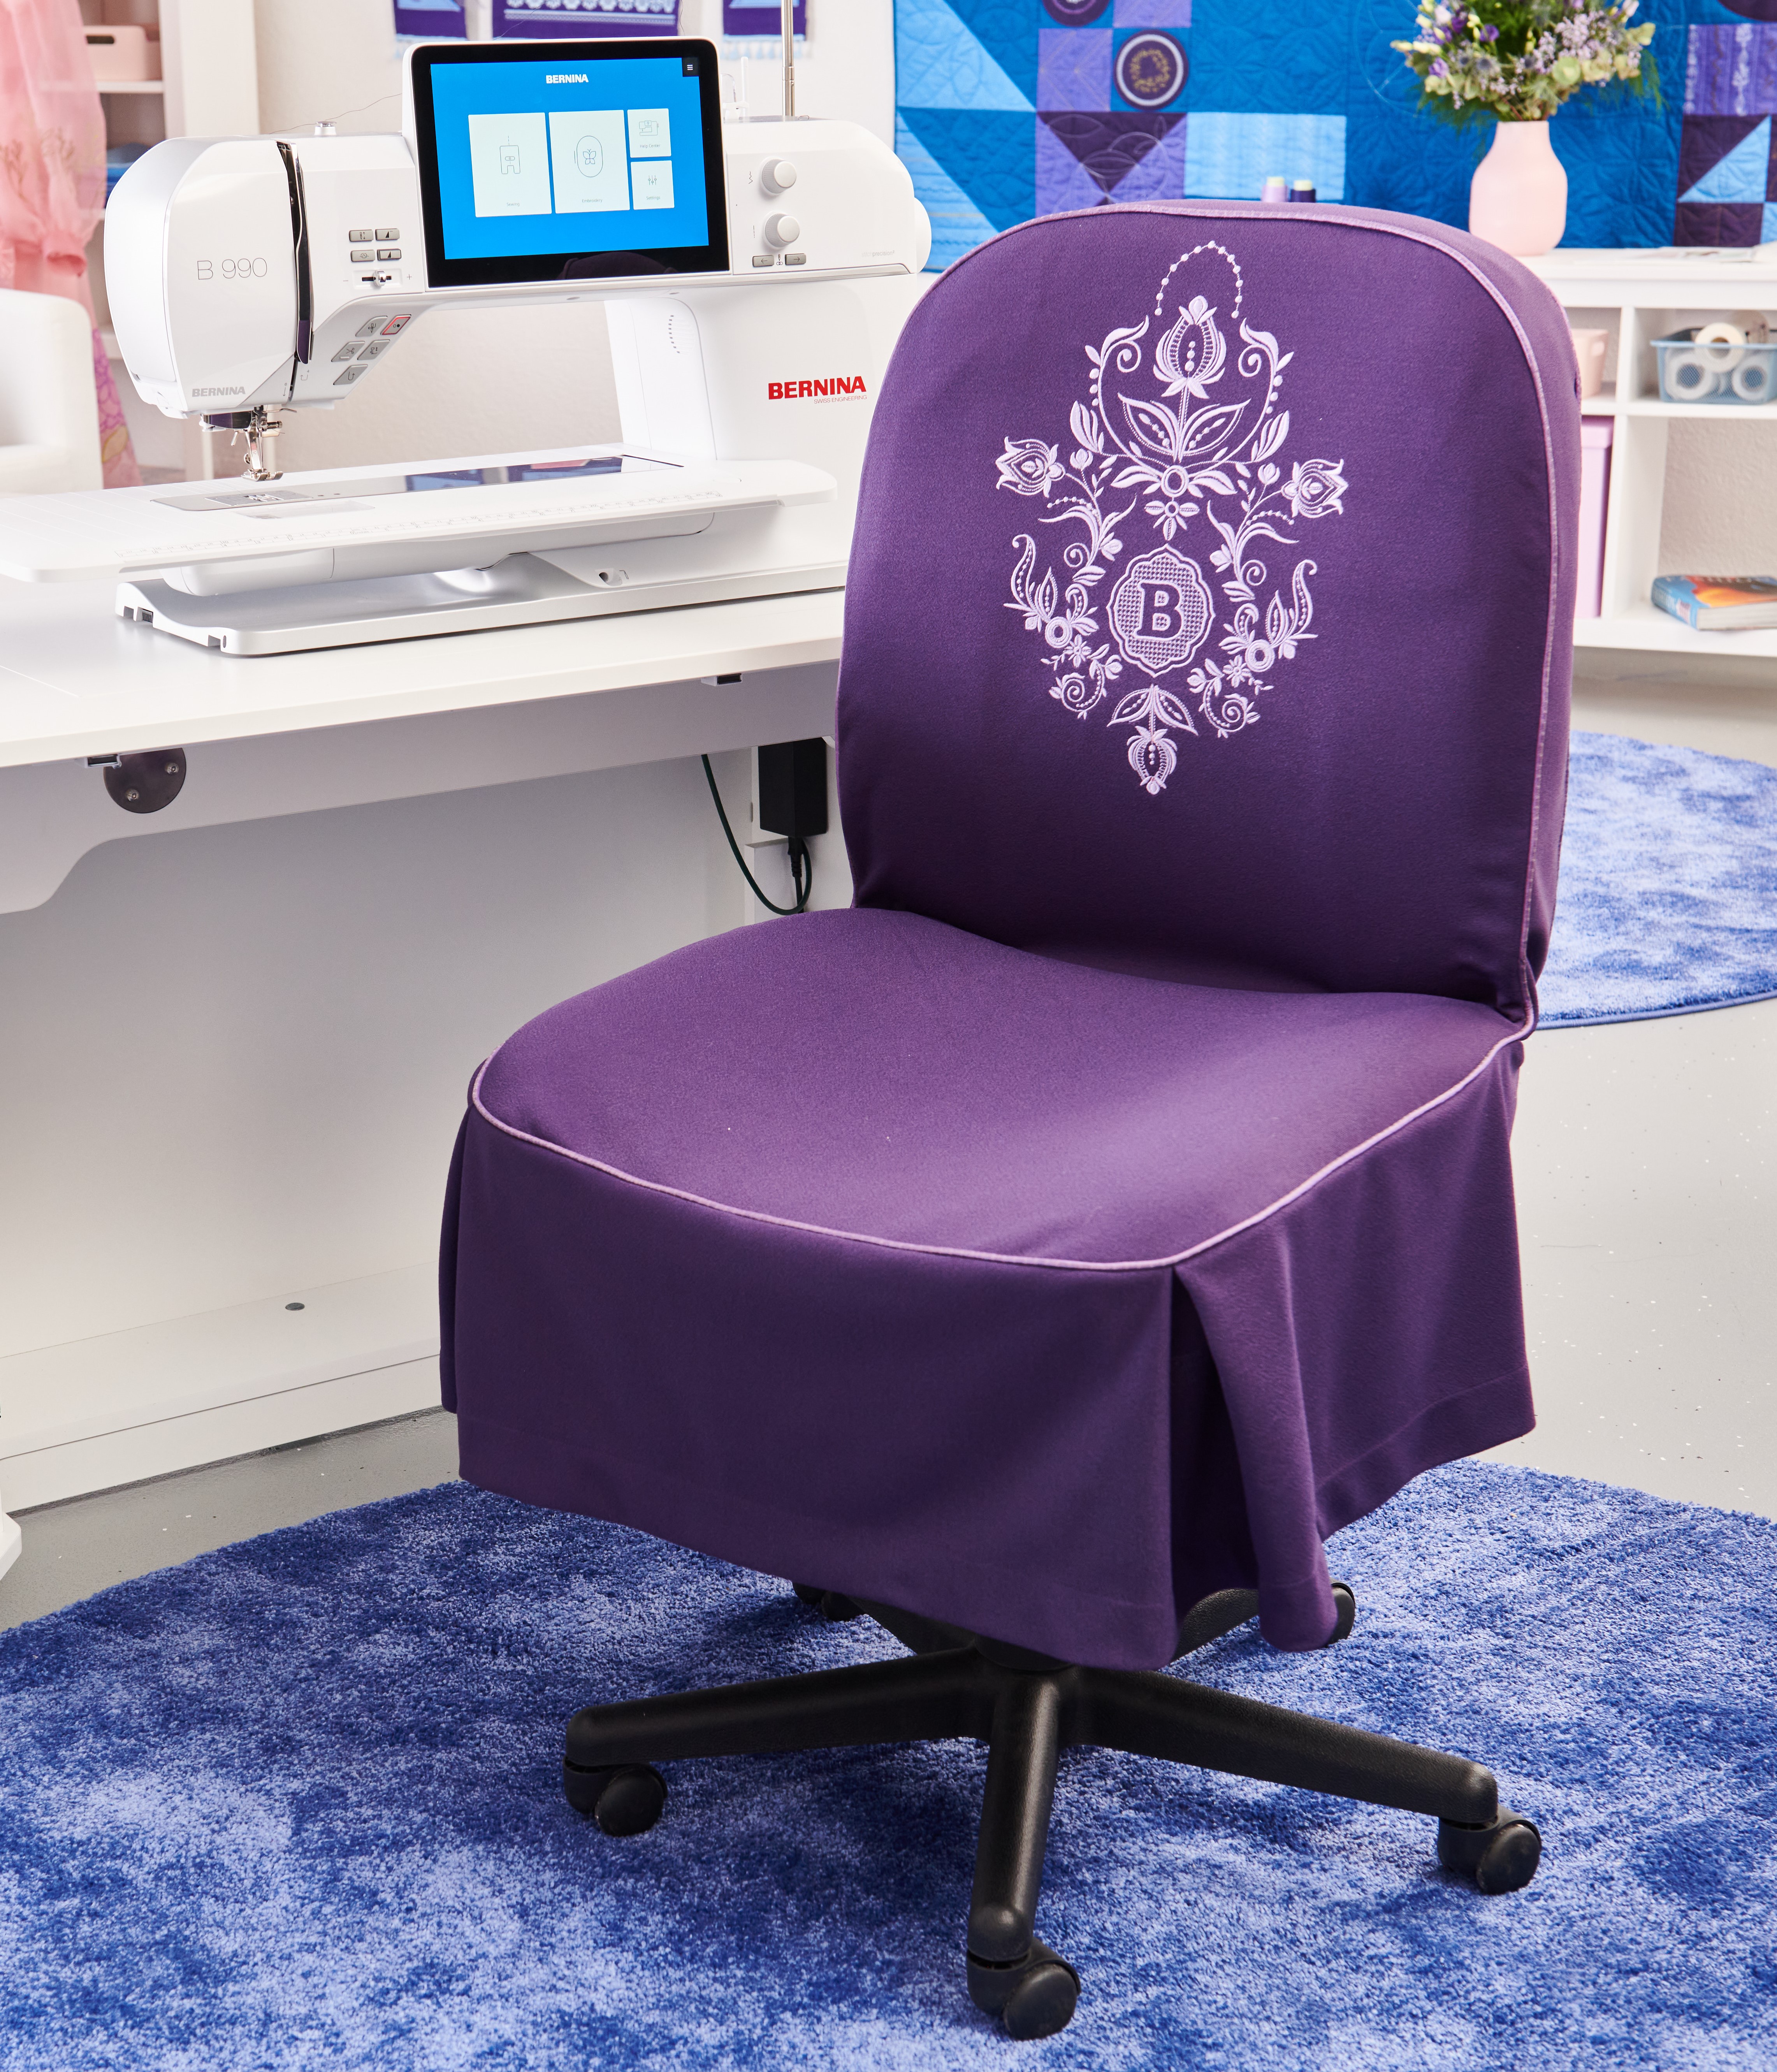
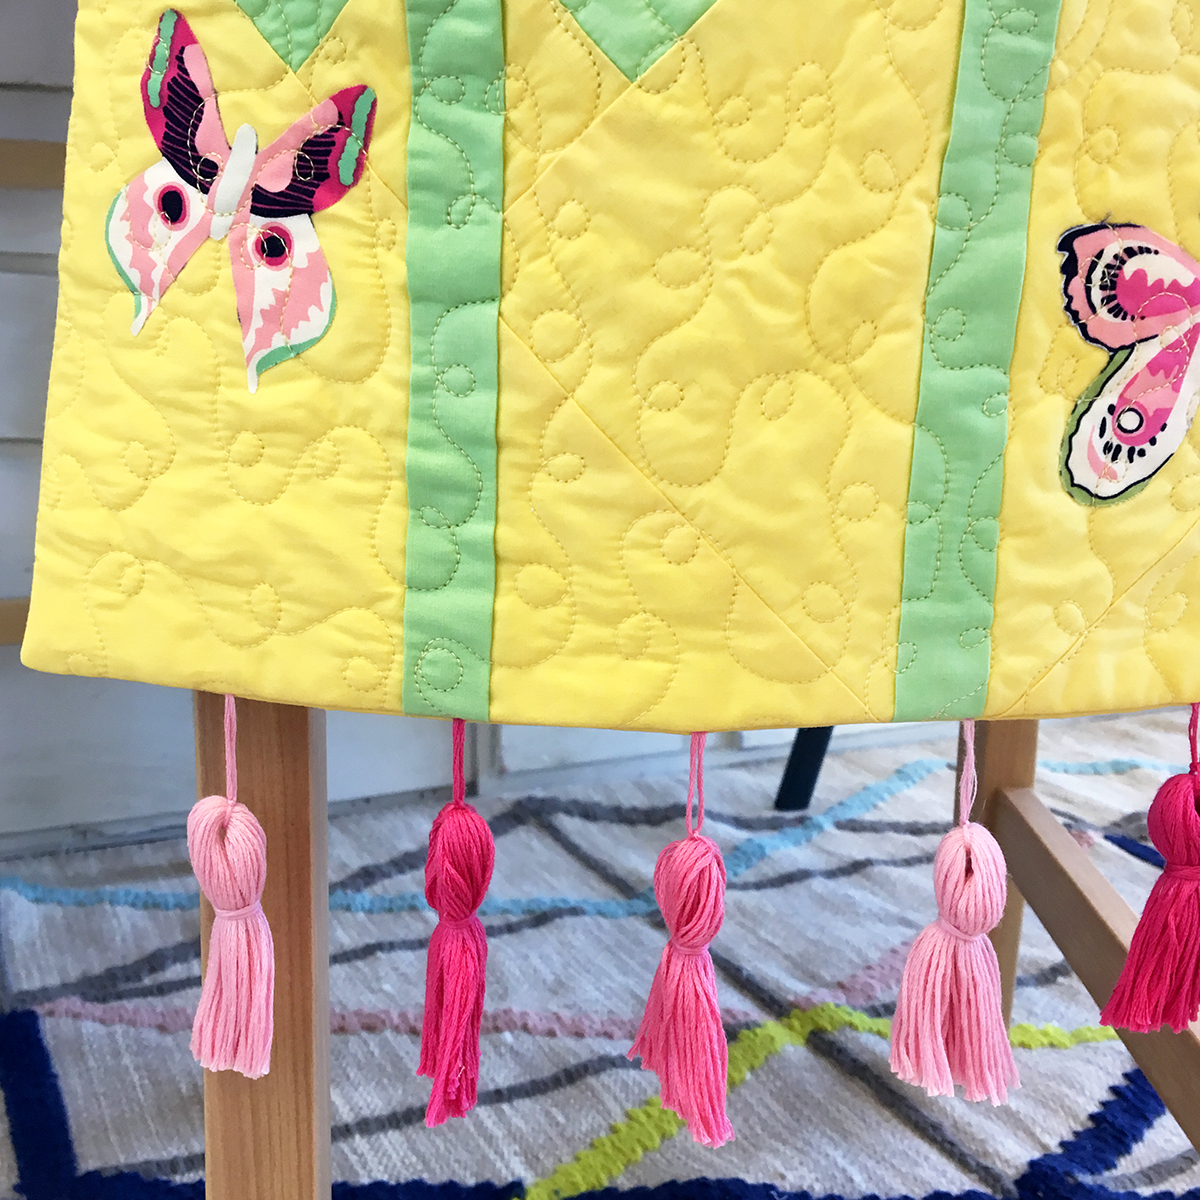
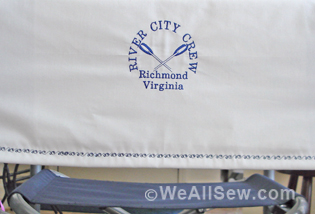
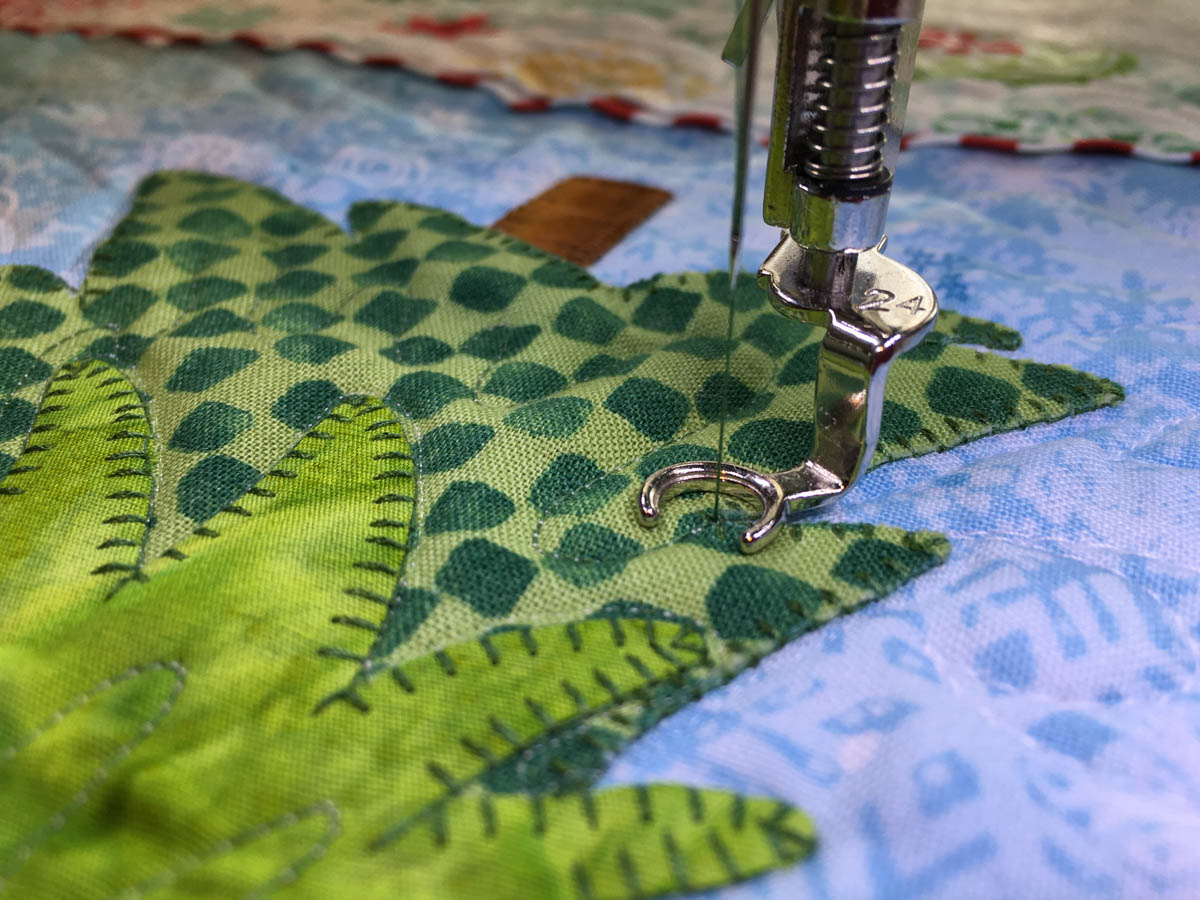
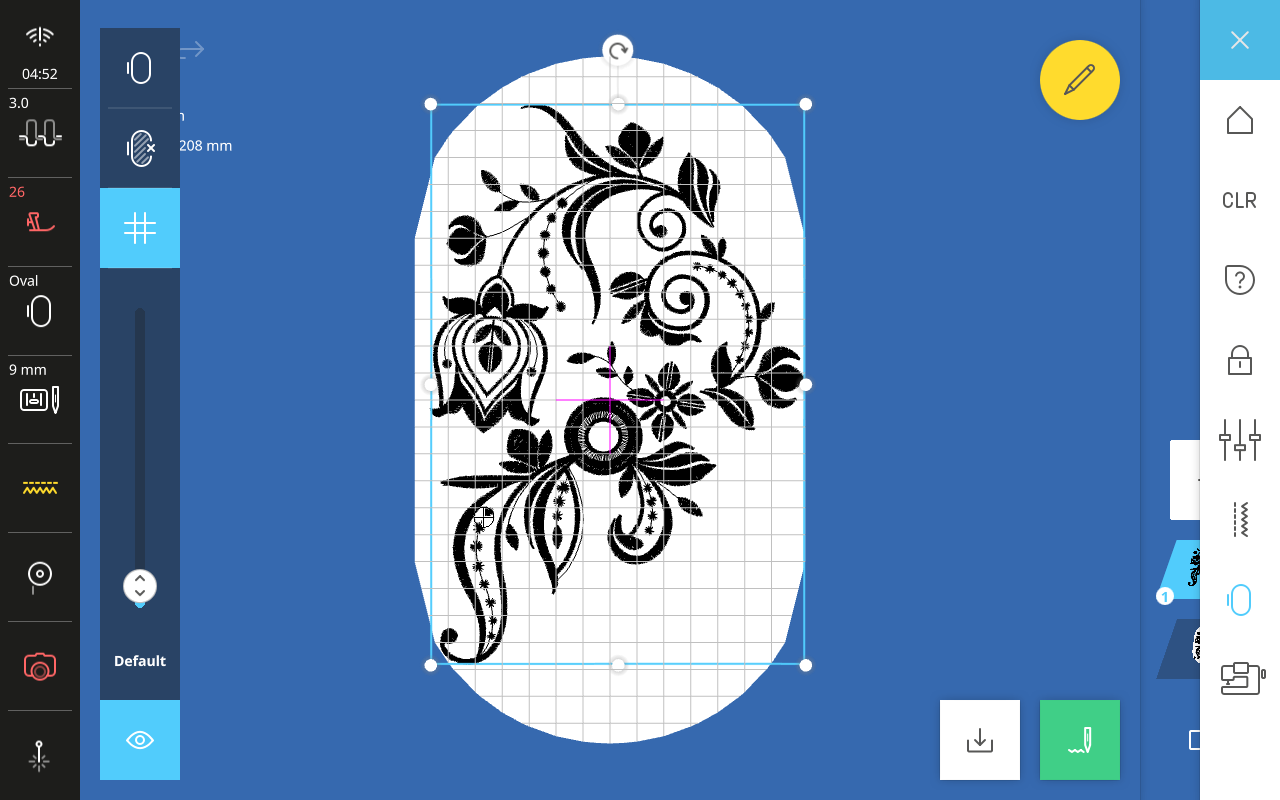
Our chair is embroidered with beautiful designs included in the machine. We have combined one with a monogram and stitched it out using the Giant Hoop. When embroidering large designs, it is recommended to embroider the fabric pieces before cutting them out, so it is possible to hoop the fabric, giving a better result.
This cover has been designed for the red BERNINA Sewing chair, but it is also possible to create a pattern for other chairs. We have included some instructions below.
Our cover includes contrasting piping, which we covered ourselves, but it is also possible to purchase ready-made. There is a 5” pleat added at the center of the back to make the cover easy to get on. You may like to add some ties or bows to the center back.
A 10” (25cm) skirt or flounce around the seat has been added with a 4-inch pleat at each front corner; the seam is hidden in the pleat, so we didn’t need so much fabric as the whole piece didn’t fit across the width of the fabric. There is a 2-inch hem to give it some weight. The chair’s back length below the seat is the same depth as the skirt. You can customize your chair to suit a shorter skirt or a gathered piece.
The front and seat are in one piece, and to keep it in place on the seat, we recommend adding two ties stitched to the inside of the cover 2 inches (5cm) in from each side. Tie these to the back rest of the chair so the cover stays in place.
The Pattern
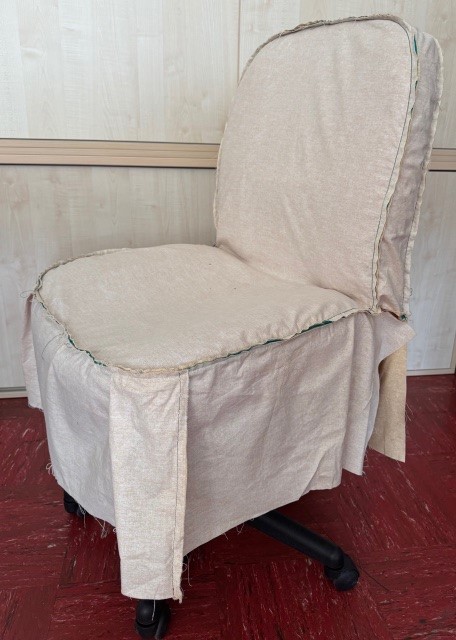
We created the pattern by first making a muslin sample using the chair measurements and checking the fit on the chair before cutting into the chosen fabric. The picture below shows the first mockup of the cover inside out.
The pattern is available in two printing sizes:
- AO to be printed at a print shop:

- US Letter, which you can print on a home printer and stick together:
The 3/8” seam allowance is included in the pattern.
If you own another type of chair, take some muslin or a cheaper fabric and drape it over your chair. Pin the fabric in place over the fabric-covered areas and then use a pen to map out the shapes onto the fabric, then remove the pins. Once you have the parts you need, add the desired seam allowance (we have used 3/8”), cut out the pieces, and sew it together using a long stitch length. Then, you can see how it fits and make any alterations. It is then easy to undo because you can then either use it as a pattern or transfer it onto paper for future use.
With some office chairs, you may need to dismantle them to cover some parts, as a loose cover will not work. There are lots of videos available on YouTube if you want to see how this is done.
Selecting the Fabric
Choose a durable fabric that will hold its shape and stand the test of time. Furnishing fabric, canvas or even denim would work well.
These calculations are for plain fabric. If you want to use a patterned fabric or if you want to add bows or piping, you will need more.
Fabric 44 inches (112cm) wide – 2 ¾ yards (2 1/2 meters) or Fabric 55 inches (140cm) wide – 1 ¾ yards (1.60 meters)
- Iron-on Interfacing is only required if your main fabric is a lighter-weight fabric.
- Tearaway 25 x 18 inches (giant hoop) and 2 x 15 x 10 inches (large oval hoop)
- 1 ½” Piping – 5 yards (4.5m). It is possible to purchase it ready to use
If you choose to make it yourself, then you need 5 yards or 4.5 meters ½” (12mm) piping cord and the same in bias cut strips 1 1/8” 3cm wide.
- ½” Cotton Tape – 2 x 15” (30cm) to hold the cover on the chair in the inside
| Pattern pieces | |
| Back Rest/Seat | 1 x 44 ½ inches x 24 inches |
| Chair Back | 2 x 36 x 15 ½ inches (Notch the top and bottom center) |
| Top and side band | 1 x 56 inches x 4 ½ inches (Notch at the fold) |
| Seat Skirt
|
2 x 24 ¼ x 12 inches
1 x 33 X 12 inches |
Cutting
We recommend block cutting the front panel with an additional 3 inches at the top so the fabric can be hooped in the giant hoop. Also block cut the 2 back pieces with an extra 2 inches added to the top.
Notions
- OESD Medium Weight Tear Away Stabilizer 1 x 25” x 20” and 2 x 15” x 11”
- Embroidery thread to suit – Isacord or Mettler Polysheen
- Sewing thread – Metter Metrosene or Seralon to match and one contrasting color for the bobbin (when sewing in the piping)
- Size 80 needle
- Bobbinfil white or black to suit the fabric color
Feet and Accessories
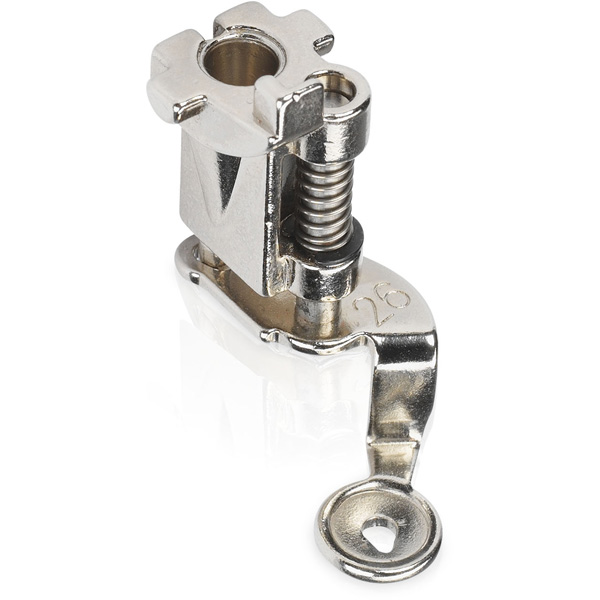
- Drop-Shaped Embroidery Foot #26
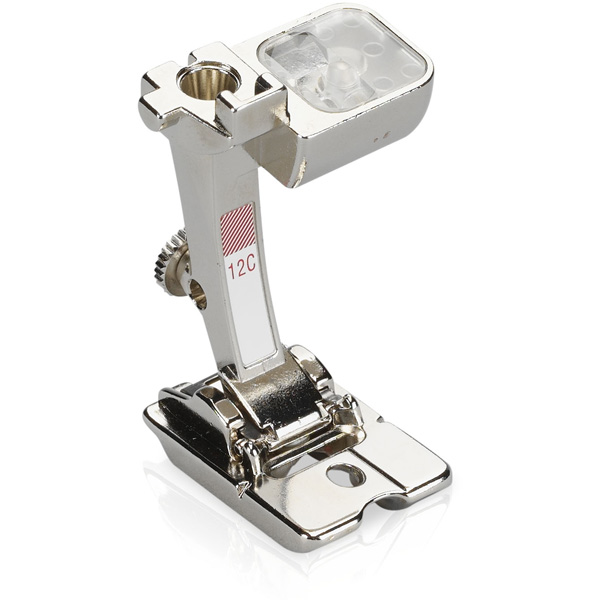
- Bulky Overlock Foot #12C
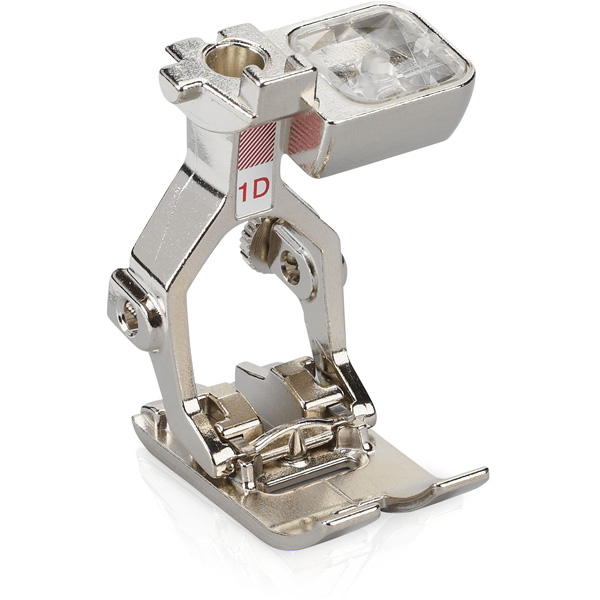
- Reverse Pattern Foot #1D
- BERNINA High Tension Bobbin case
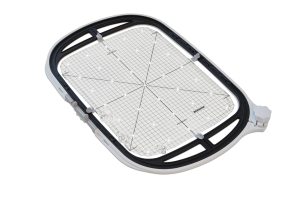
- Giant Hoop
- Large Oval hoop
- Overlocker/Serger to neaten the seams, threaded with matching thread
- Two bobbins
Embroidering the Front of the Cover
We recommend embroidering before you cut out the front and back.
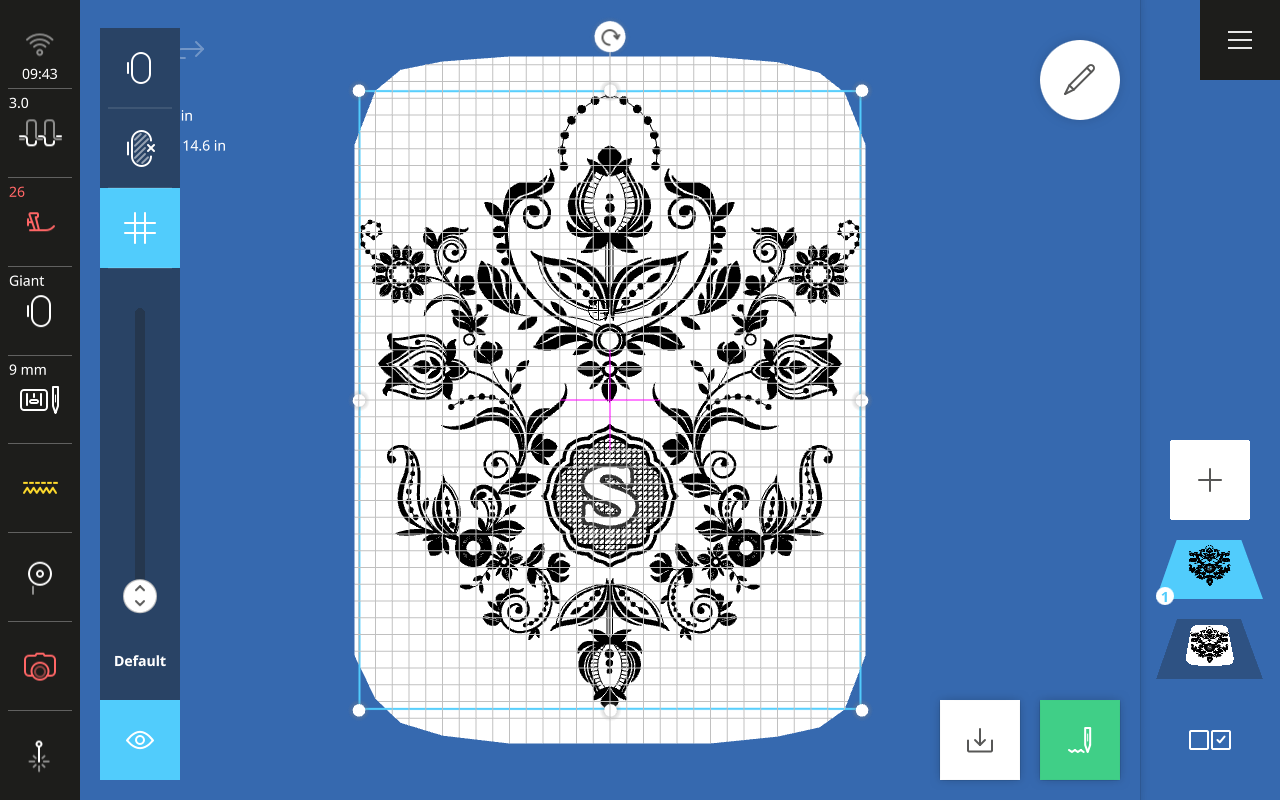
You will find the large embroidery design we used in the folder called Chair in the Inspirations folder. You can customize the design by adding your monogram, which can be found in the Monograms folder letter in the center of the design, as we have done.
Front Design
- Select Embroidery/Inspirations/Chair/C101
- Select + to add a design
- Click on Embroidery designs in the breadcrumbs or in the main menu (the butterfly)
- Scroll to monogram and select the letter of your choice
- In Edit Reduce the size to about 3.2 x 3.4 inches (80 x 85mm)
- Select view and the grid twice
- Select move and position the monogram design in the center of the large design
- Select both layers and select Group.
- Mark the center longways and your back front panel, and indicate the center and the start mark and place in the hoop. Hoop the fabric and the stabilizer so the top of the design is 5 9. inches from the top fabric edge and centered left and right, use your template and a fabric
- Thread the machine with your chosen Isacord thread color, with Bobbinfil in the bottom.
- Embroider the design.
- Cut the piece to the correct size. Notch the top and bottom center.
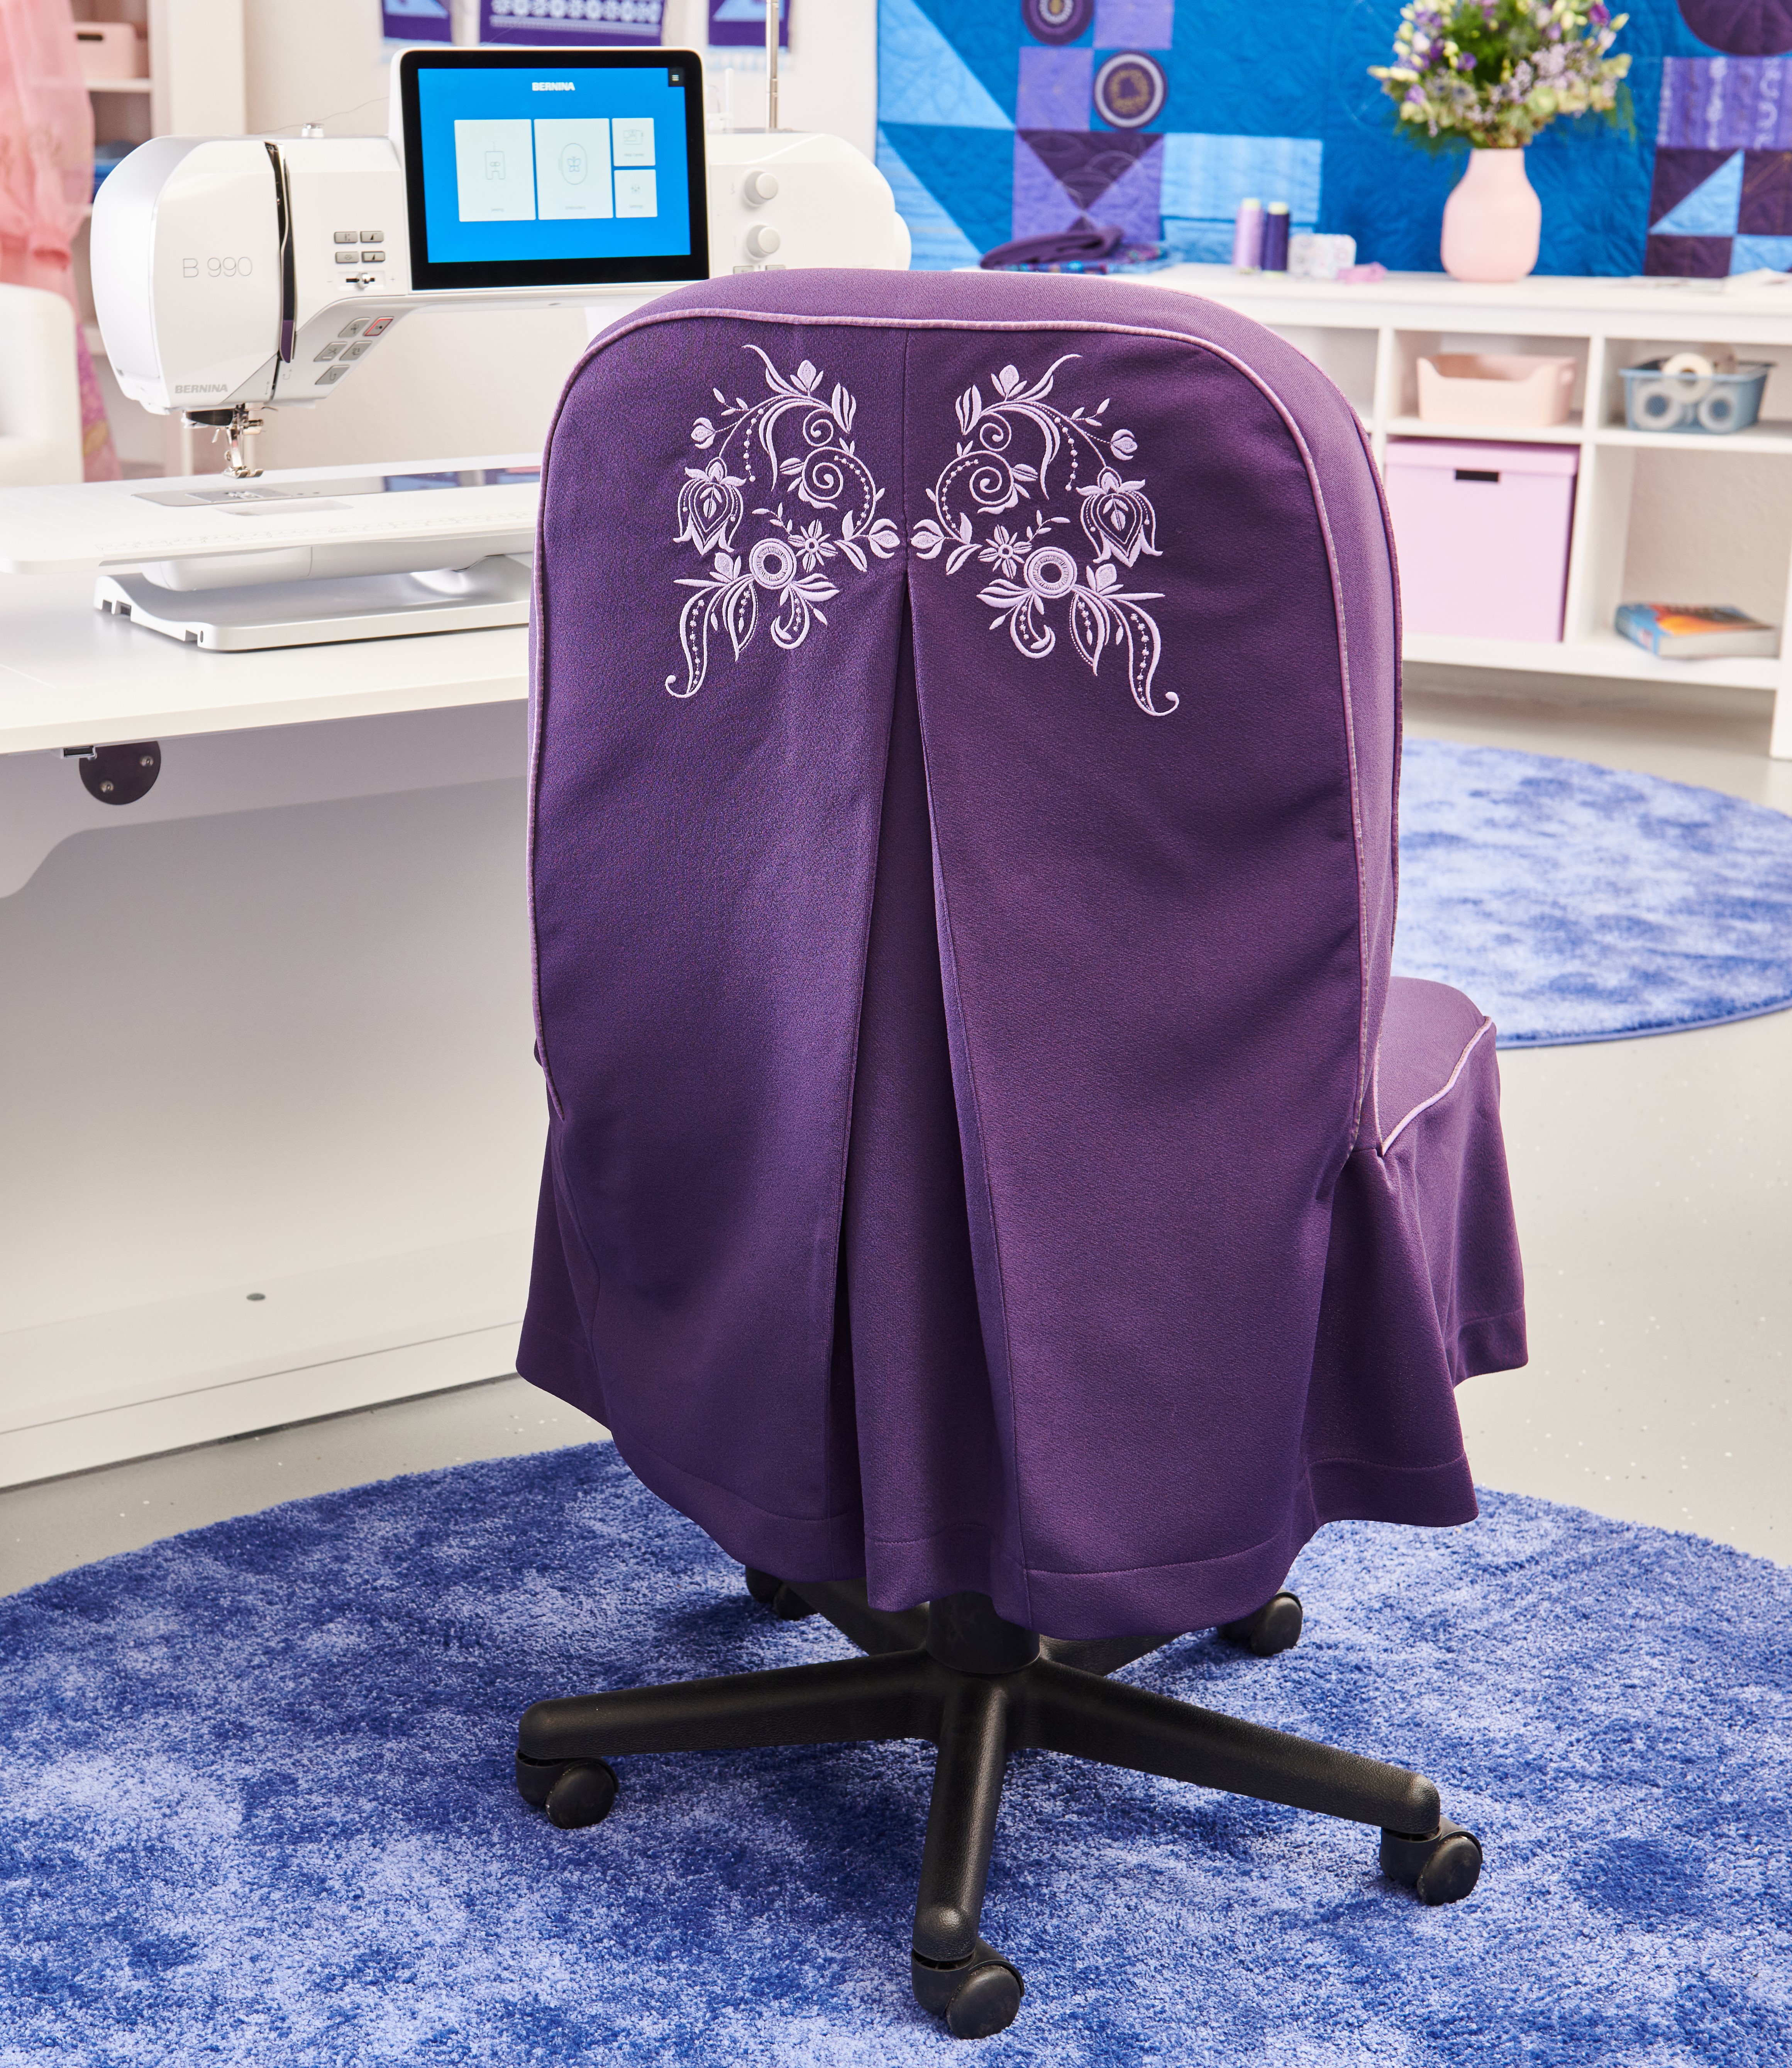
Create the Chair Back Embroidery Design
We call them angel wings 😊
- Save or delete the previous design if necessary
- Select Embroidery designs/Stylized Flowers
- Search 12633
- Select 12633-16
- Select large Oval Hoop from the hoop selection menu
- Select the grid from view if not already activated
- Close the file manager
- Select Edit
- Rotate 200°
- Enlarge 132%
- Move to 12 horizontally and -216 vertically
- Select 12633-13
- Check only the new design is selected
- Mirror Image left/right
- Rotate 219°
- Resize 110%
- Move -264 x 501
- Select both designs and Group
- Embroider the left side first.
- Hoop the fabric and a piece of Tear Away in the Oval Hoop.
- The top of the design should start 3 inches down from the top edge of the fabric.
- Stitch the design and repeat the process with the Mirror image the design for the right side.
The right side of the design should be as close to the outer fold of the center fabric edge as possible.
Constructing the Cover
Please note that the seam allowances are 3/8” (1cm)
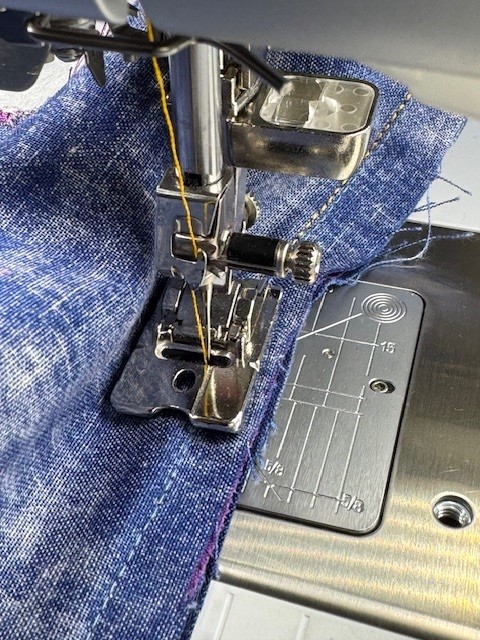
Overlock/Serge around the front, back, and top/side band – this is easier to do before you start to construct because the piping will add bulk, and then it is not so easy to overlock with the piping inserted. Maybe you have a piping attachment on your serger/overlocker, then it will work.
Attach the Reverse Sewing Foot #1D and select straight stitch. Default settings.
To create the back pleat, with right sides together at the center back, stitch down 5 inches from the top, secure, and select the long stitch in the Edit screen to sew the rest of the seam. Press the pleat in place and then remove the longer stitches. This creates a perfect pleat.
The Chair Seat Skirt
Mark the center fold on the center piece of the skirt (this will help when attaching the skirt)
Select a straight stitch and sew the center front to the two sides with a 3/8-inch seam allowance. Neaten the edges together with the overlocker/serger and press each seam towards the sides, and neaten the hem edge.
Create the pleats on each side of the skirt using the markings and baste them in place with a longer straight stitch, needle position 2.
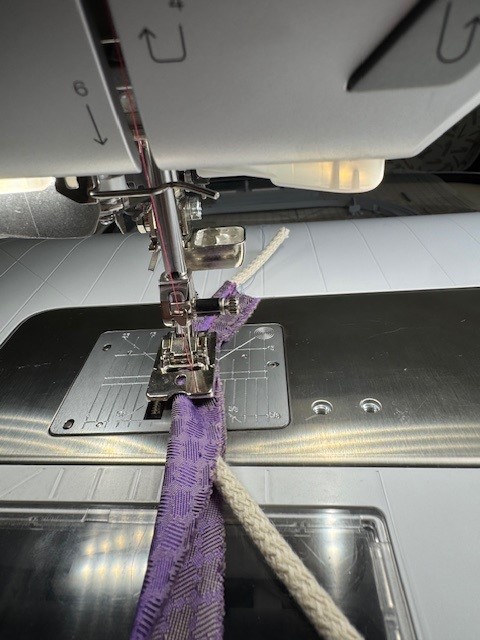
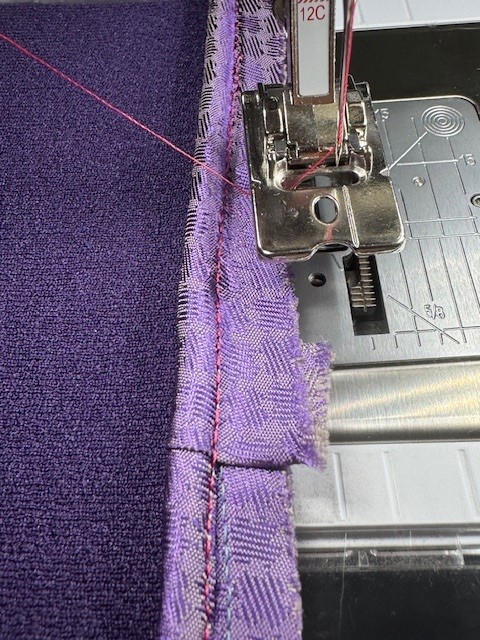
Piping
Create your 5 yards / 4.5 meters of Piping or open the packet and go to the instructions for attaching the piping to the front panel.
To Create Your Own Piping:
- Cut about 5 yards/4.5 meters of bias strips 1 1/8 inch (3cm) wide.
- Attach the straight stitch plate and Reverse Pattern Foot #1D
- Place two of your bias strips that are (cut at a 45° angle at each end) right sides together, line up with the outside edge of the foot. Sew and then continue to create a continuous strip.
- Attach the 9mm stitch plate and the Bulky Overlock Foot #12C
- Select Straight stitch, stitch length 3 and needle position -2.
- Wrap the strip firmly around the ½” inch Piping cord and stitch it in place.
Attach the Piping to the Front Panel
Tip – It is recommended to use a contrast thread in the bobbin and top thread matching bias fabric. The goal is to stitch inside this row of stitching, closer to the piping cord
Attach the Bulky Overlock Foot #12C and move the needle position 3 to the right – you might need to fine-tune as you don’t want to see the original stitching on the piping. If you can’t get close enough, then you could remove the original stitching before you move to the next stage. Start where the front back rest meets the seat.
Leaving 2 inches of piping at the start, with a 3/8-inch seam allowance, attach the piping right around the front panel piece.
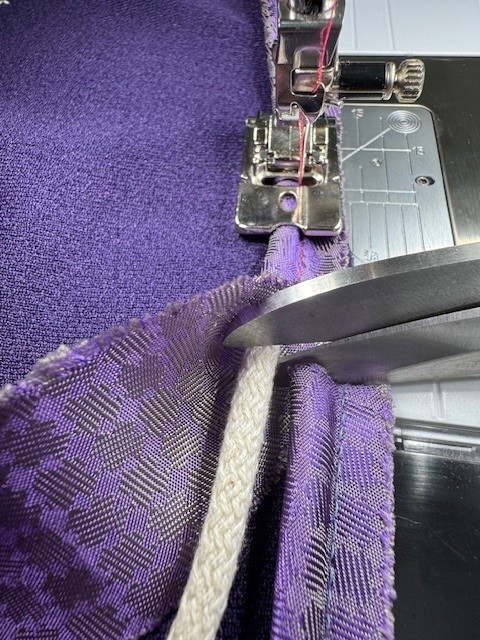
2 inches before reaching the start, stop, peel back the bias tape, and trim the piping cord so it’s flush with the starting cord.
Fold over the bias tape about an inch and wrap it tightly around the starting end.
The piping needs to be flat against the chair fabric. Continue stitching to finish.
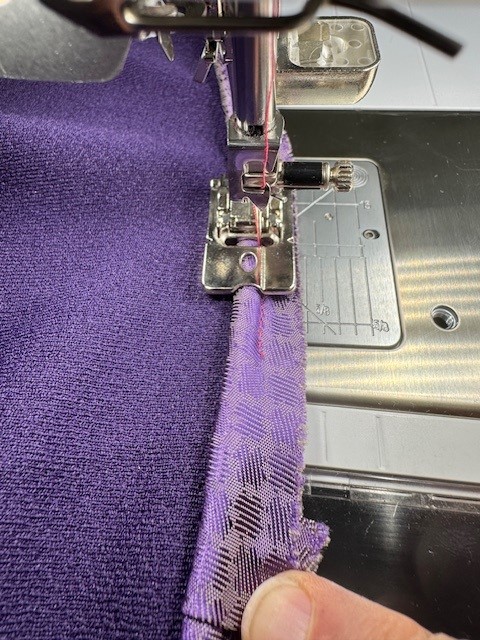
Sew the piping to one side of the top strip.
Center the strip and pin with the top center of the back panel.
With the top strip and piping on the upper side, start to sew from the center to the side. Aim to get as close as you can to the piping cord.
Stop 3/8” from the bottom.
Pin the other side so it is the same as the first and sew from the bottom upwards with the strip and piping on the top. Again, stitch as close to the piping as possible – inside the previous stitching, if possible, for a snugger piped finish.
Pin or clip the Top Strip to the front, matching the top center notch to the notch on the Strip. With the front piped piece on top, start in 3/8” and aim to stitch inside the previous row of stitching right around to 3/8” from the end of the Top Strip.
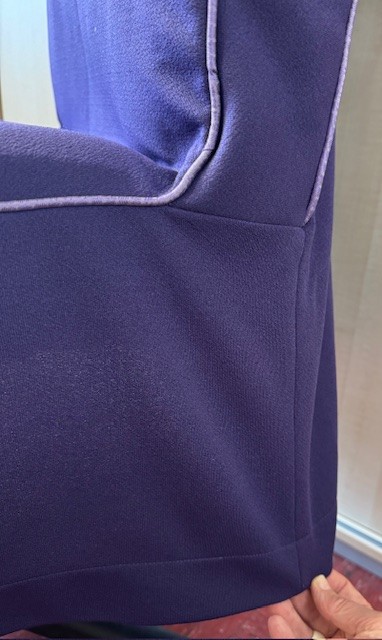
Attach the skirt to the back panel on each side. Start at the hem edge and sew up, stopping 3/8” from the end of the skirt – it should be on the same point as you finished attaching the Top strip.
Then pin the skirt to the front, match the center of the front to the center of the skirt, matching the pleats with corner notches. You will see the first part on each side is the bottom of the side piece and then the front continues.
Working with the piping on top and starting from the center attach the skirt. Stop when you reach the end of the top strip seam and secure and cut the thread.
Continue by sewing the top strip to the skirt and stop and secure when you reach the piped seam of the back.
Repeat on the other side in the same way.
Press up a 2-inch hem.
Attach Reverse sewing foot #1D, engage dual feed and select straight stitch and sew the hem.
Attach two ties (made from the 2 x 15-inch strips of fabric) on the inside of the cover where the seat meets the back rest, 2 inches (5cm) in from the edge. Put the cover on the chair and tie the ties together.
Enjoy your new chair cover.