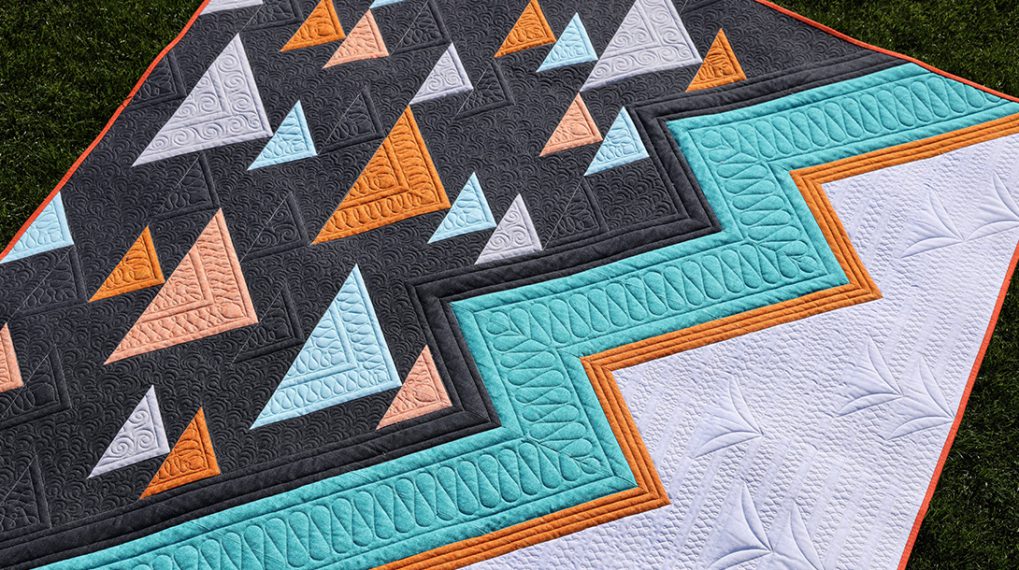
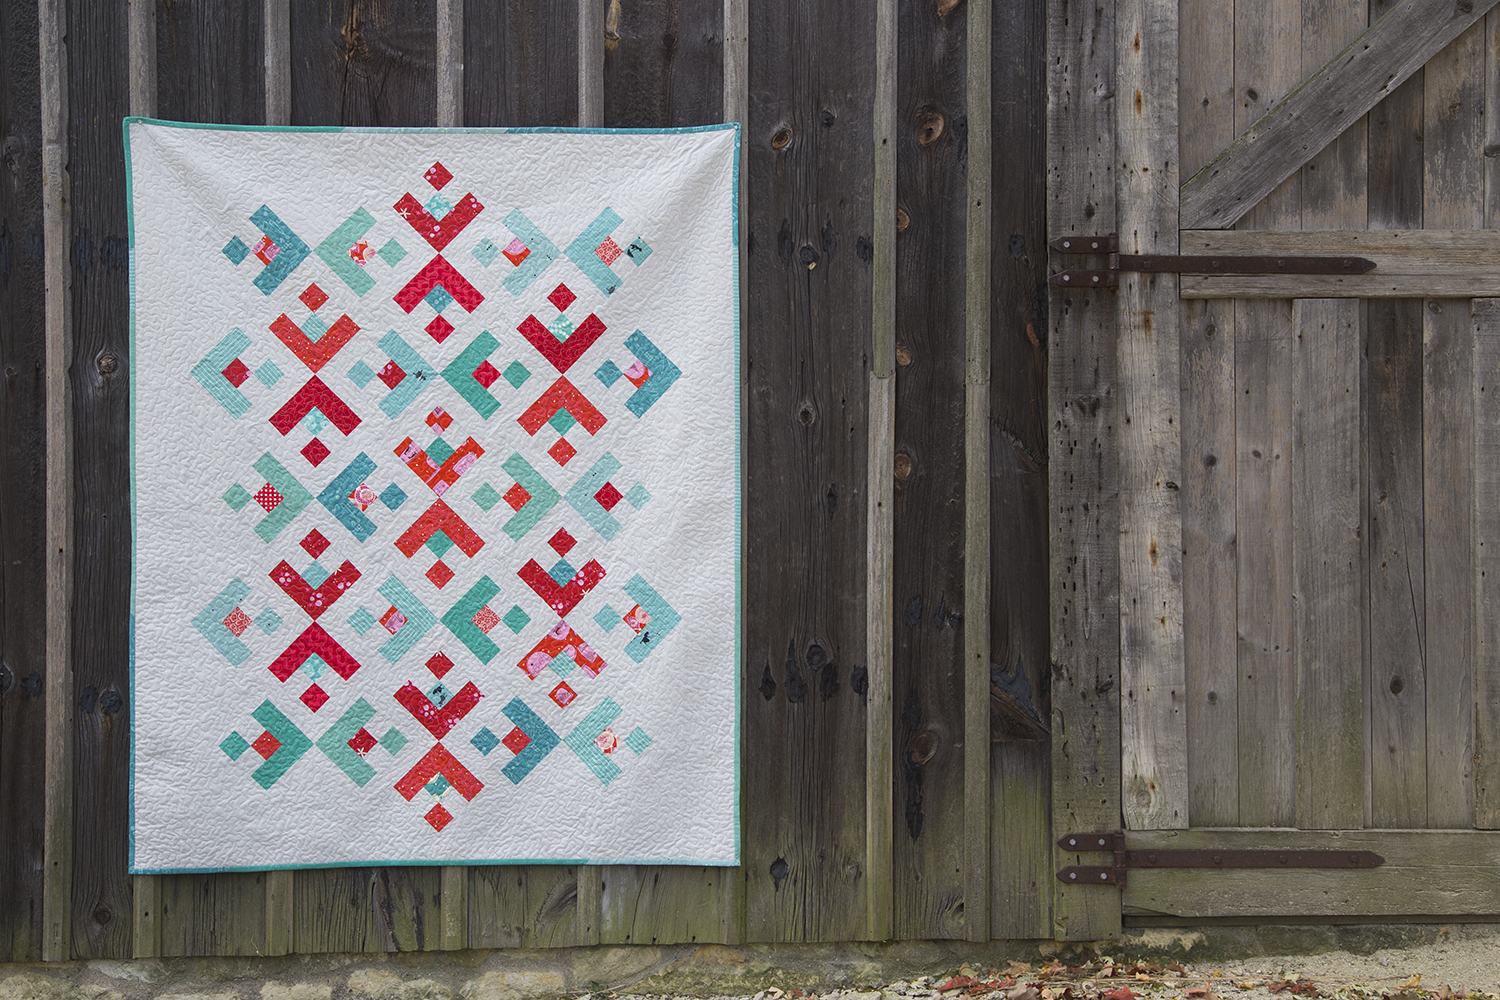
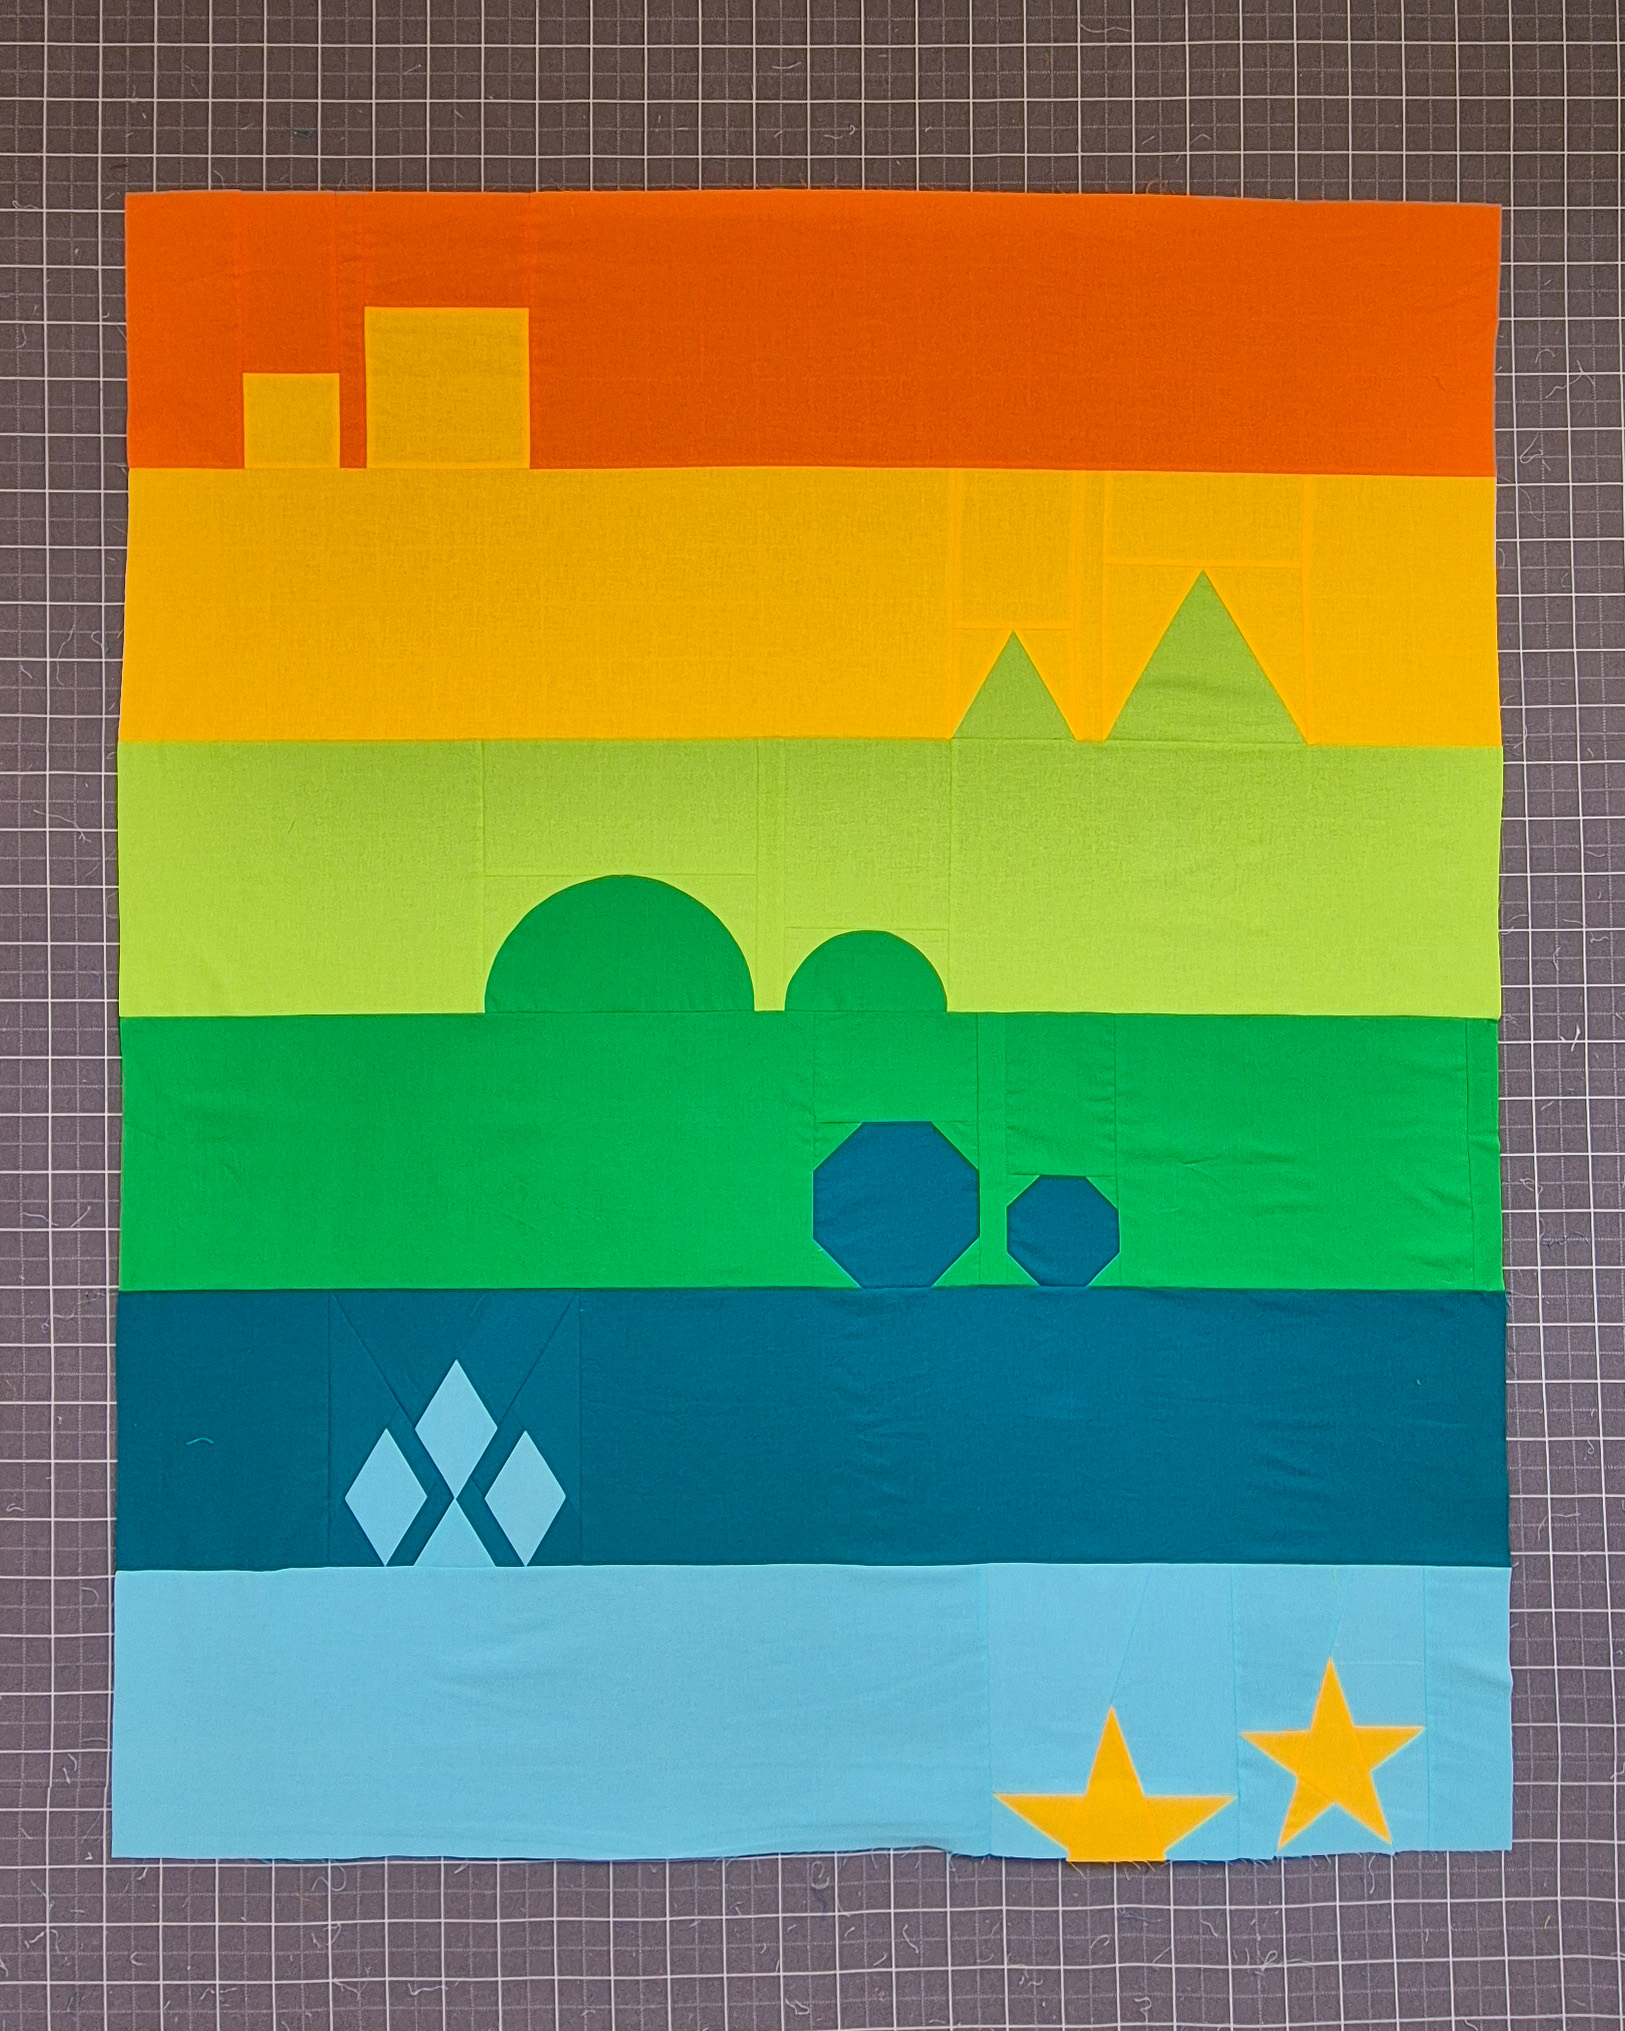
Q-matic Quilt Along, Part One: Sewing the Quilt Top
It’s time! We are going to start with the Q-Matic Quilt Along. Let’s sew the first rows of the quilt.
In our previous blog post, you can read all about the QAL. You will find the materials needed and the quilt along schedule.
Want to get notifications for every blog post that will be published on the QAL? Sign up over here!
Today we will sew the first three rows of our quilt.
General Instructions
Here are some instructions for sewing all of the rows of the Q-Matic Quilt Along quilt.
- Printing: Make sure to print the patterns at 100%, or ‘no scaling’. Always check the 1-inch box to see if your printer did a good job.
- Measurements: All measurements mentioned in the pattern already include 1/4 inch seam allowance, unless stated otherwise.
- Seam allowance: Use a 1/4 inch foot on your machine to sew everything together with 1/4 inch seam allowance
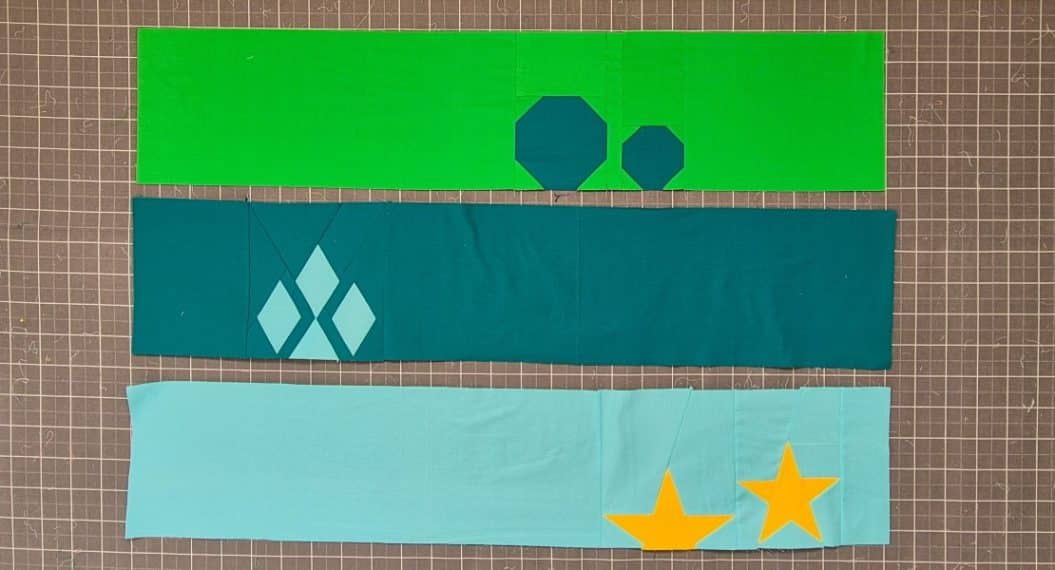
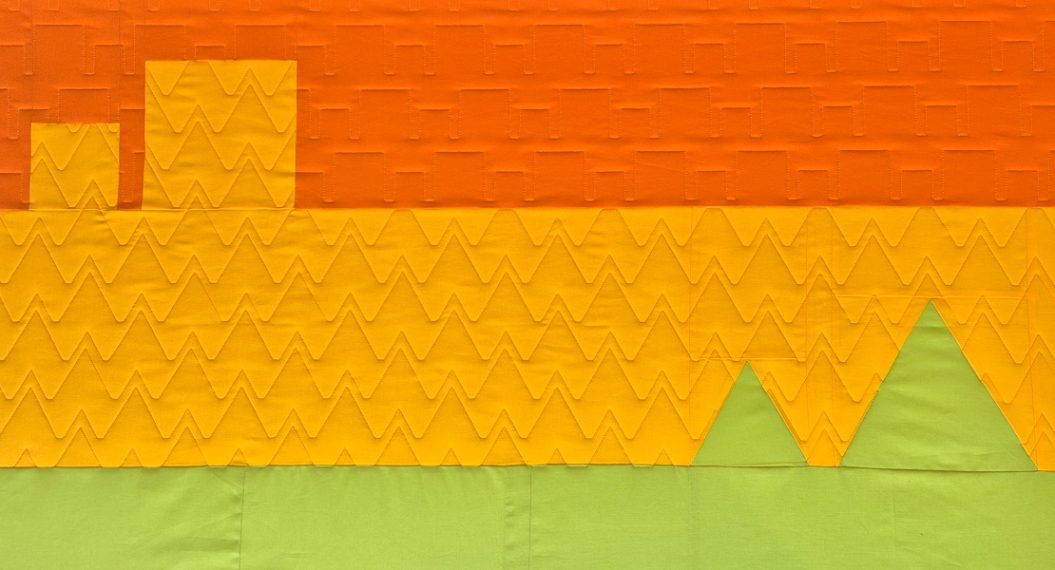
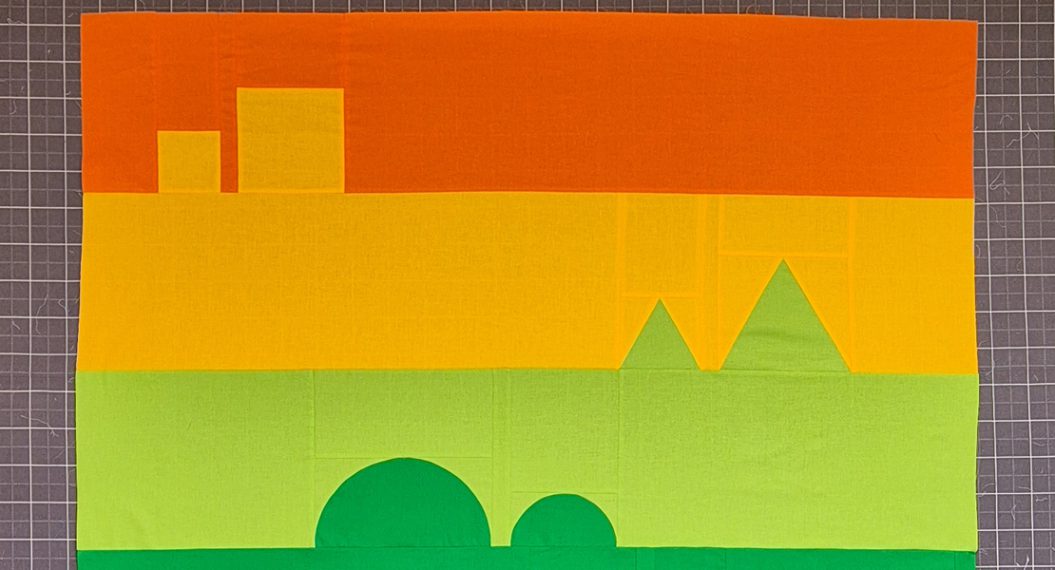
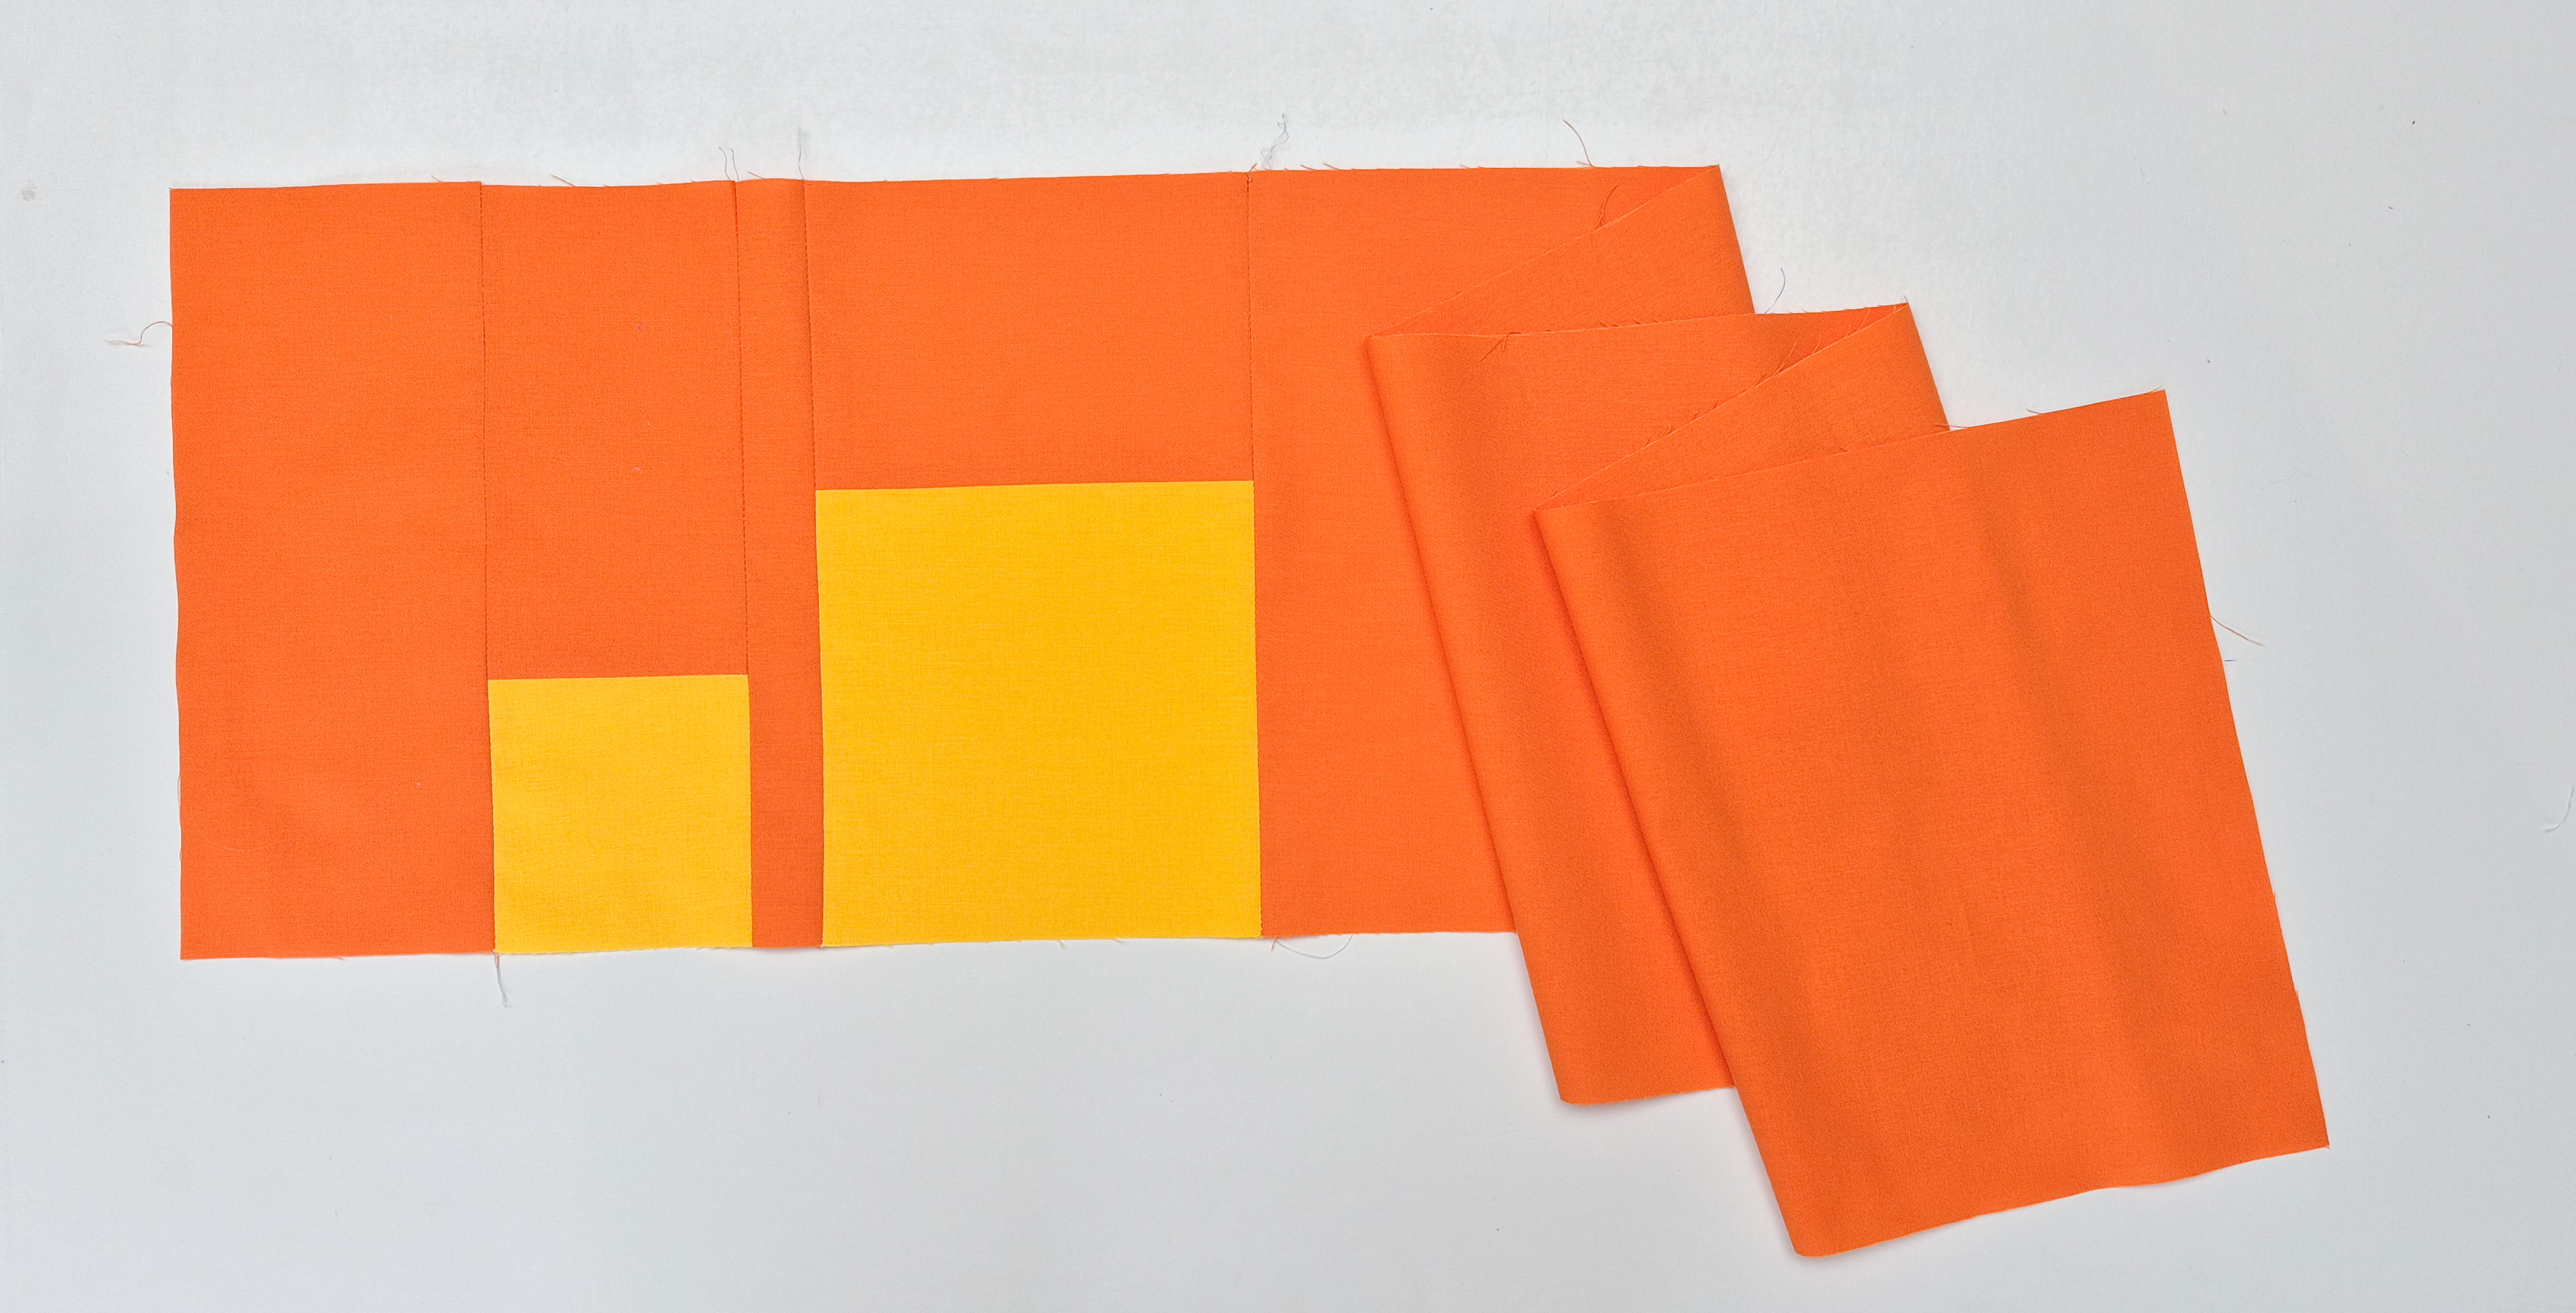
Row 1: Squares
The first row is sewn with regular piecing. Use an inch ruler and a rotary cutter to precisely cut all the pieces from our first fabric. The first row is made with Kona Kumquat and Kona Sunny. You can find a kit for the Quilt Along in my webshop.
Cutting
The following measurements, and all the measurements of other patterns in this quilt along, already include a 1/4 inch seam allowance.
Cut the following from Kona Kumquat
- A: 36 x 10 1/2″
- B: 4 1/2 x 10 1/2″
- C: 1 1/2 x 10 1/2″
- D: 6 1/2 x 4 1/2″
- E: 4 x 7″
Cut the following from Kona Sunny
- F: 4 x 4″
- G: 6 1/2 x 6 1/2″
Piecing
We sew everything together with 1/4 inch seam allowance.
First sew piece E to F and piece D to G

Now you can sew all the elements of the row together from left to right.

The size of the row should be 50 1/2 x 10 1/2 inch.

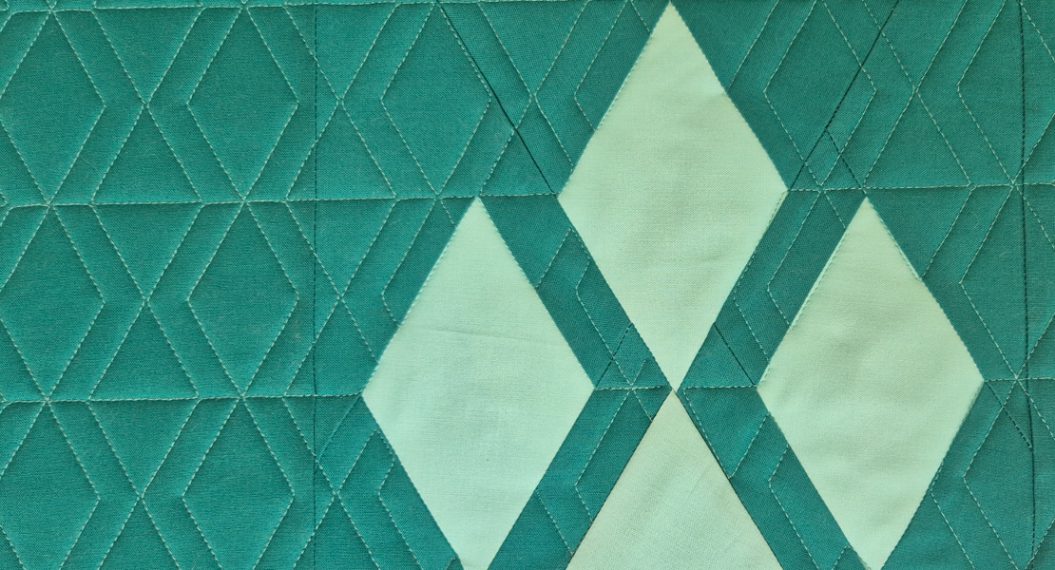
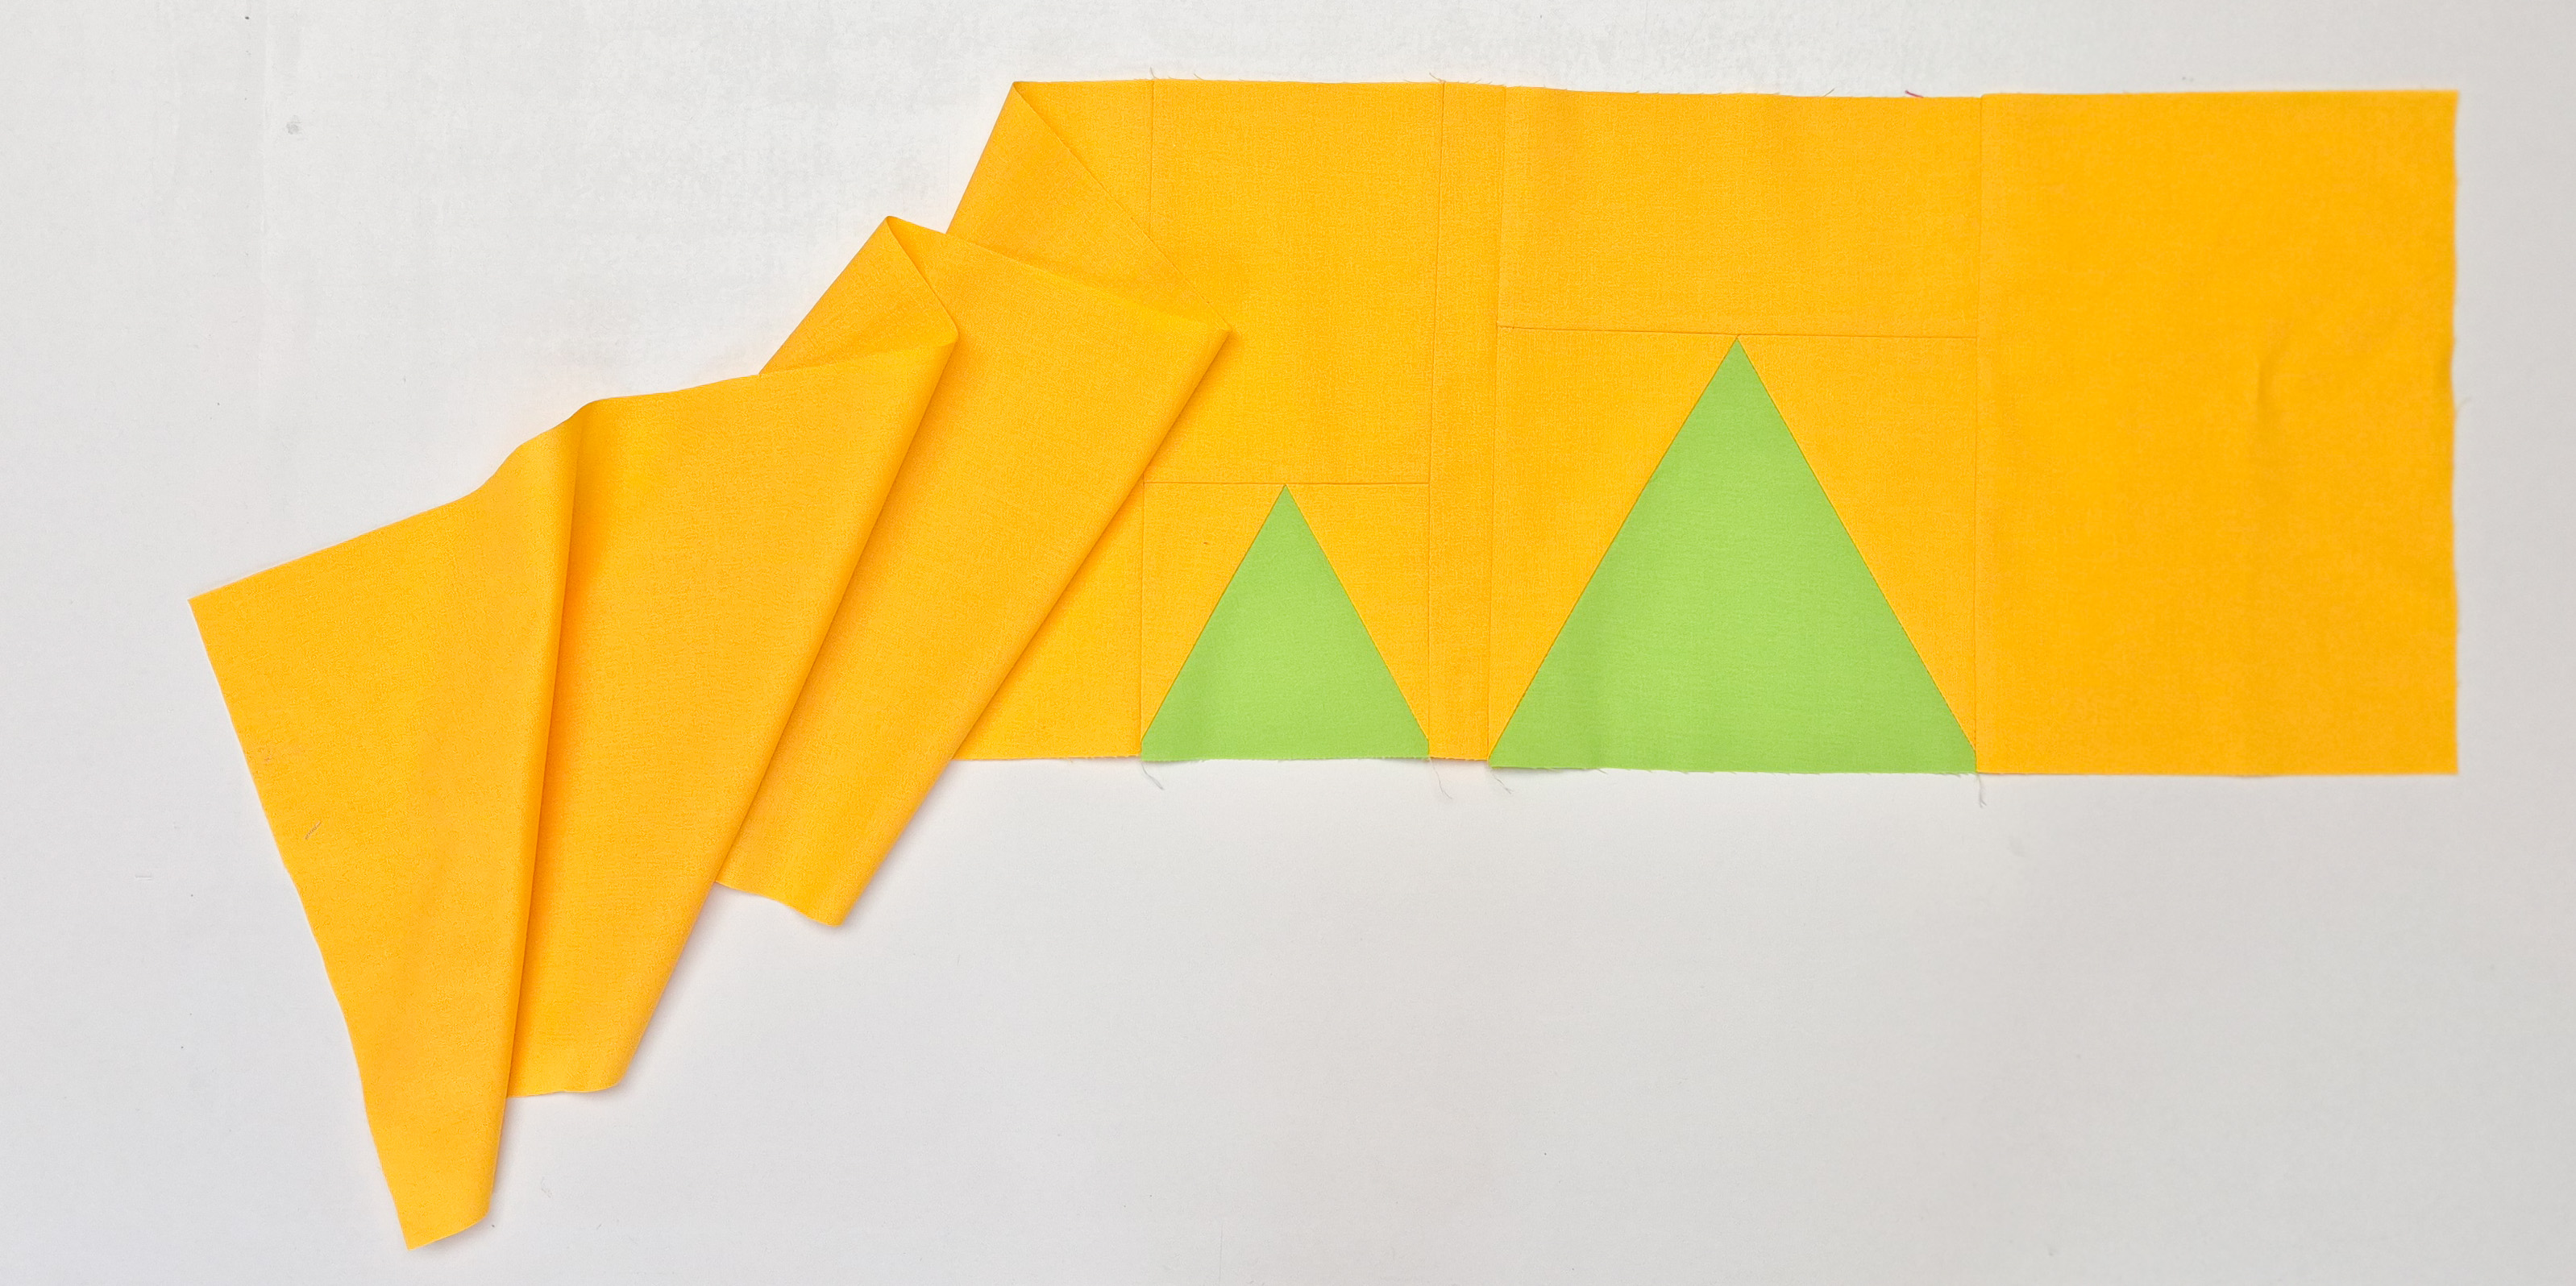
Row 2: Triangles
Let’s move on to row 2. This row is made with two triangles. You can download the PDF for the Foundation Paper Piecing pattern. There are also measurements on the FPP pattern if you prefer regular piecing.
In this blog post, you can find a photo and video tutorial of the FPP technique.

Cutting
Cut the following from Kona Sunny:
- A: 30 1/2 x 10 1/2″
- B: 7 1/2 x 10 1/2″
- C: 1 1/2 x 10 1/2″
- D: 5 x 6 1/2″
- E: 8 x 4″
- 2 x SMALL triangle B (see PDF pattern)
- 2 x BIG triangle D (see PDF pattern)
Cut the following from Kona Chartreuse:
- 1 x SMALL triangle A (see PDF pattern)
- 1 x BIG triangle C (see PDF pattern)
Piecing
Start by piecing the big and the small triangle blocks from the PDF pattern. The block with the small triangle should measure 5 x 4 1/2 inch. The block with the big triangle should measure 8 x 7 inch.
Now sew everything together with 1/4 inch seam allowance.
First sew D to the small triangle and E to the big triangle

Now you can sew all the elements of the row together from left to right.

The size of the finished row should be 50 1/2 x 10 1/2 inch.

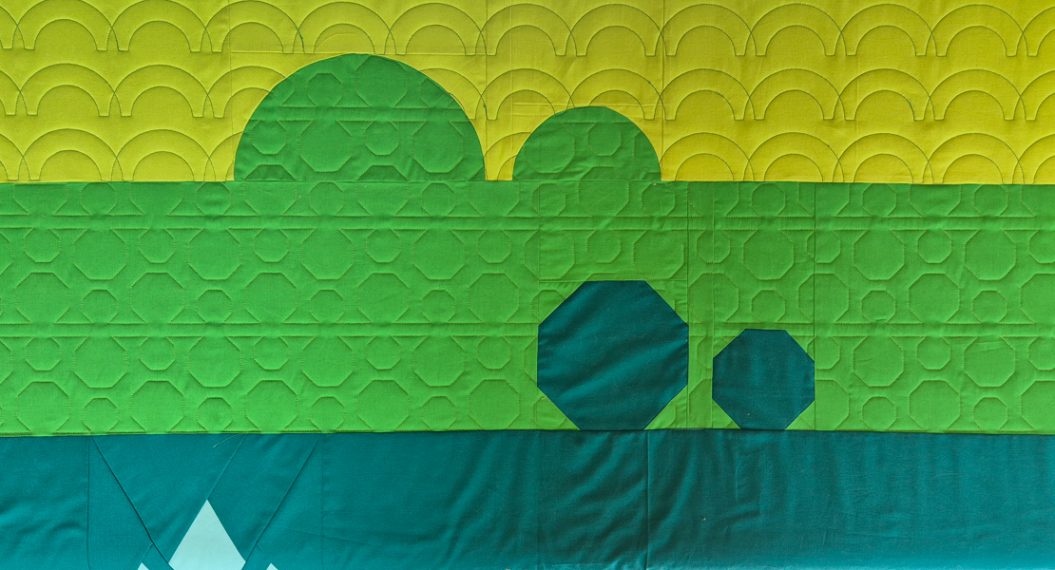
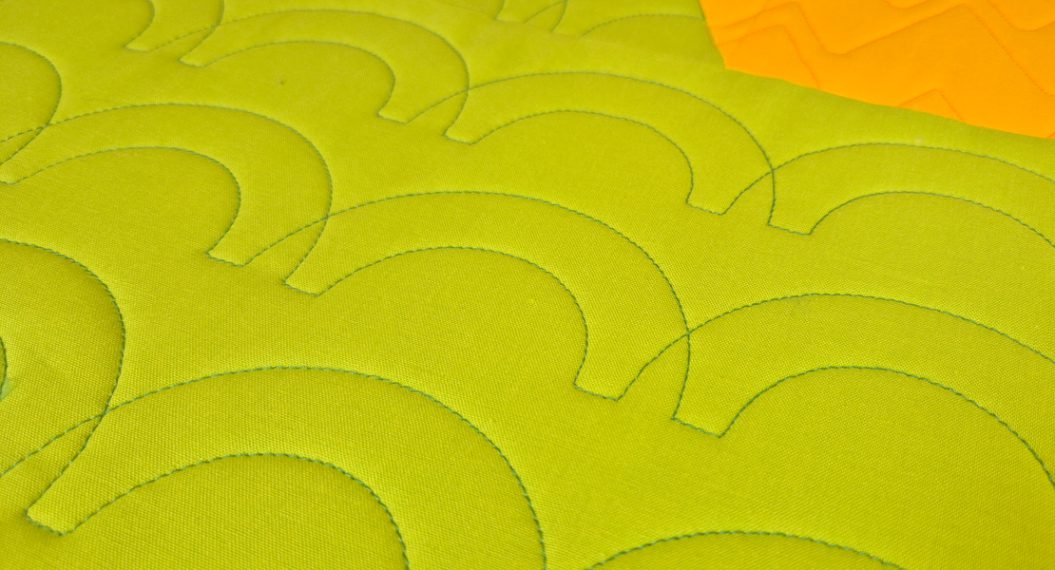
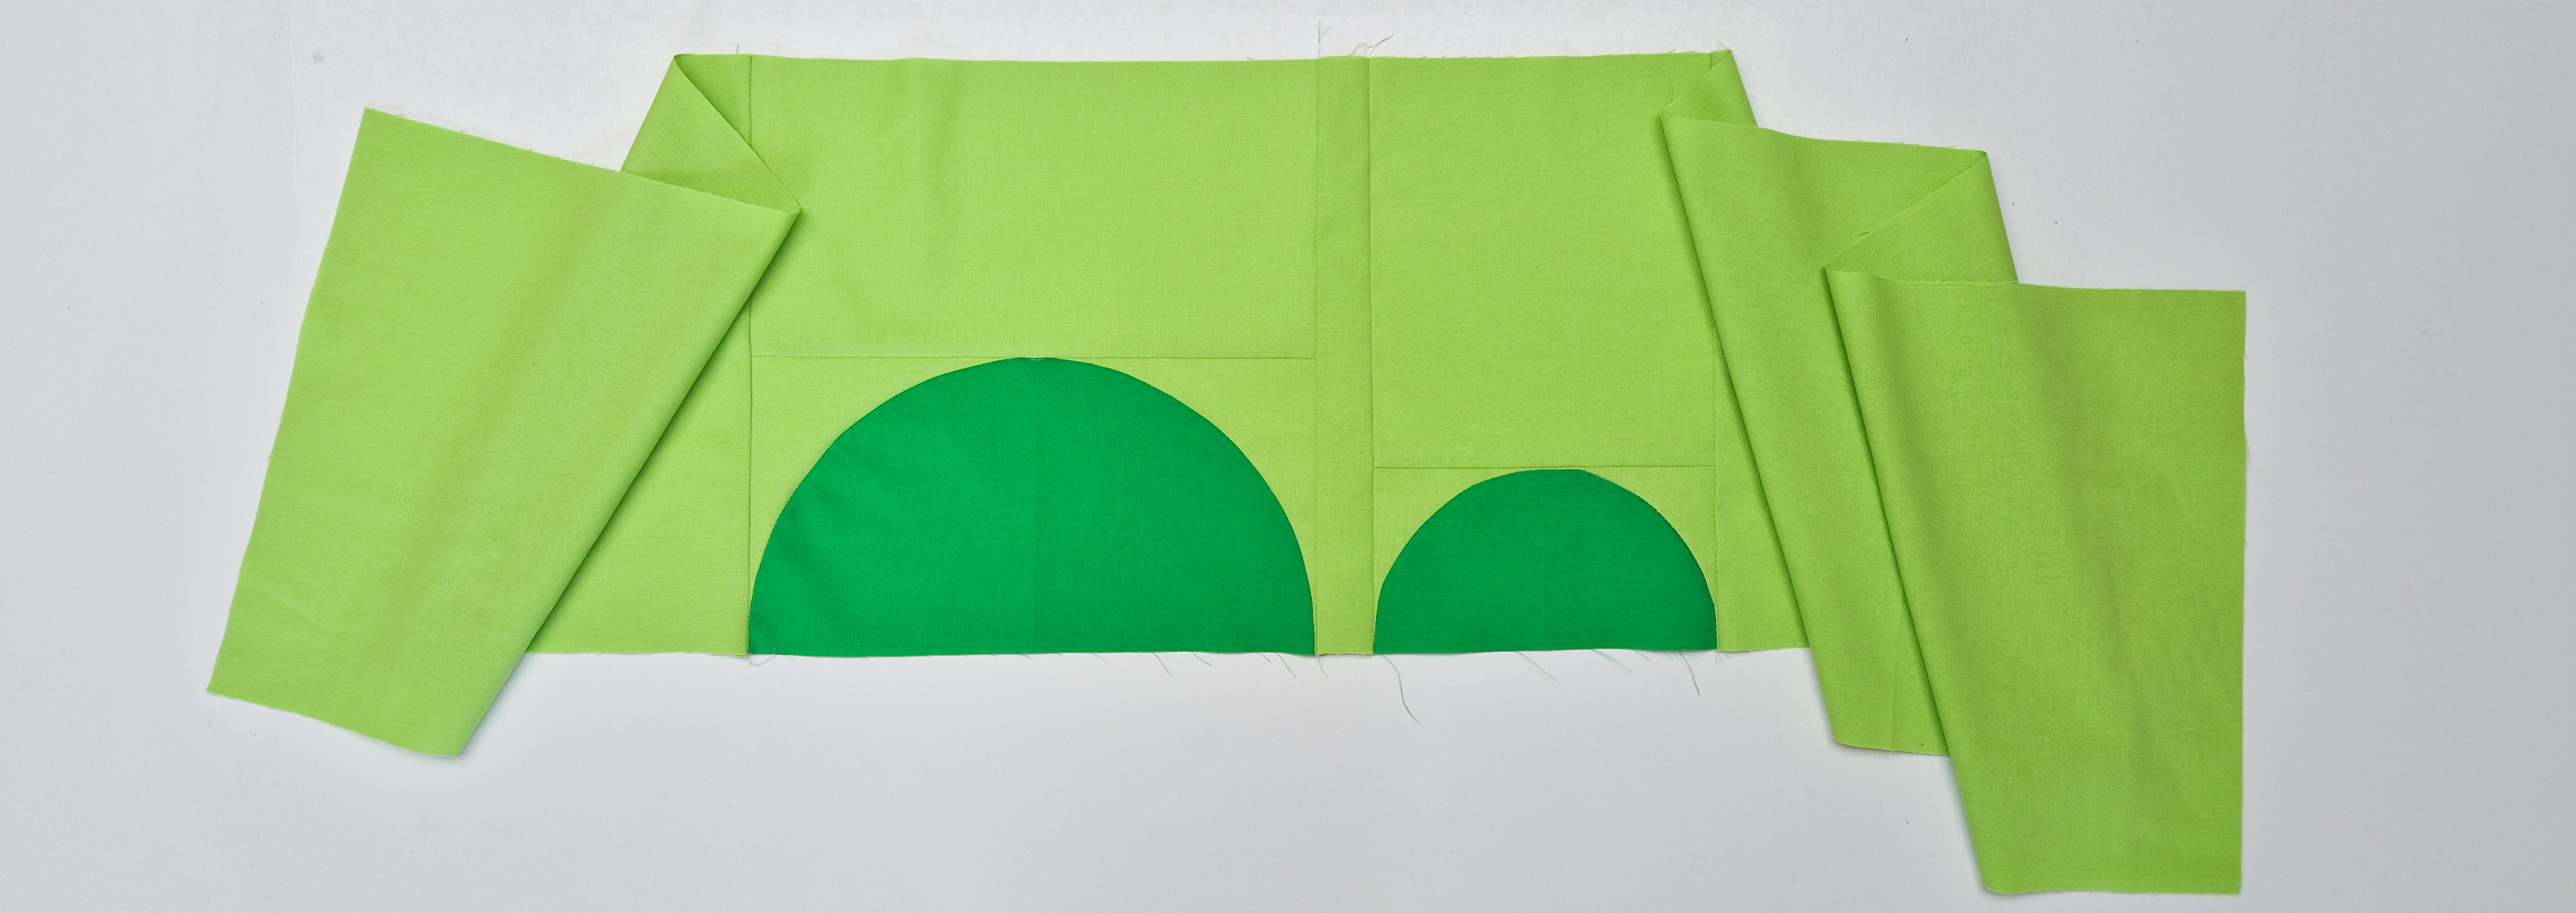
Row 3: Quarter Circles
The last row for today will be the half-circle row. We will make the half circles using quarter circle blocks.
Cutting
Cut the following from Kona Chartreuse:
- A: 13 1/2 x 10 1/2″
- B: 201/2 x 10 1/2″
- C: 1 1/2 x 10 1/2″
- D: 10 1/2 x 5 1/2″
- E: 6 1/2 x 7 1/2″
- 2 x BIG template B Concave
- 2 x SMALL template D Concave
Cut the following from Kona Kiwi:
- 2 x BIG template A Convex
- 2 x SMALL template C Convex
Piecing
Start by piecing the quarter circle blocks. Use the templates in the PDF pattern to cut your fabrics.
In a previous BERNINA Quilt Along, I created a photo tutorial on sewing quarter circle blocks. That blog post also includes a video tutorial.
The templates from our PDF pattern will give you slightly oversized quarter circles block so you can trim them to the correct size after sewing.
Cut the smaller quarter circle to 3 1/2 x 3 1/2 inch. Cut the bigger quarter circles to 5 1/2 x 5 1/2 inch. (These measurements include seam allowance)
Now sew the two quarter circles into half circles.

Sew D to the big half circle and E to the small half circle.

Now you can sew all the elements of the row together from left to right.

The size of the row should be 50 1/2 x 10 1/2 inch.

See You In Two Weeks!
Our next blog post with the patterns for row 4, 5, and 6 will be posted on August 18.
If you have any questions about the Q-Matic Quilt Along or the patterns that we are making today, just leave a message in the comments below.
Bye!
Irene