Beginner CutWork & Appliqué on the BERNINA 990, Part One
Love the look of appliqué but find it tedious to hand cut all the shapes you need? On BERNINA machines, we can use specialty tools in embroidery to make this process extremely easy, from cutting out the shapes to stitching them all in the embroidery hoop.
I have divided this tutorial into two parts—first, I will take you through the process to cut out our appliqué shapes using the BERNINA CutWork tool. In part two, we will appliqué those shapes in-the-hoop.
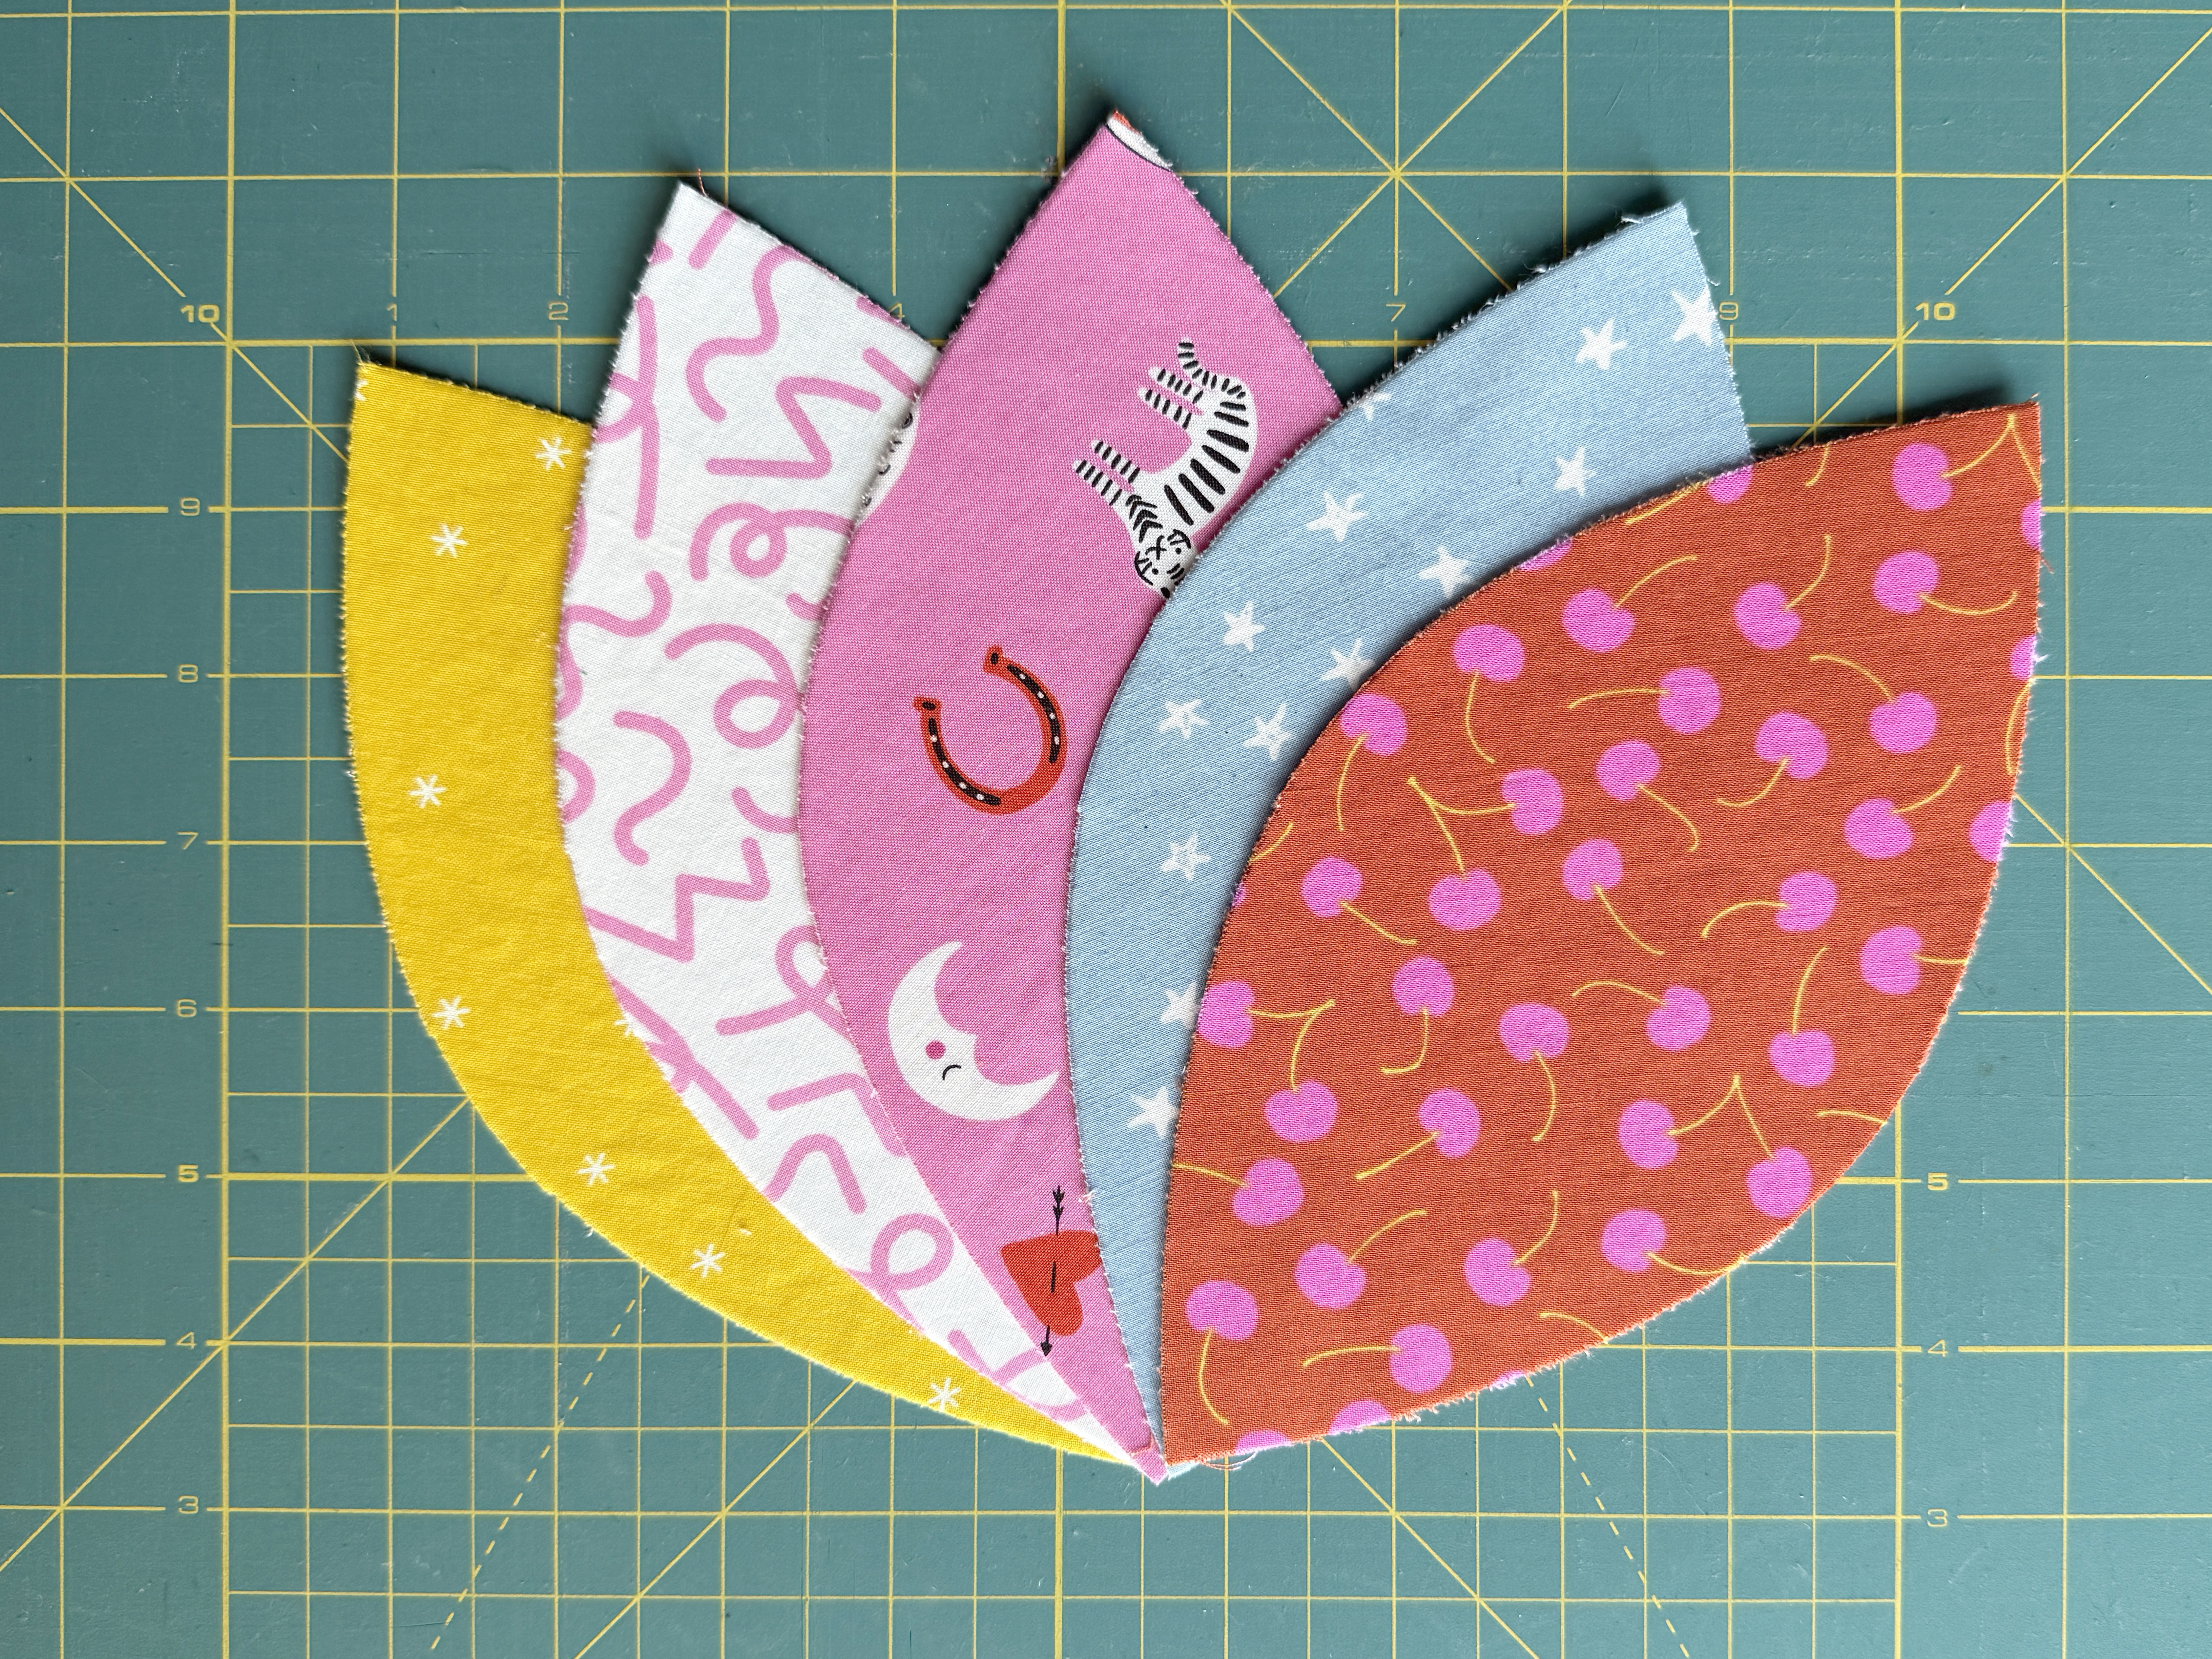
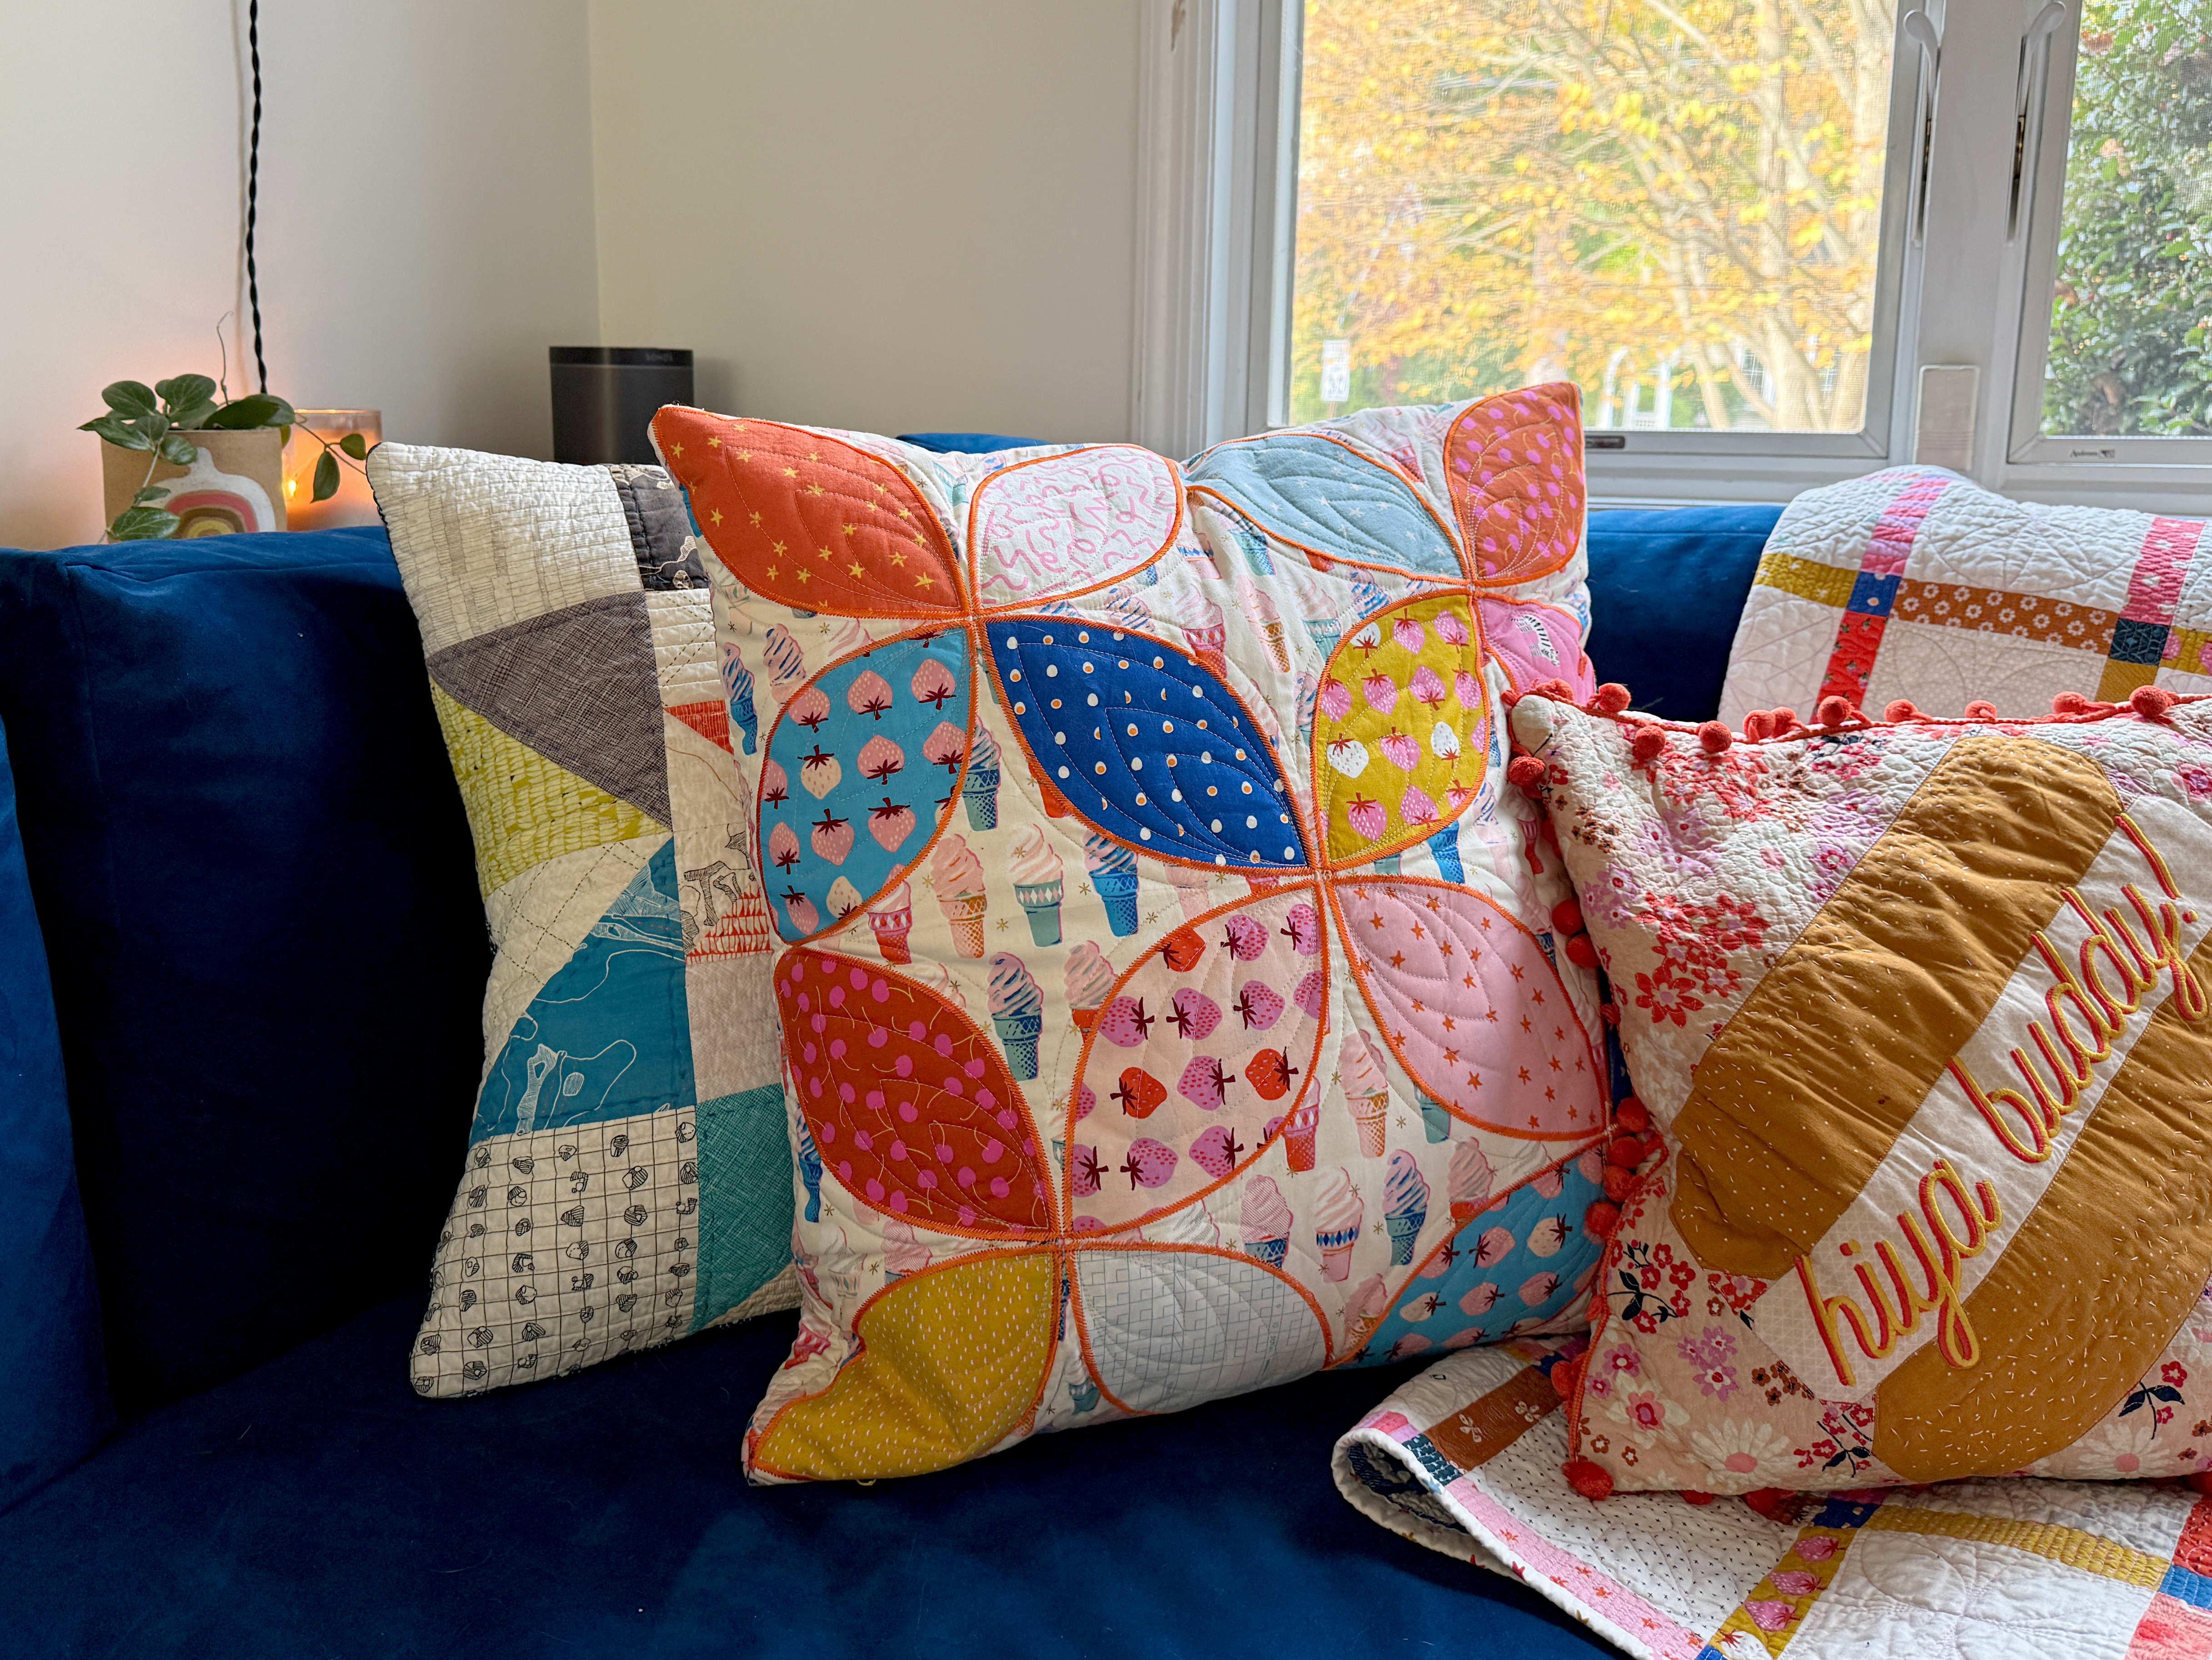
The result will be a cute, generous 24” square throw pillow to show off your new appliqué skills!
Supplies
- (16) 7” squares of quilting cotton fabric
- (16) 7” squares of fusible web (such as OESD SoftWeb or Appliqué Fuse & Fix)
- (4) 15” x 15” pieces OESD Ultra Clean & Tear stabilizer
- 40 weight embroidery thread, such as Isacord
- 75/11 embroidery needle
- OESD Bobbin Thread
- BERNINA CutWork tool
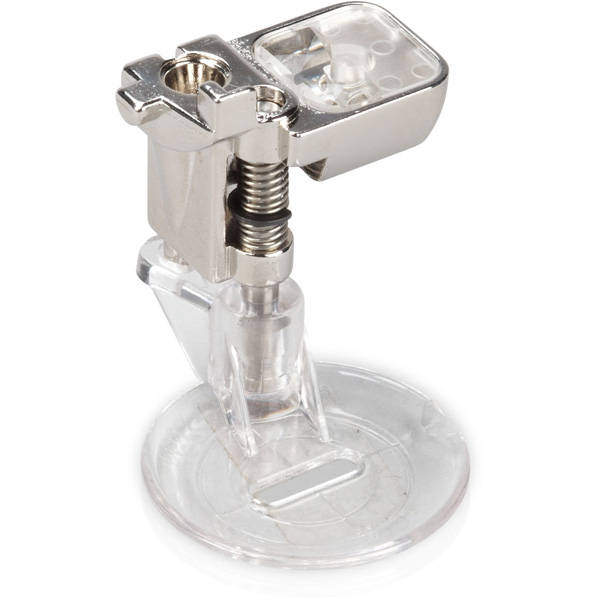
- Echo Quilting and CutWork Foot #44C
- Straight Stitch Plate with Sensor
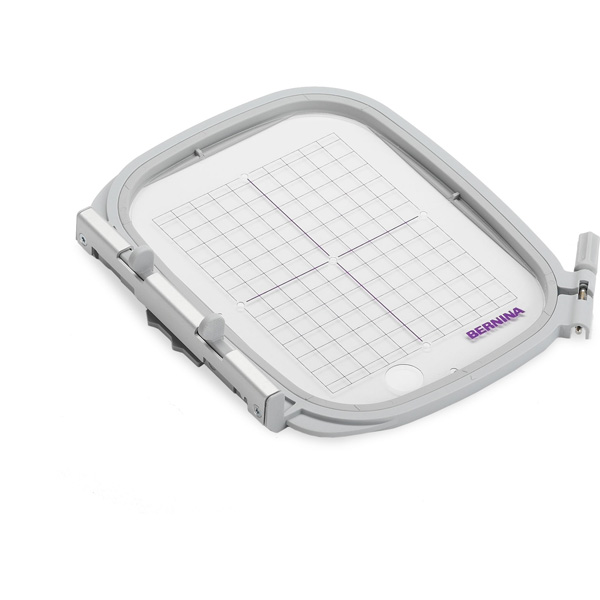
- Medium Clamp Hoop
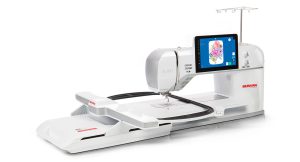
- BERNINA 990
- Embroidery Module XL with Smart Drive Technology
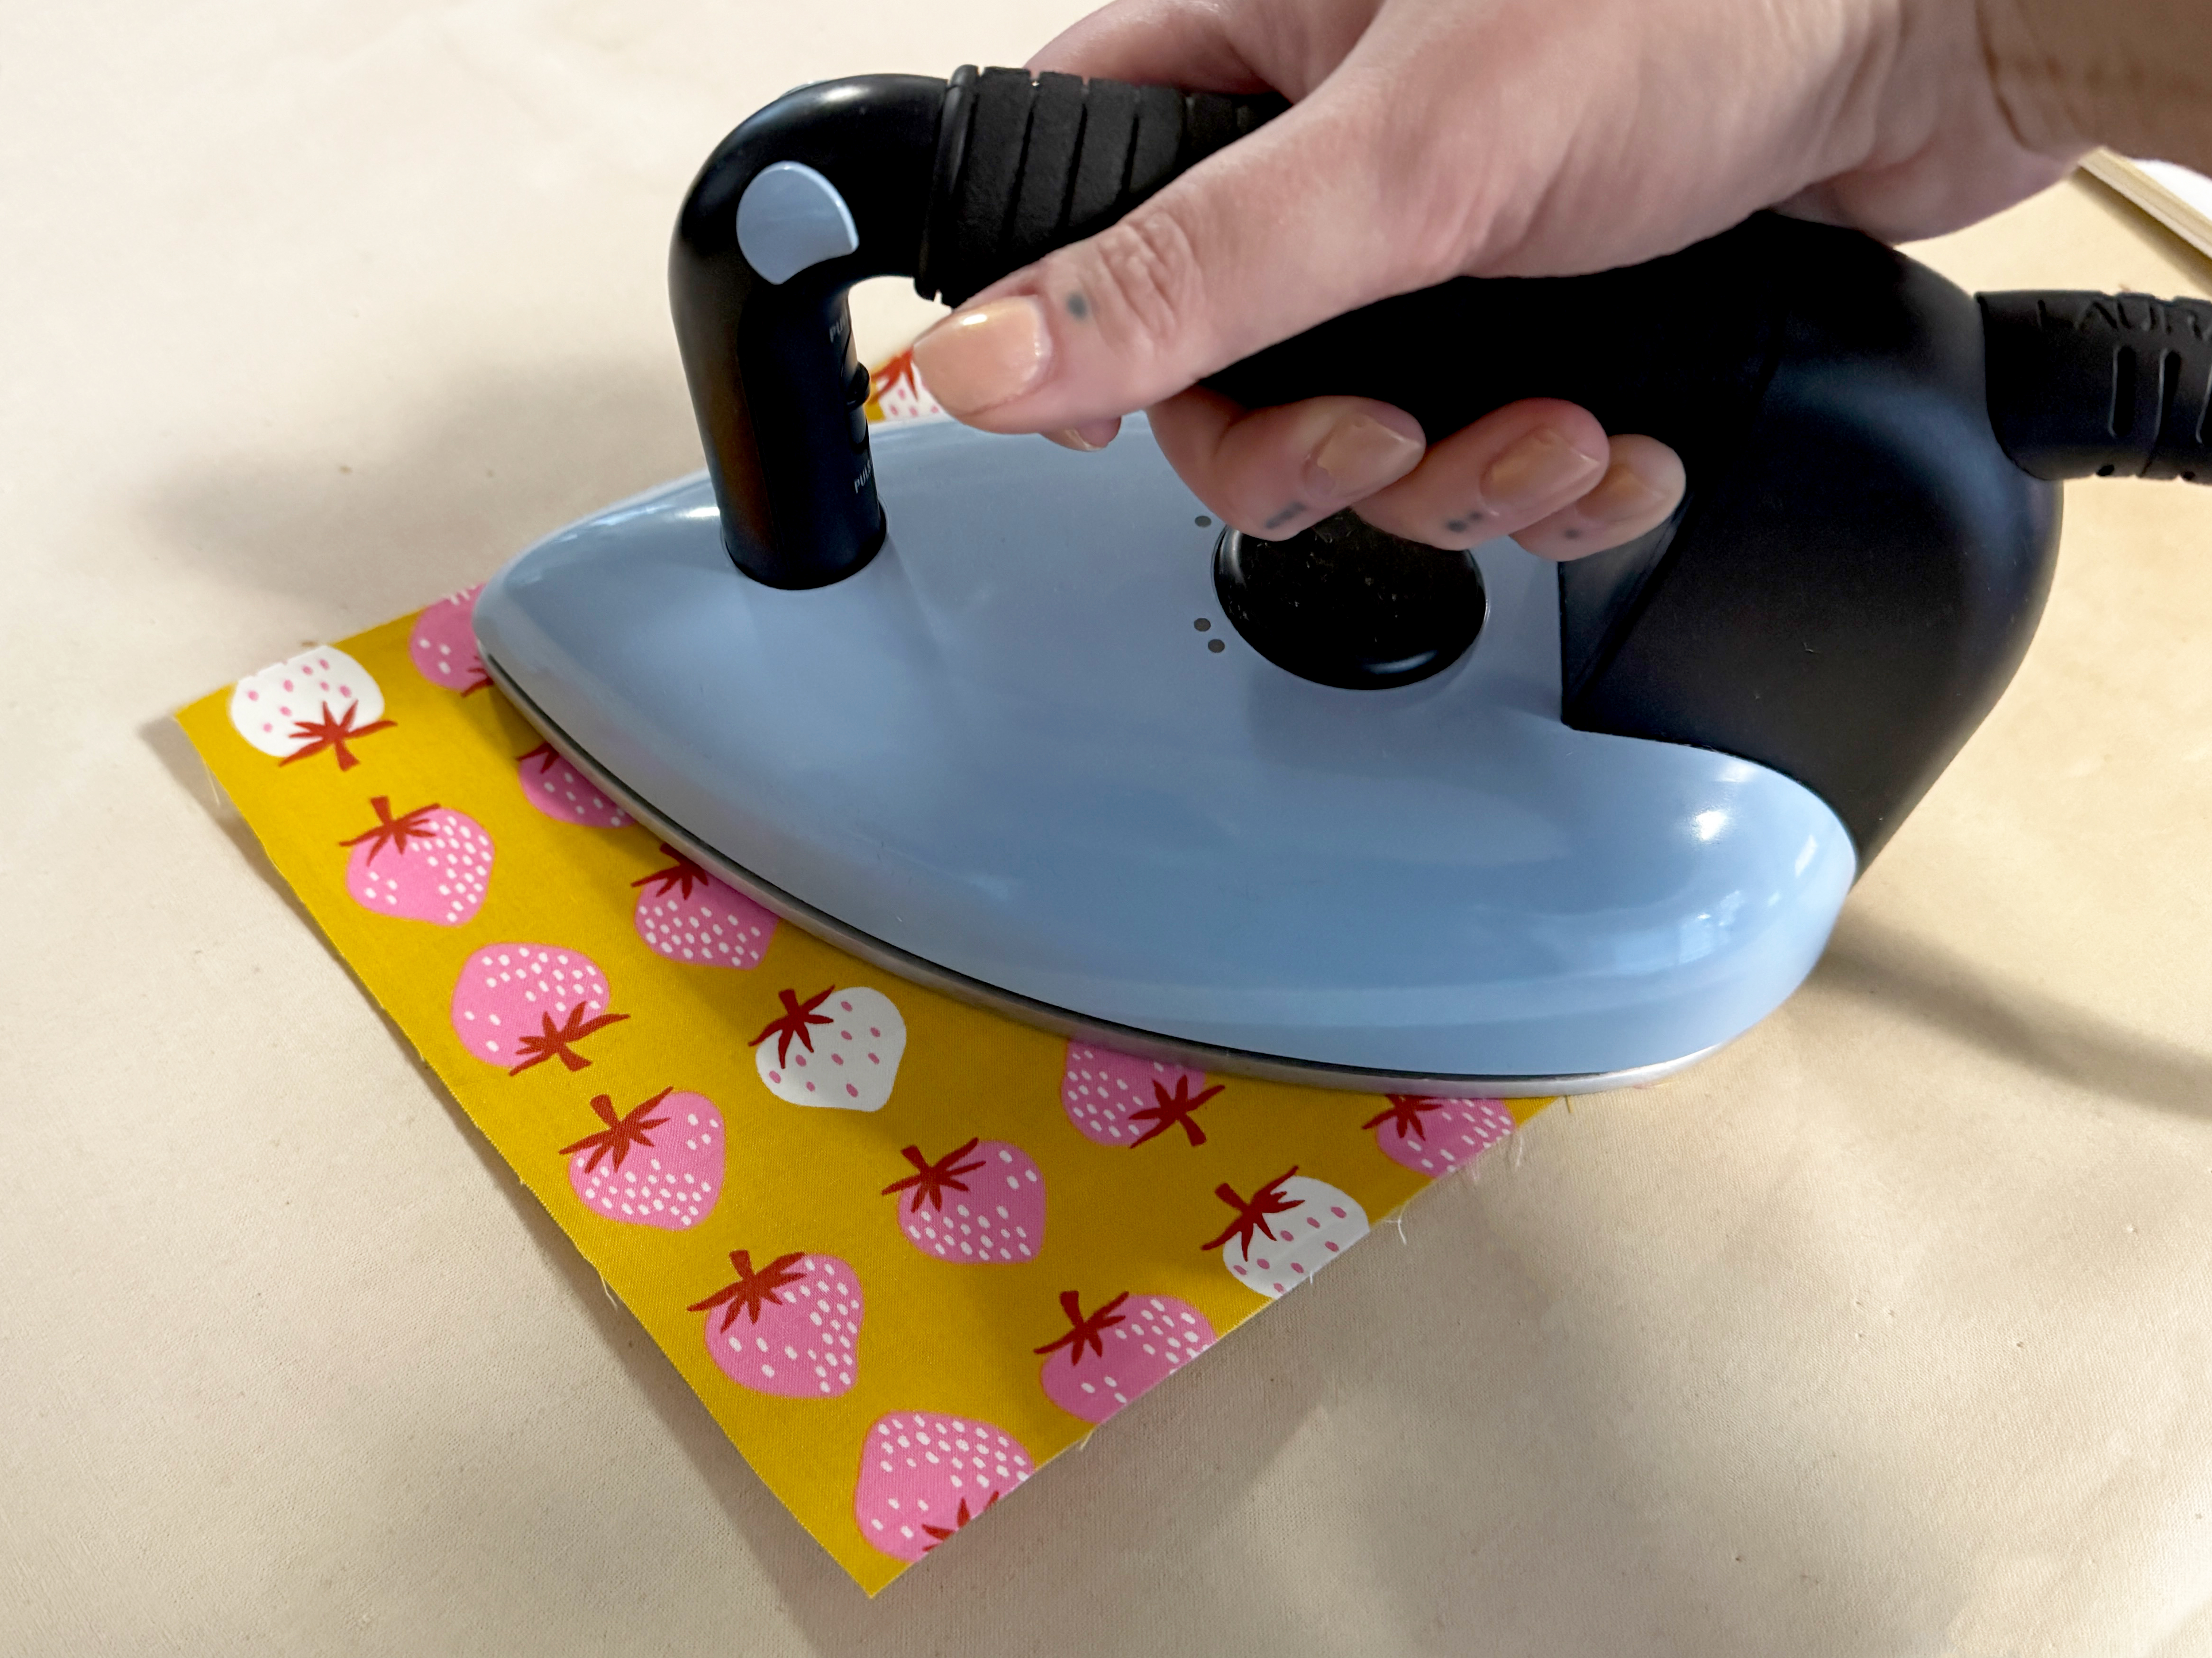
Step 1: Add Fusible Web to Appliqué Fabrics
After cutting squares of fabric for your appliqué, prepare them with fusible. Fuse the web to the wrong side of the fabric squares and allow to fully cool and set. Do not remove the paper backing.
A Note About Fusible Web
This product gets fused to the wrong side of the fabric, then a paper backing is removed before appliquéing, and then fused once more to bond the two layers of fabric together. OESD makes two great fusible web products and both work well for this kind of project. But there are a few differences you might want to be aware of!
Appliqué Fuse & Fix is a very easy and beginner-friendly product to work with. After being fused to the fabric, and the paper backing is removed, your appliqué will have a sticky backing, making it very easy to position and hold its place while you stitch down. It’s easily repositionable until ultimately fused in place onto the background fabric in your final project. The only drawback to this product is that it can feel a bit bulky or stiff. This is the fusible web I prefer for projects like throw pillows or wall hangings.
Soft Web does not have this sticky backing. After fusing to your appliqué, you have to be a bit more careful to make sure it’s held in place during the appliqué stitching process so that it doesn’t shift. The benefit of this product is that it is, as the name implies, very soft, lightweight, and has more flex or drape. This is my preferred fusible for garments or quilts that I want extra soft and snuggly.
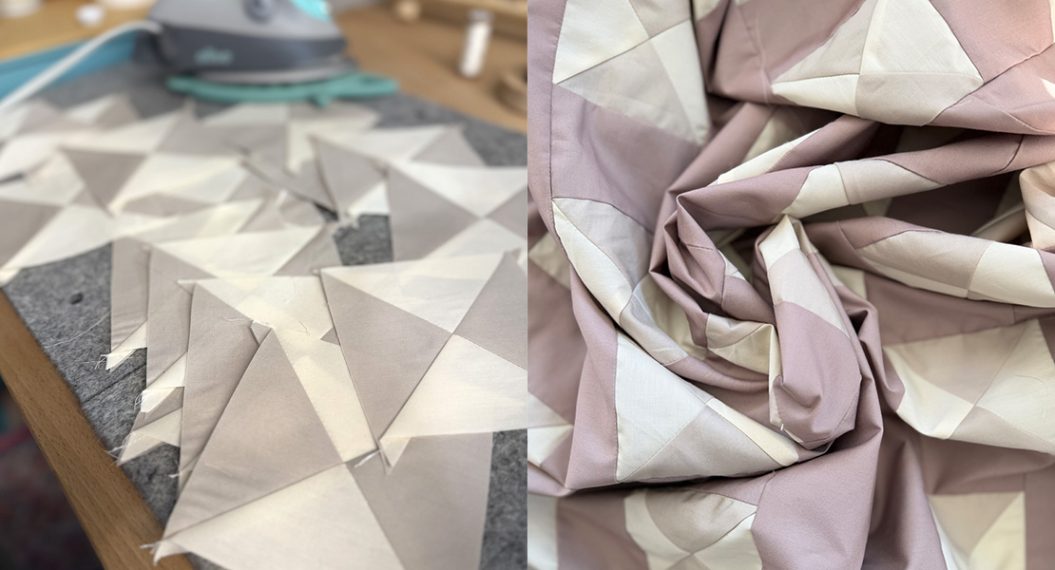
Step 2: Hoop for CutWork
It is always important in embroidery to use the smallest compatible hoop for your chosen design. For the orange peel shapes in this project, we will use the Medium Clamp Hoop. Cut your stabilizer to 15” squares to fit this hoop.
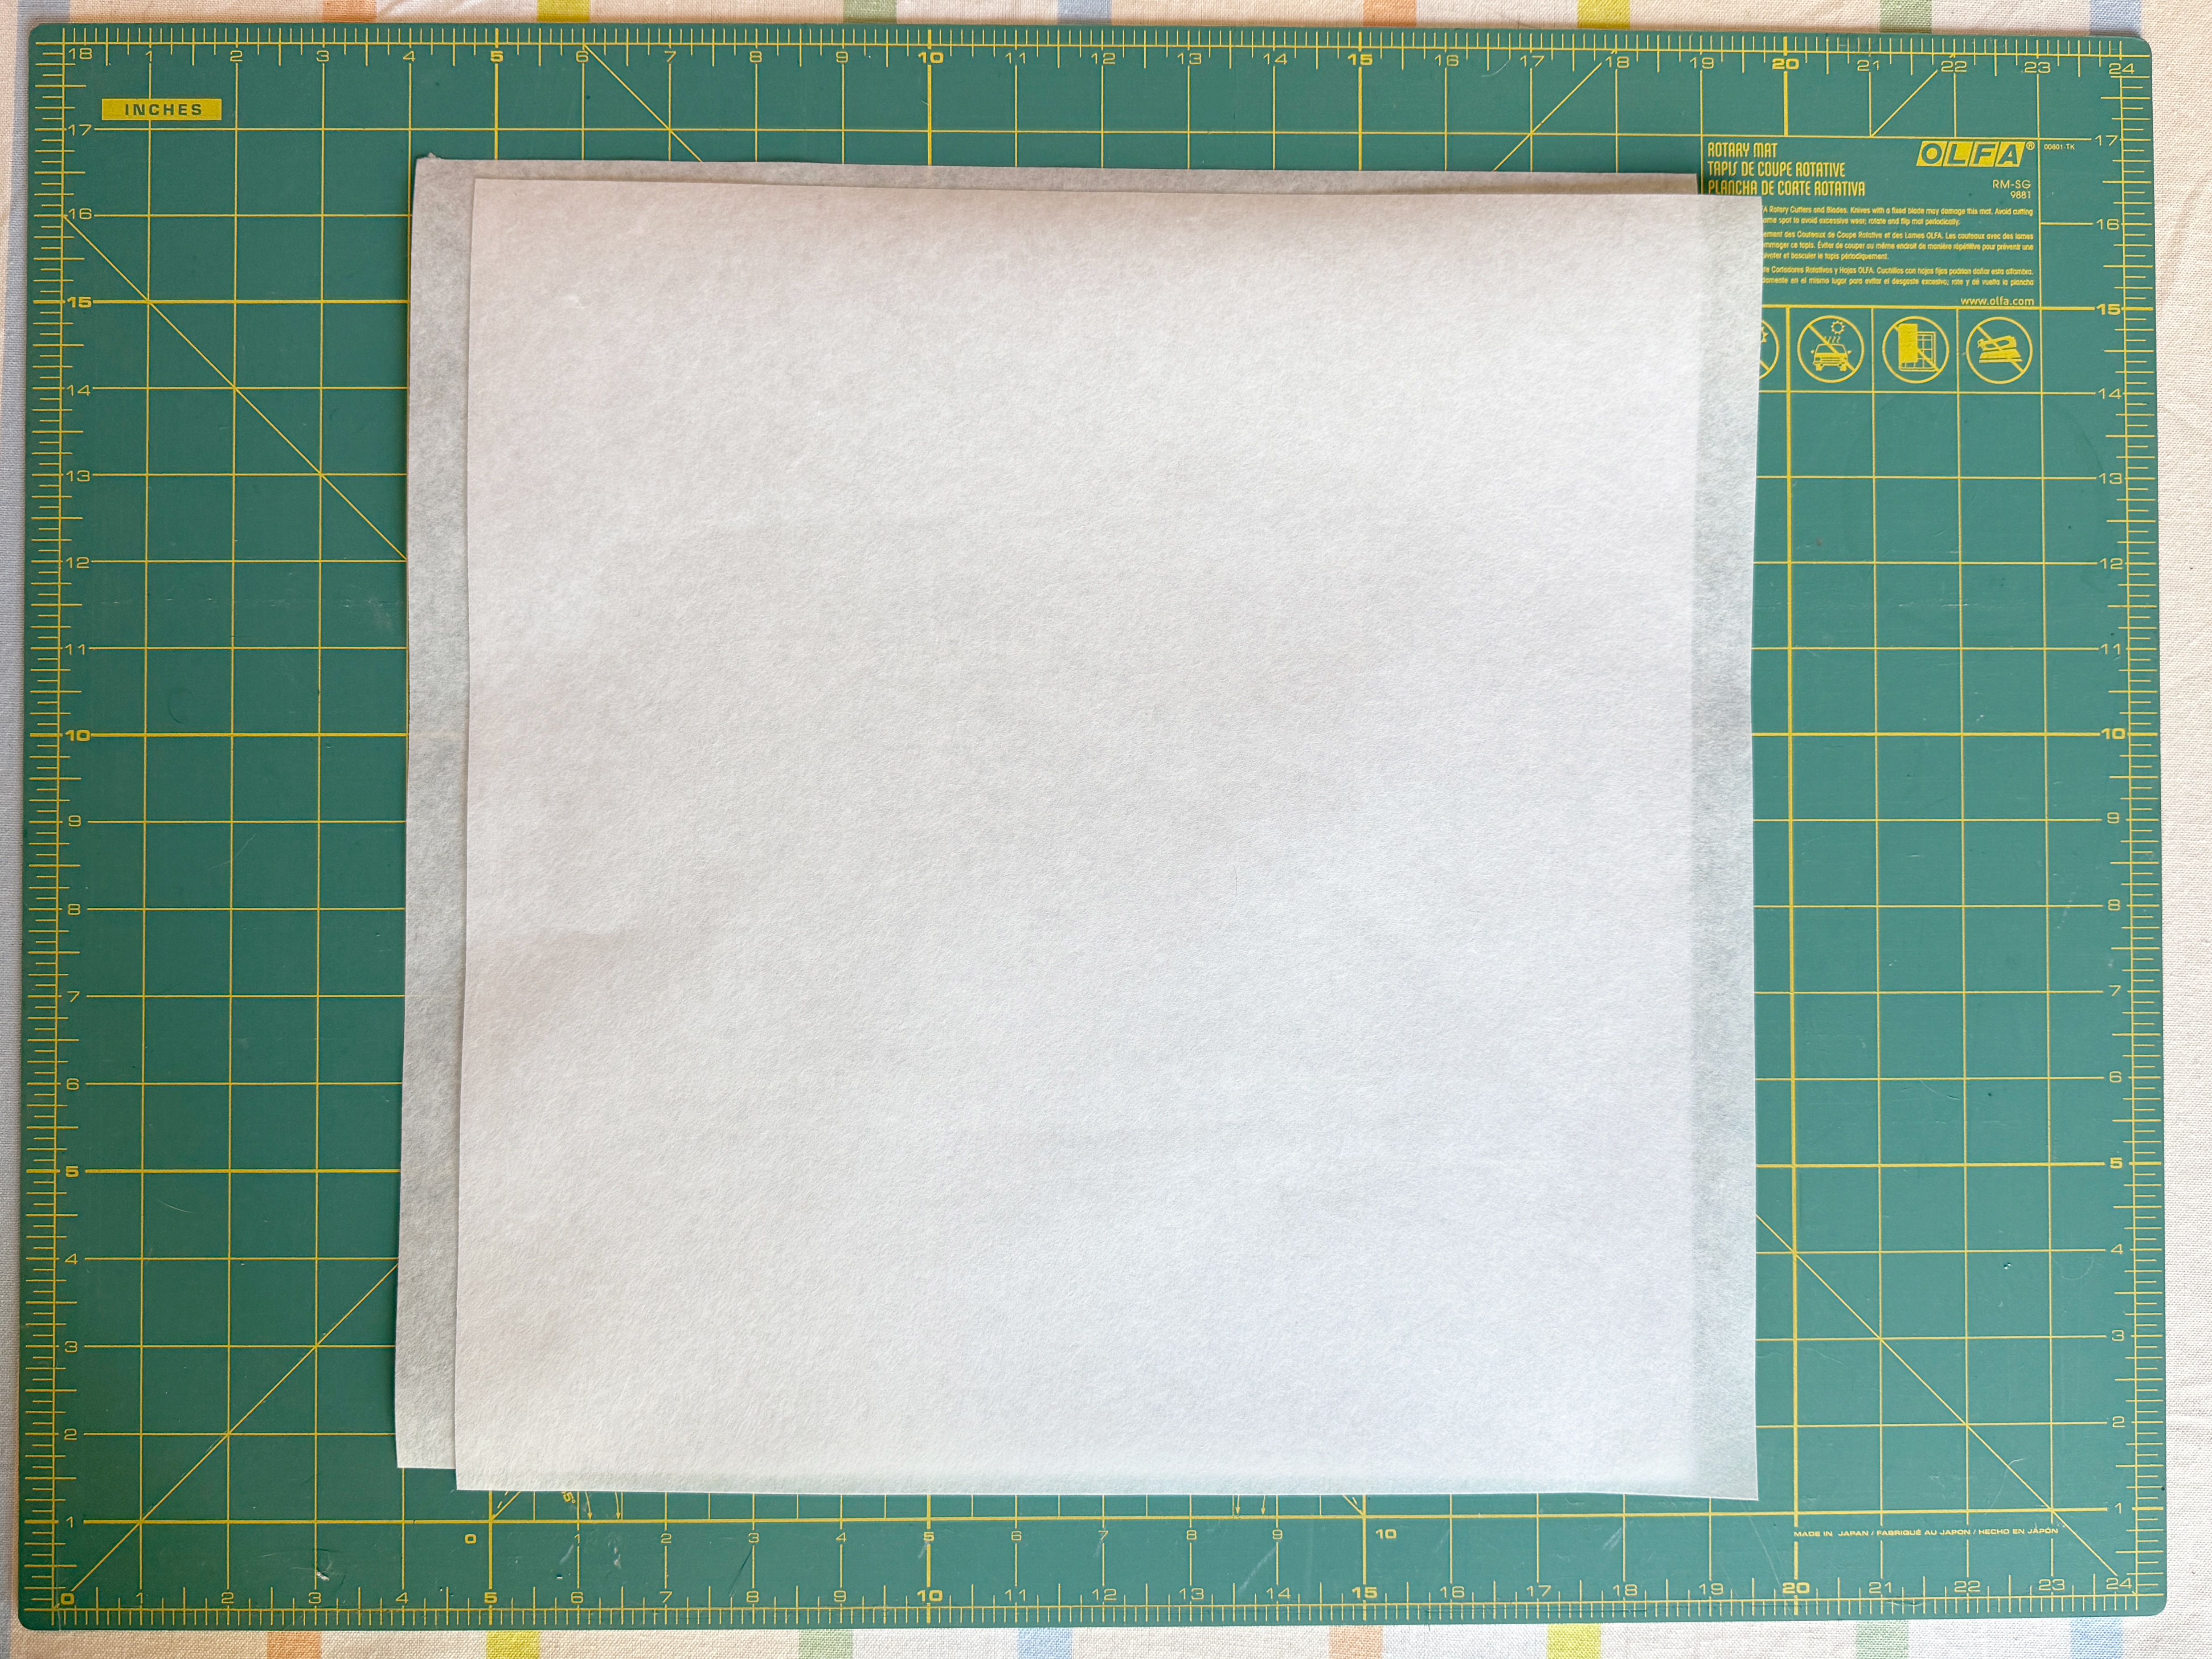
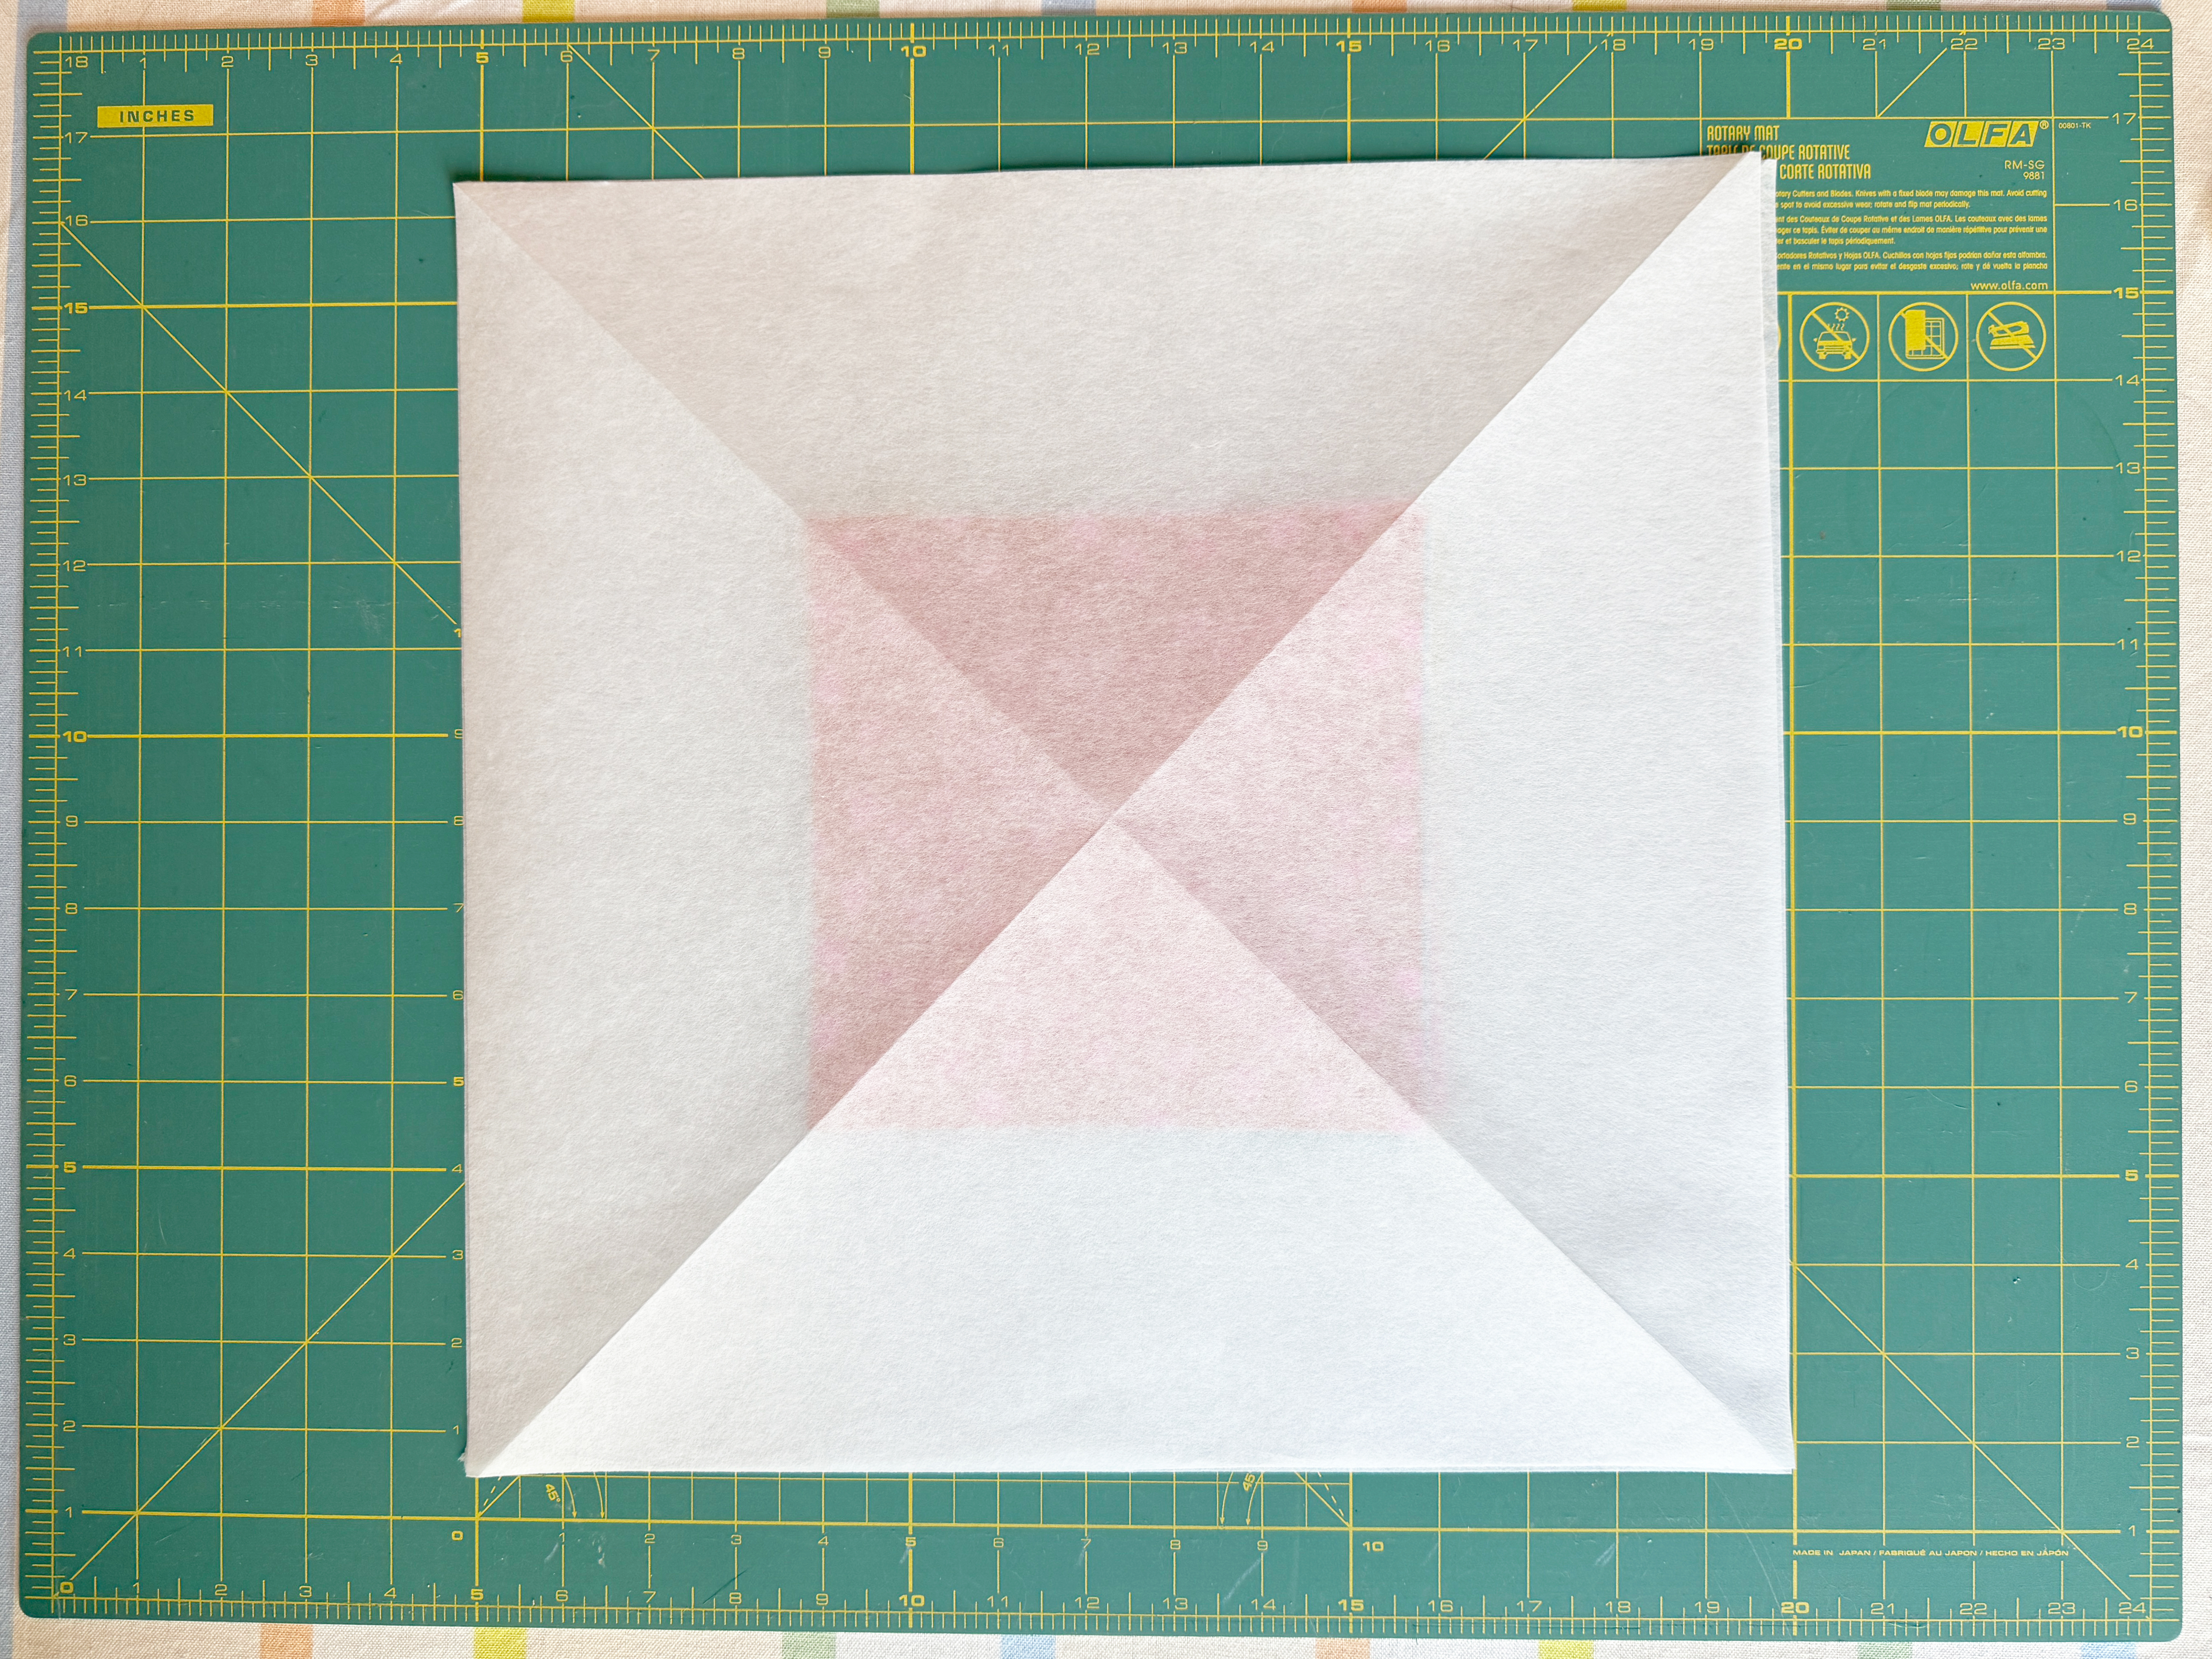
Fold two squares of stabilizer in half from corner to corner and repeat in the opposite direction. You should have a creased X across the middle of the stabilizer.
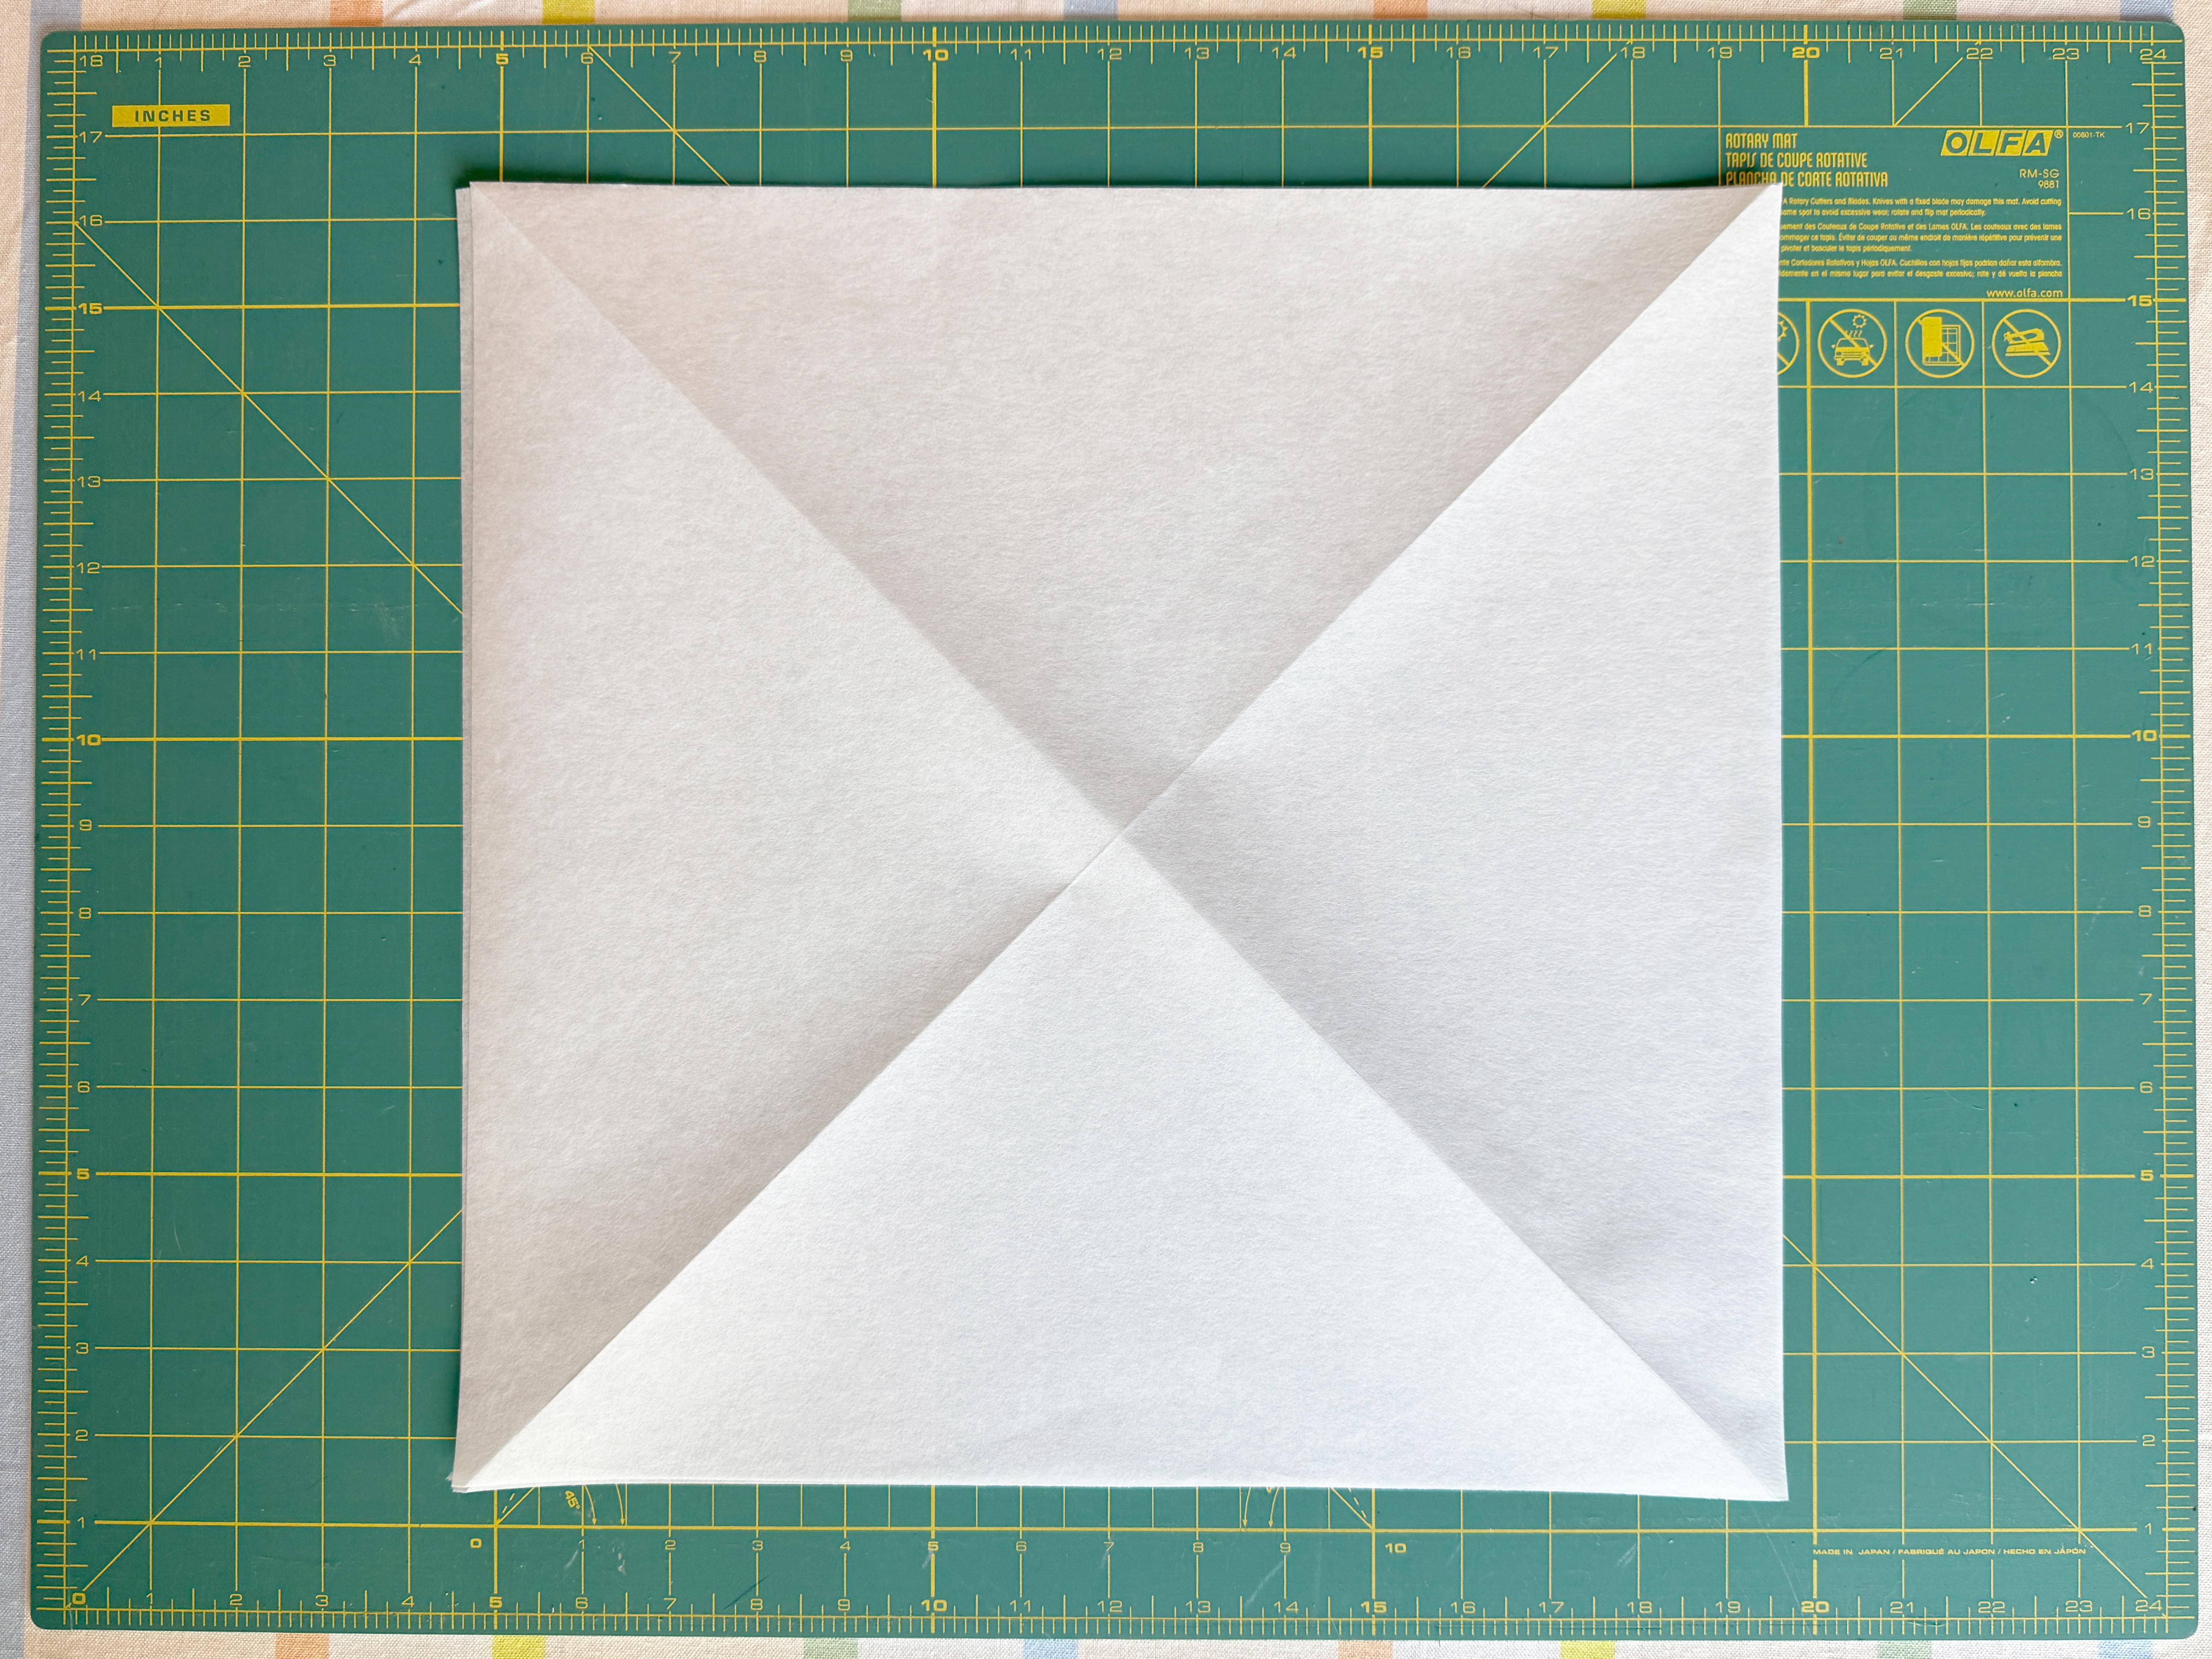
Stack half of your appliqué squares (or up to nine squares with fusible and backing) aligned neatly and center them over one of the pieces of stabilizer. Use the creased X as your guide, aligning the four corners of the stack with creases in the stabilizer.
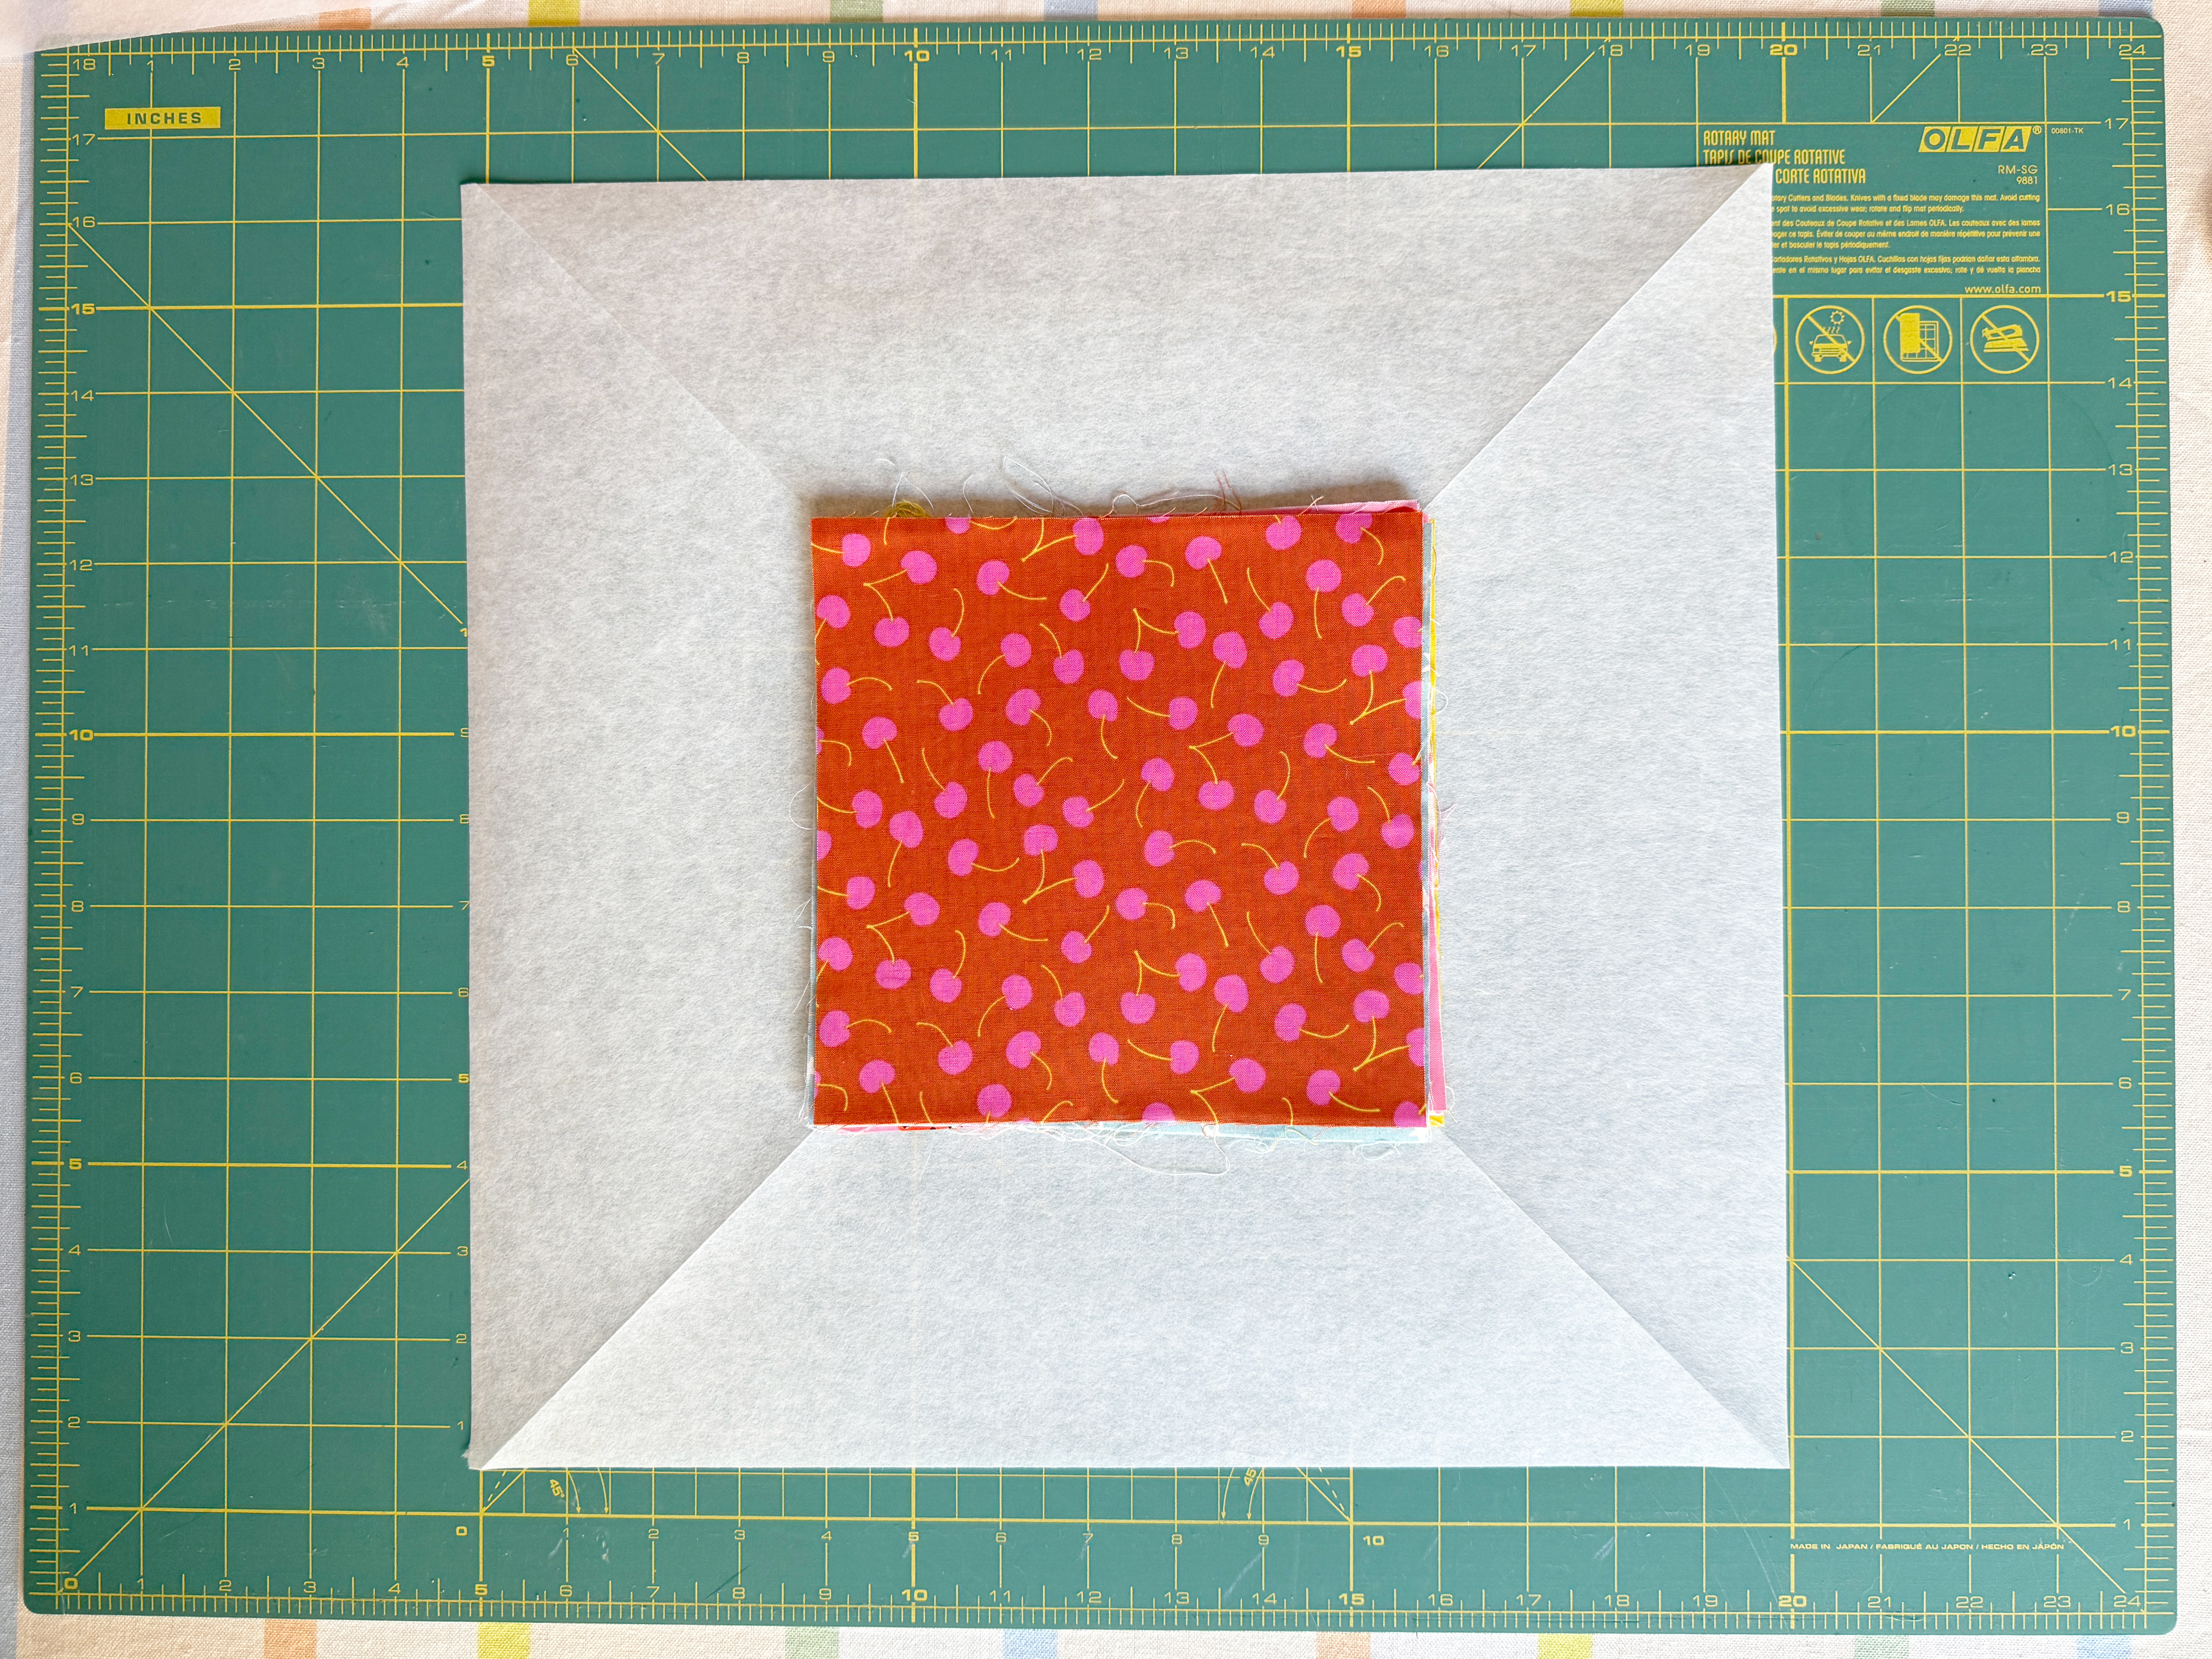
Place the second piece of stabilizer on top, aligning both X’s and the corners of the squares.
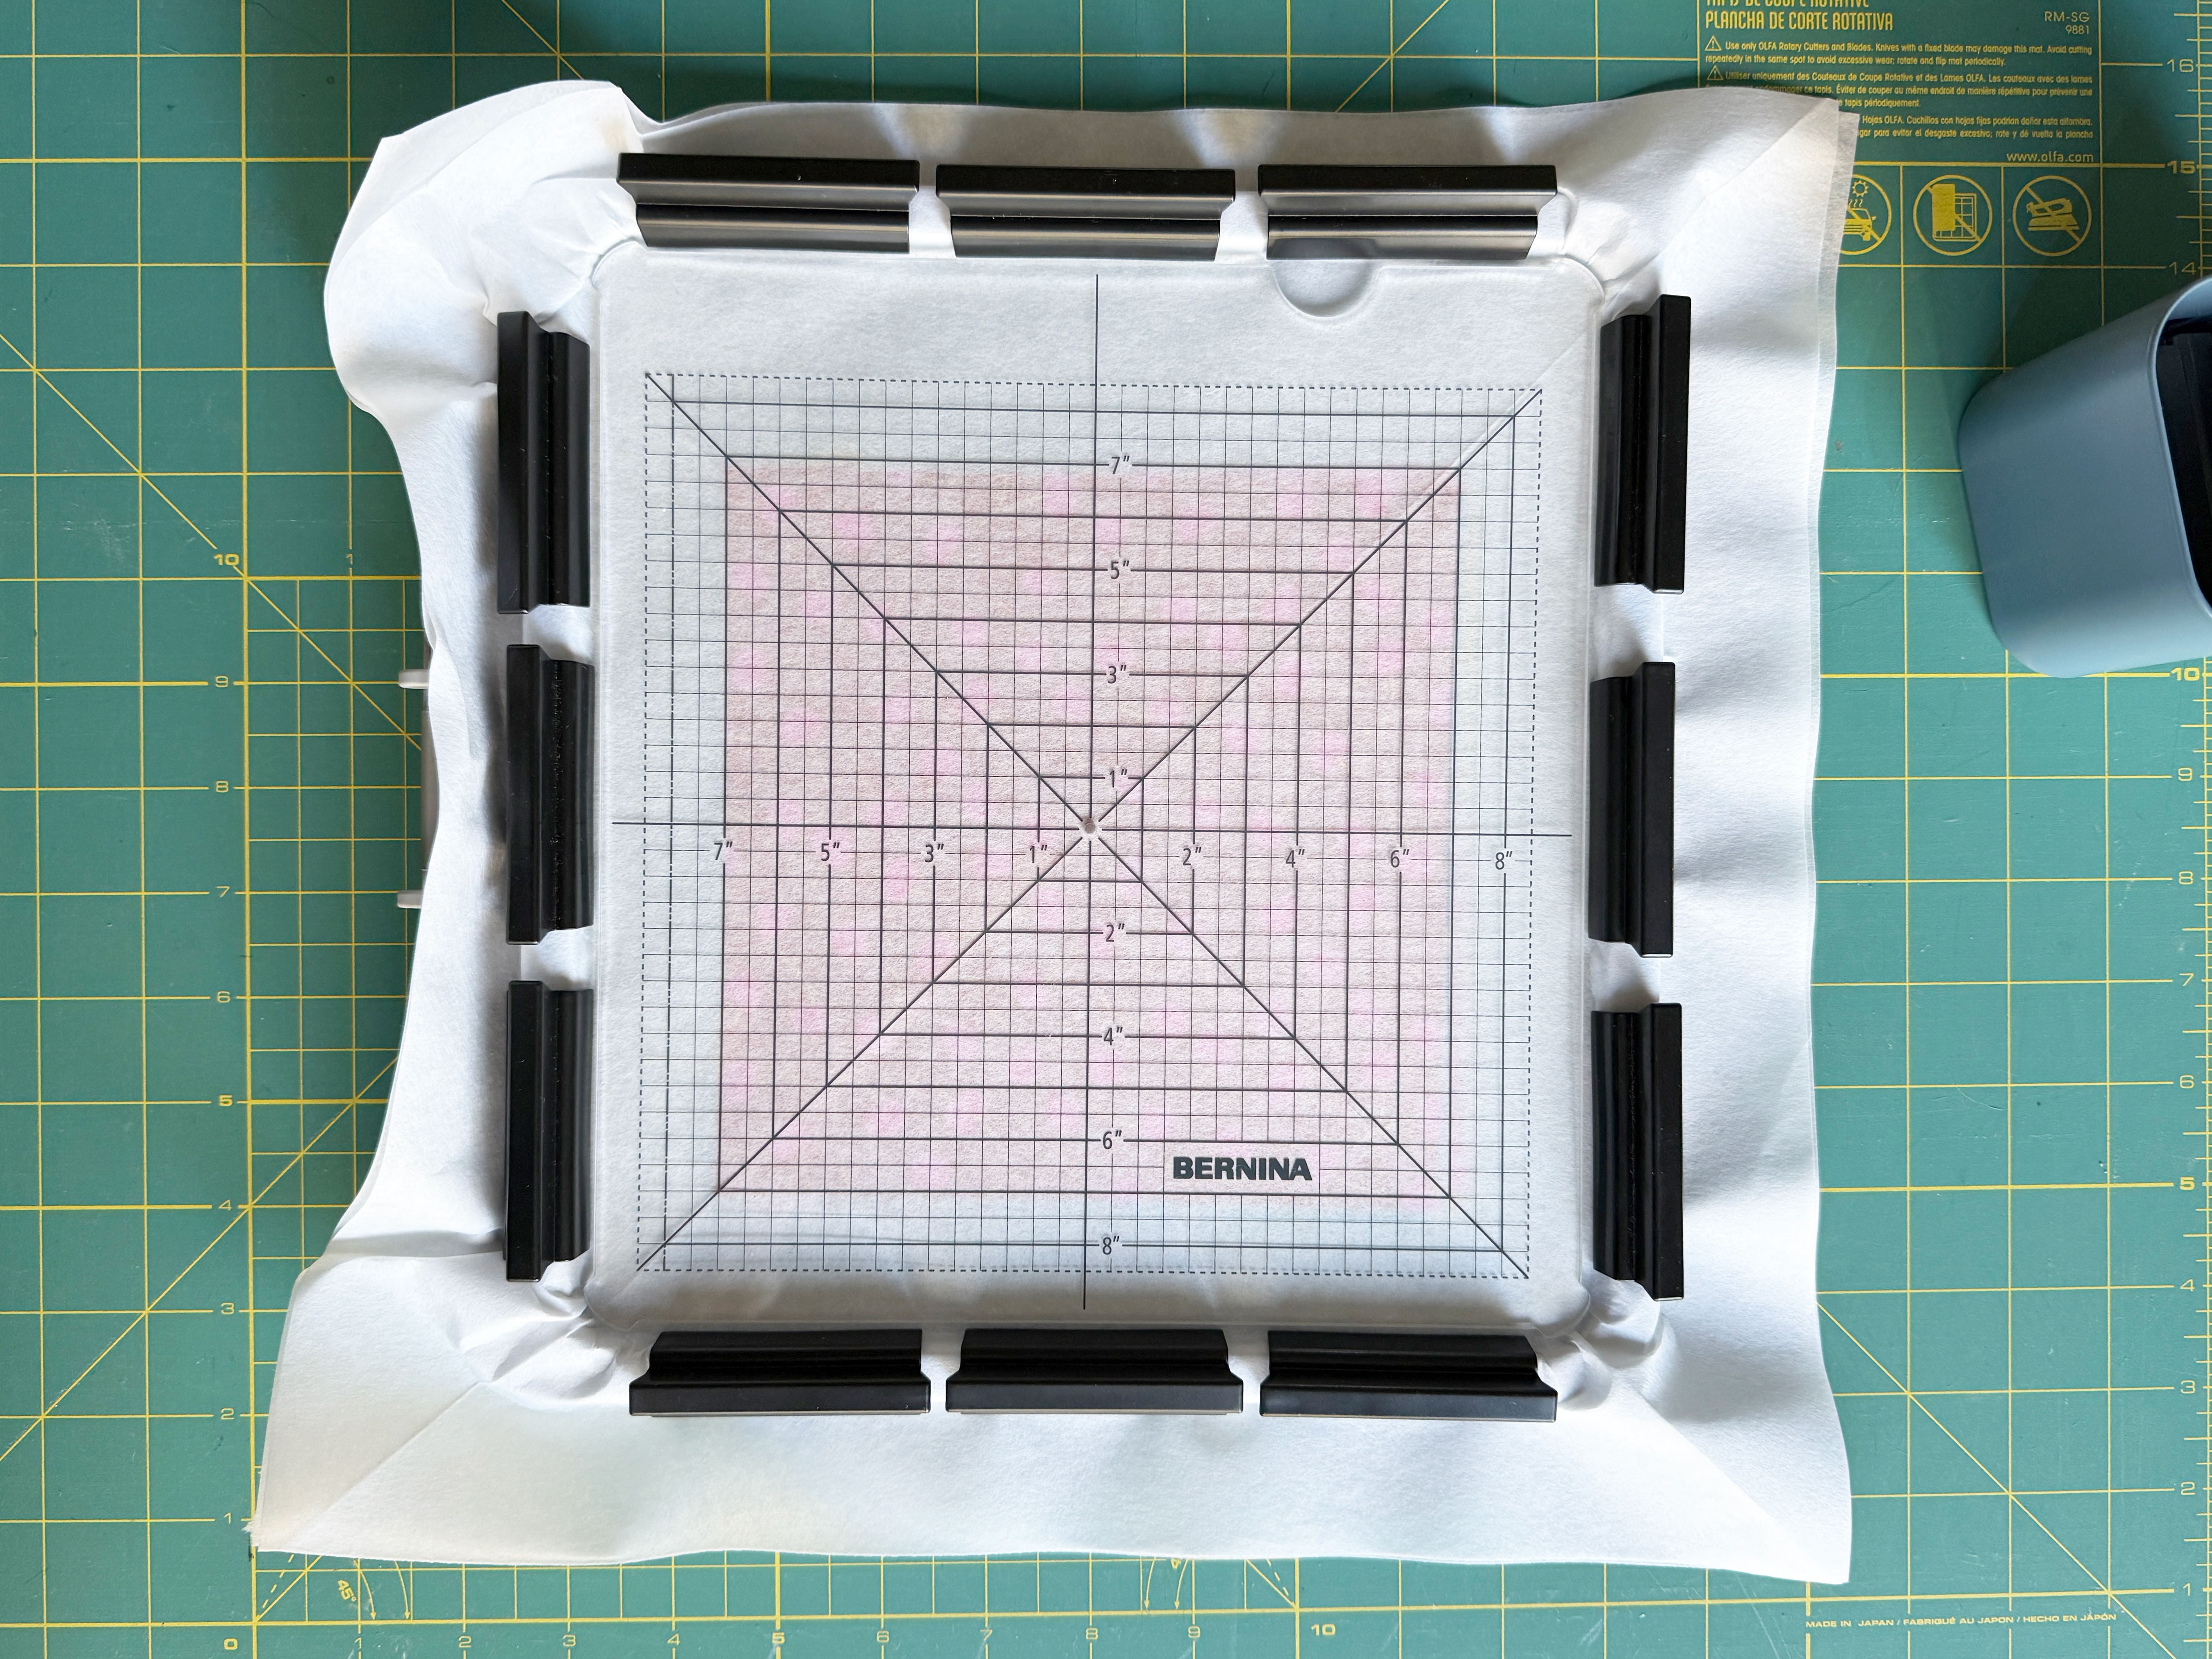
Hoop all the layers in the Medium Clamp Hoop, using the template to keep the fabrics centered and straight. Secure with all clamps, then remove the template.
These two layers of stabilizer sandwich many pieces of appliqué fabrics together and help hold them secure as we move over to the machine for cutting.
Step 3: Place the Design
At the machine, in Embroidery Mode, tap the View toolbar and select Hoop Background. From the drop-down menu, select Scanned Image. Tap the green Scan Hoop icon.

When prompted, attach the embroidery hoop and begin the scan. After scanning, tap the green checkmark to confirm.
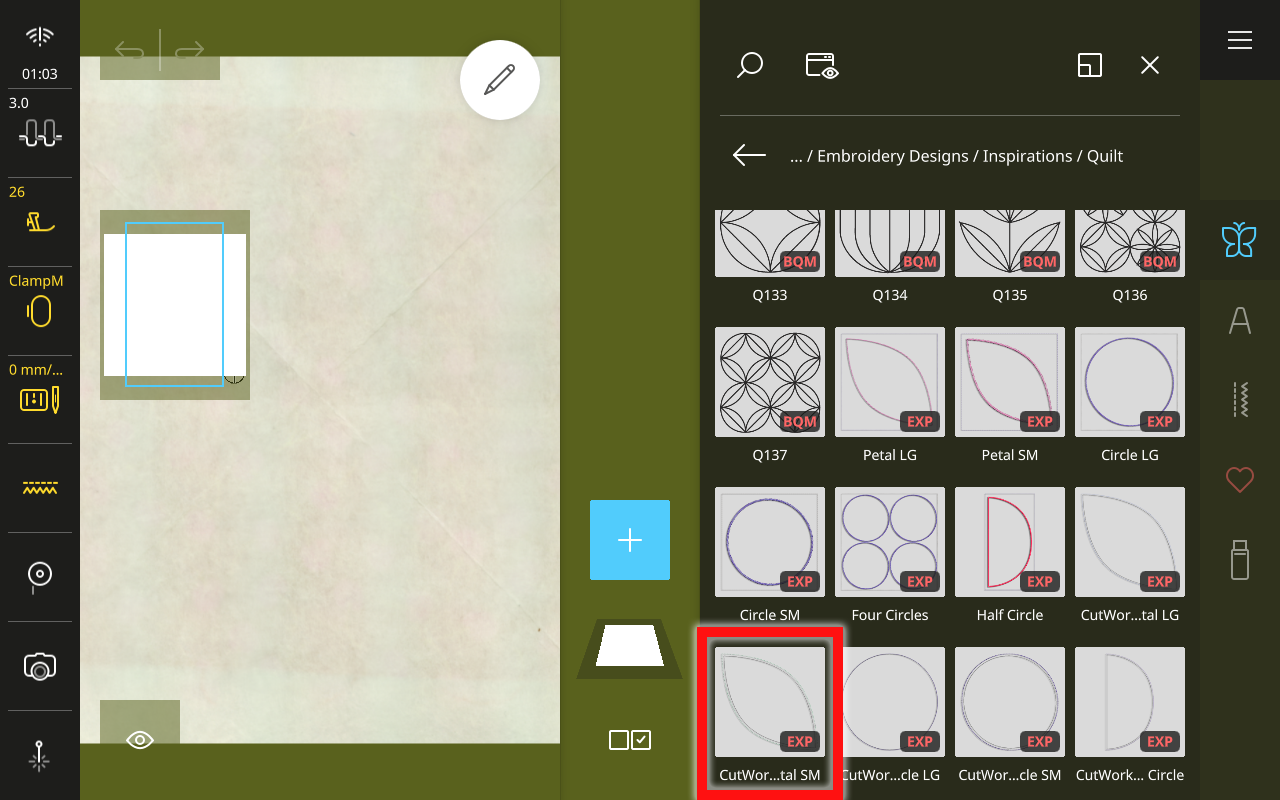
Close the View toolbar when finished. Tap the plus sign to add/open a design, then navigate to Embroidery Designs, then the Inspiration folder, the Quilt folder, and open design CutWork Petal SM.exp.
Use the Multi-function Knobs to move the design, if necessary, making sure that the design fits entirely on your appliqué fabric. It is important to note that CutWork designs cannot be resized or rotated, so if you hooped too crooked, or cut your fabric too small, you will need to re-hoop and try again.

When you are able to see on the scanned image that your design fits and is roughly centered on the appliqué fabric, tap the green needle icon to move to prepare for stitching.
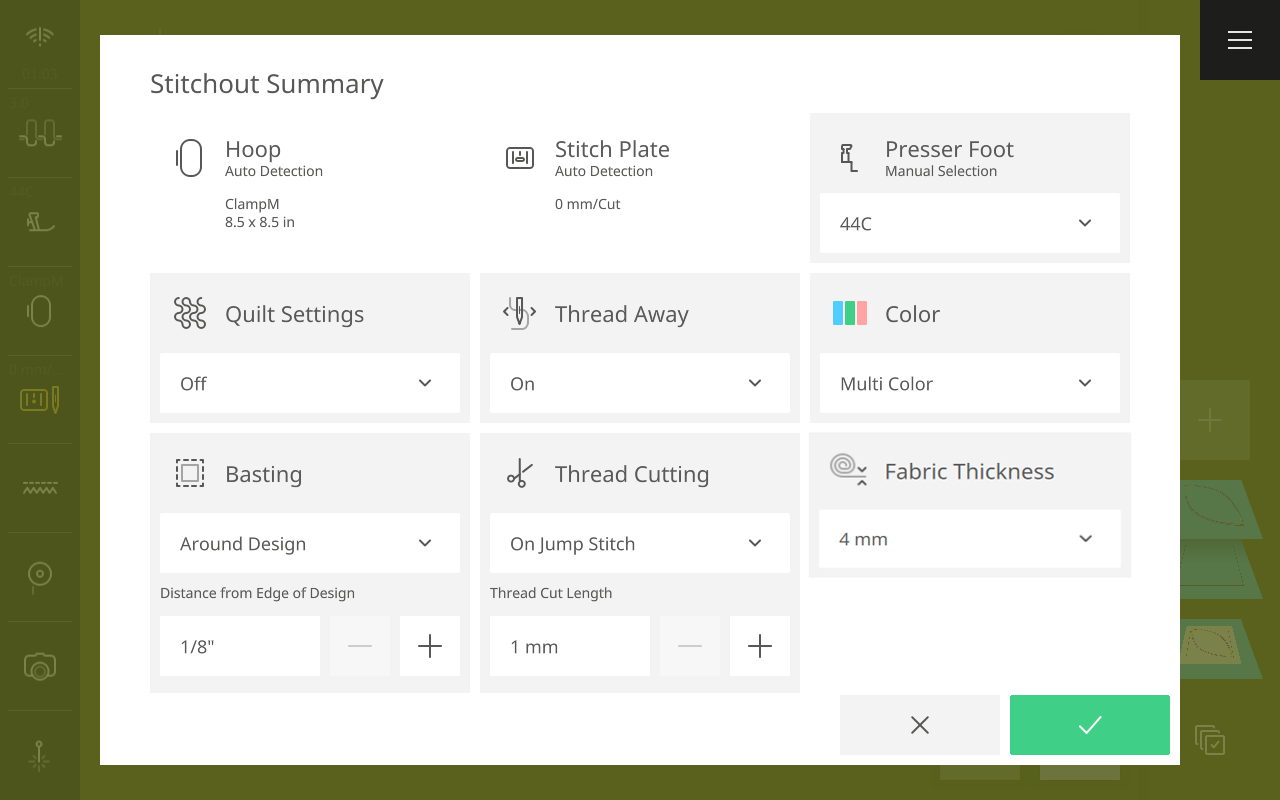
In the Stitchout Summary, most settings are left at the default options. Be sure that the #44C foot is selected as it is the only compatible foot for CutWork. I also recommend adding a Basting for some added security with all these layers of fabric and stabilizer. From the drop-down menu, select Around the Design and set to 1/8”. Then select the green checkmark to move to Stitchout.
Step 4: Cut Out Appliqués
Attach Echo Quilting and CutWork Foot #44C.
As you move through the steps or “colors” of this embroidery design, notice the information in the Color Bar. For the current color, the machine will show an icon for the type of action taking place—a spool for regular stitching, a blade for CutWork, a brush for PaintWork, etc. It will also show the thread brand and color for stitching and the cutting position for CutWork.
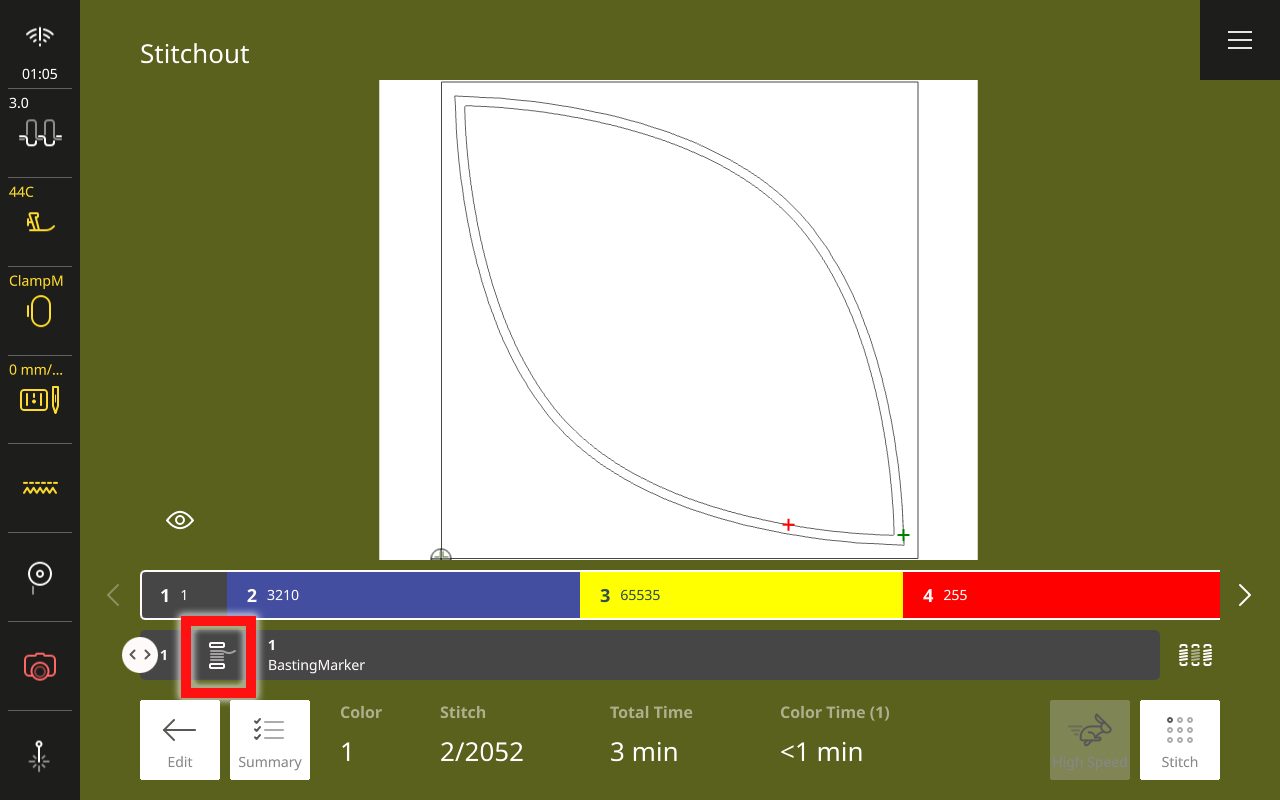
Insert an embroidery needle and thread the machine for embroidery. Stitch the first color, the basting box.
When finished, stitch the second color as well. This is a stitched outline of the appliqué shape and makes sure all the layers are held securely alongside the cutting line. When complete, remove the thread, embroidery needle, and bobbin.
For the next color, note that the machine now indicates the color as “Cut 1” with the CutWork icon. Insert the CutWork tool in place of a needle and rotate the dial to read “1”.
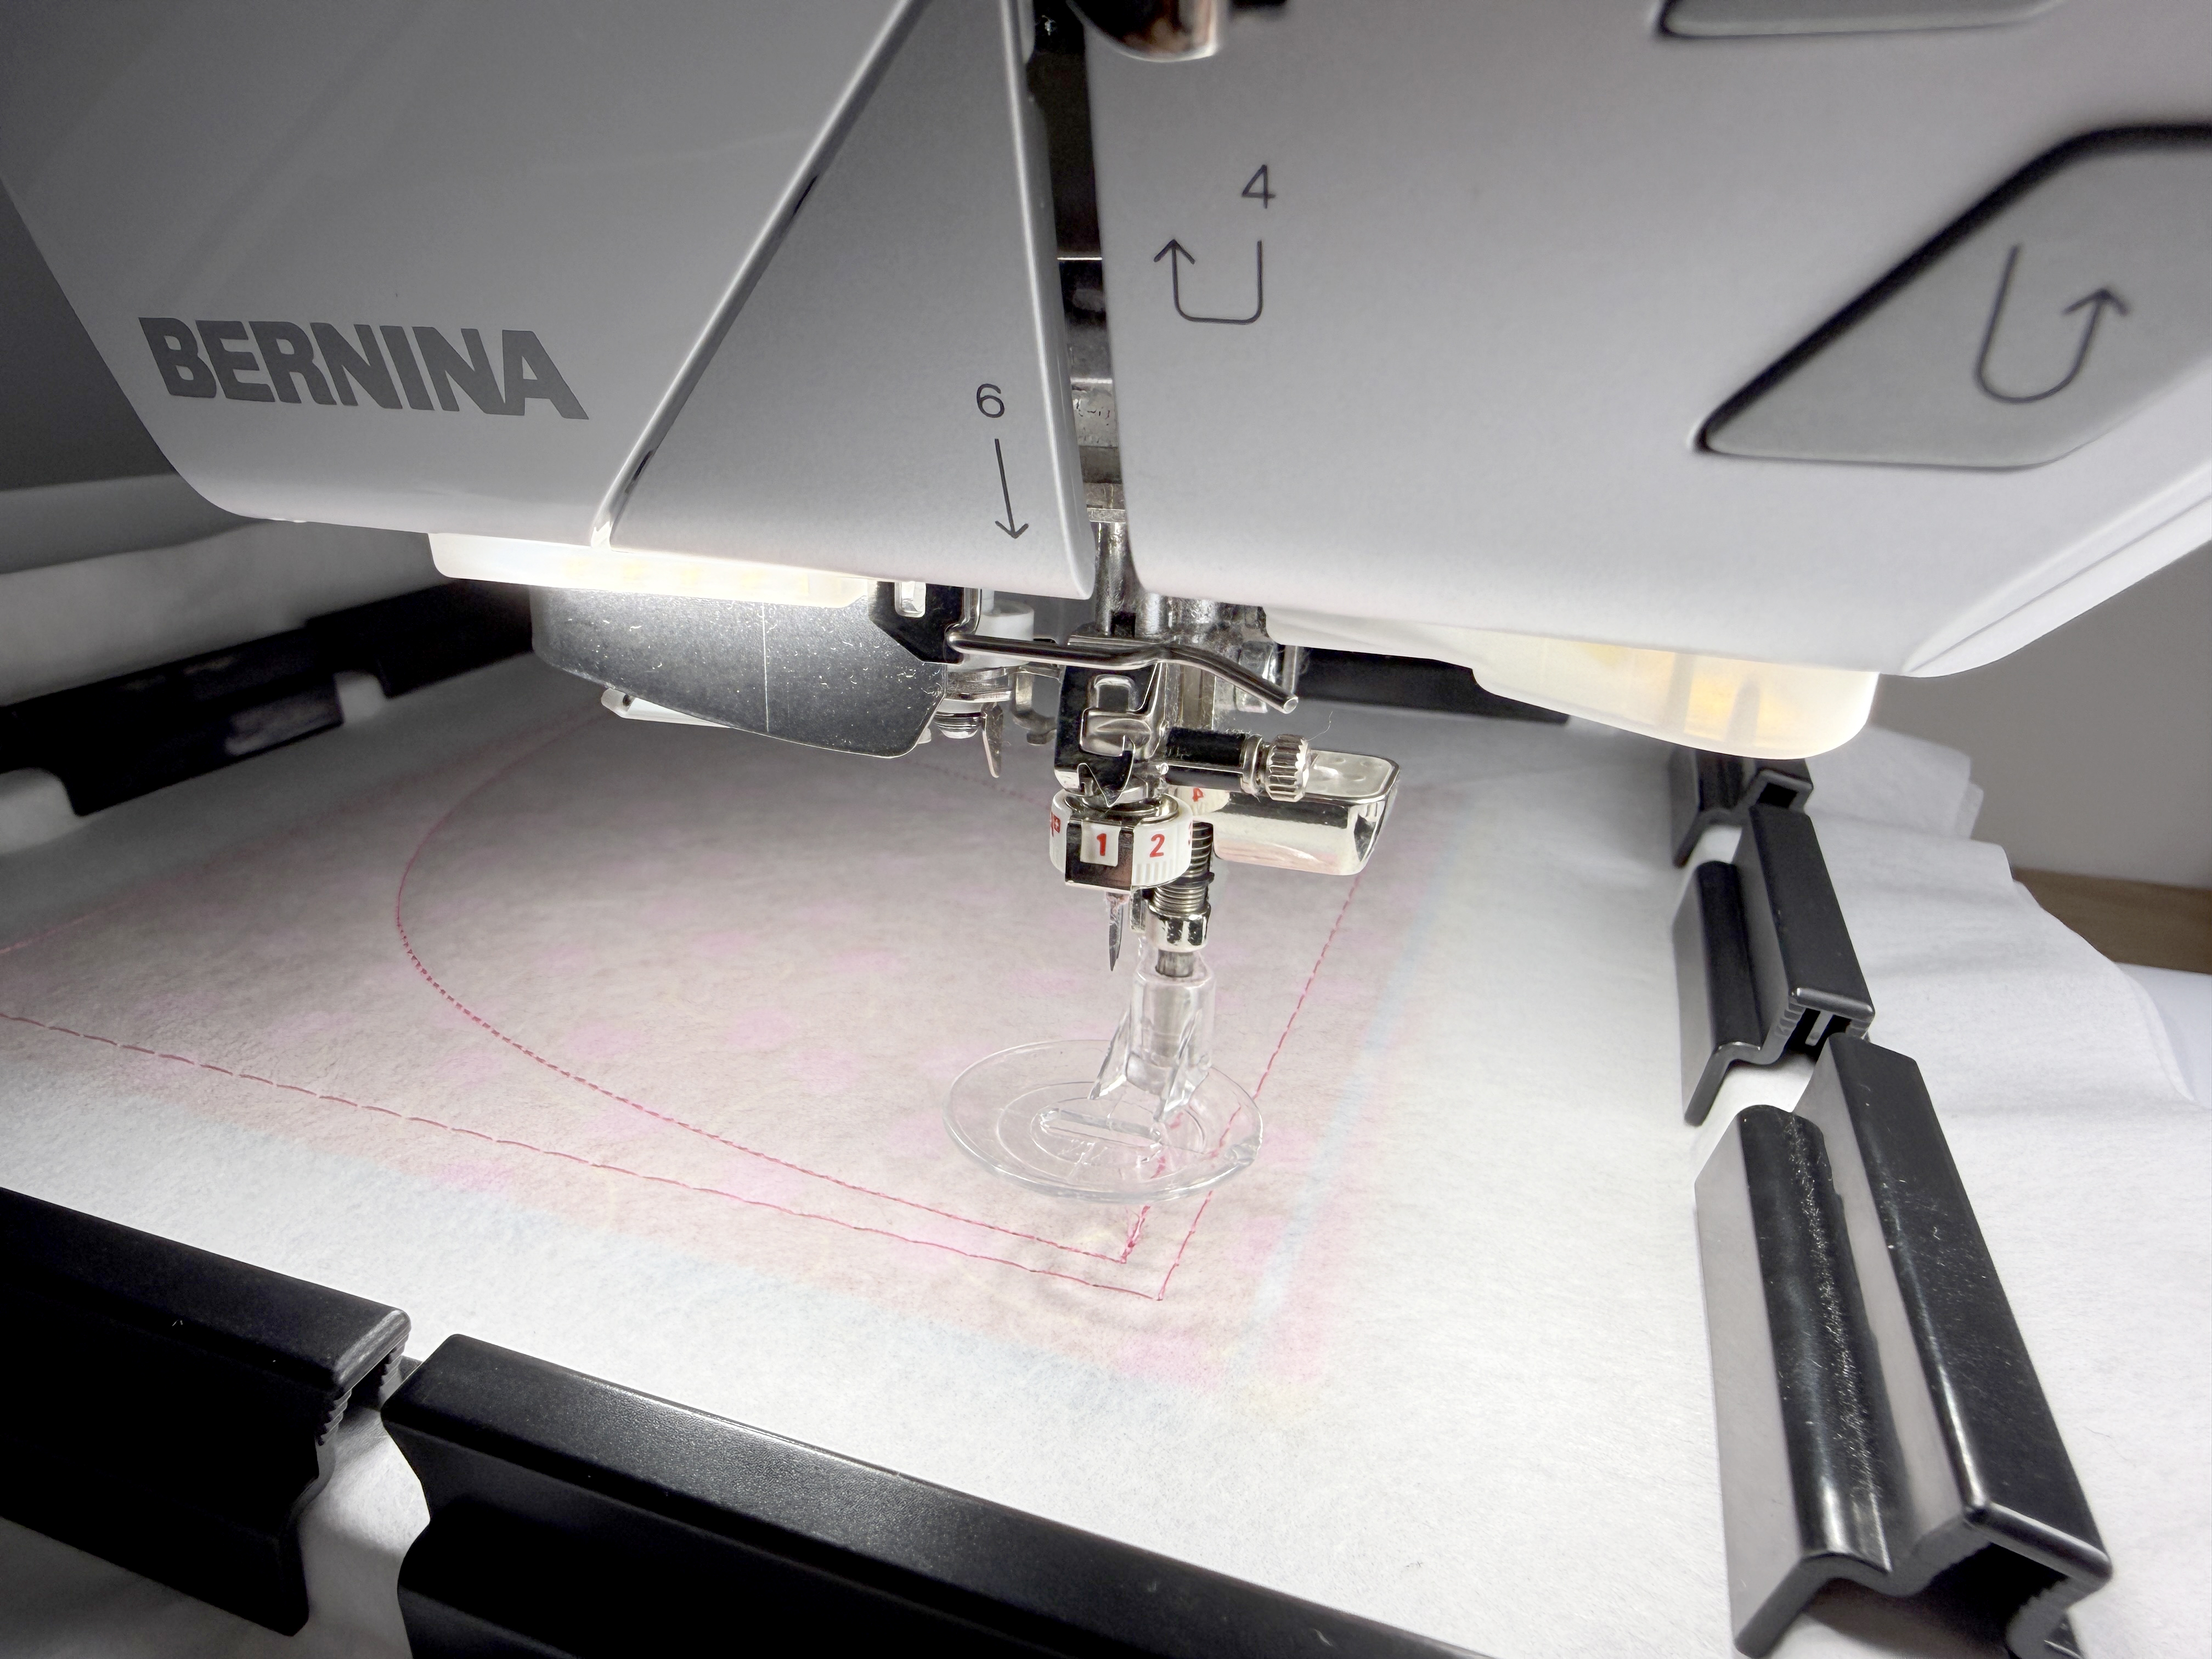
Press and hold the start/stop button to run Cut 1.
Once finished, turn the dial on the CutWork tool to move the blade into position 2. Start the machine to run Cut 2.
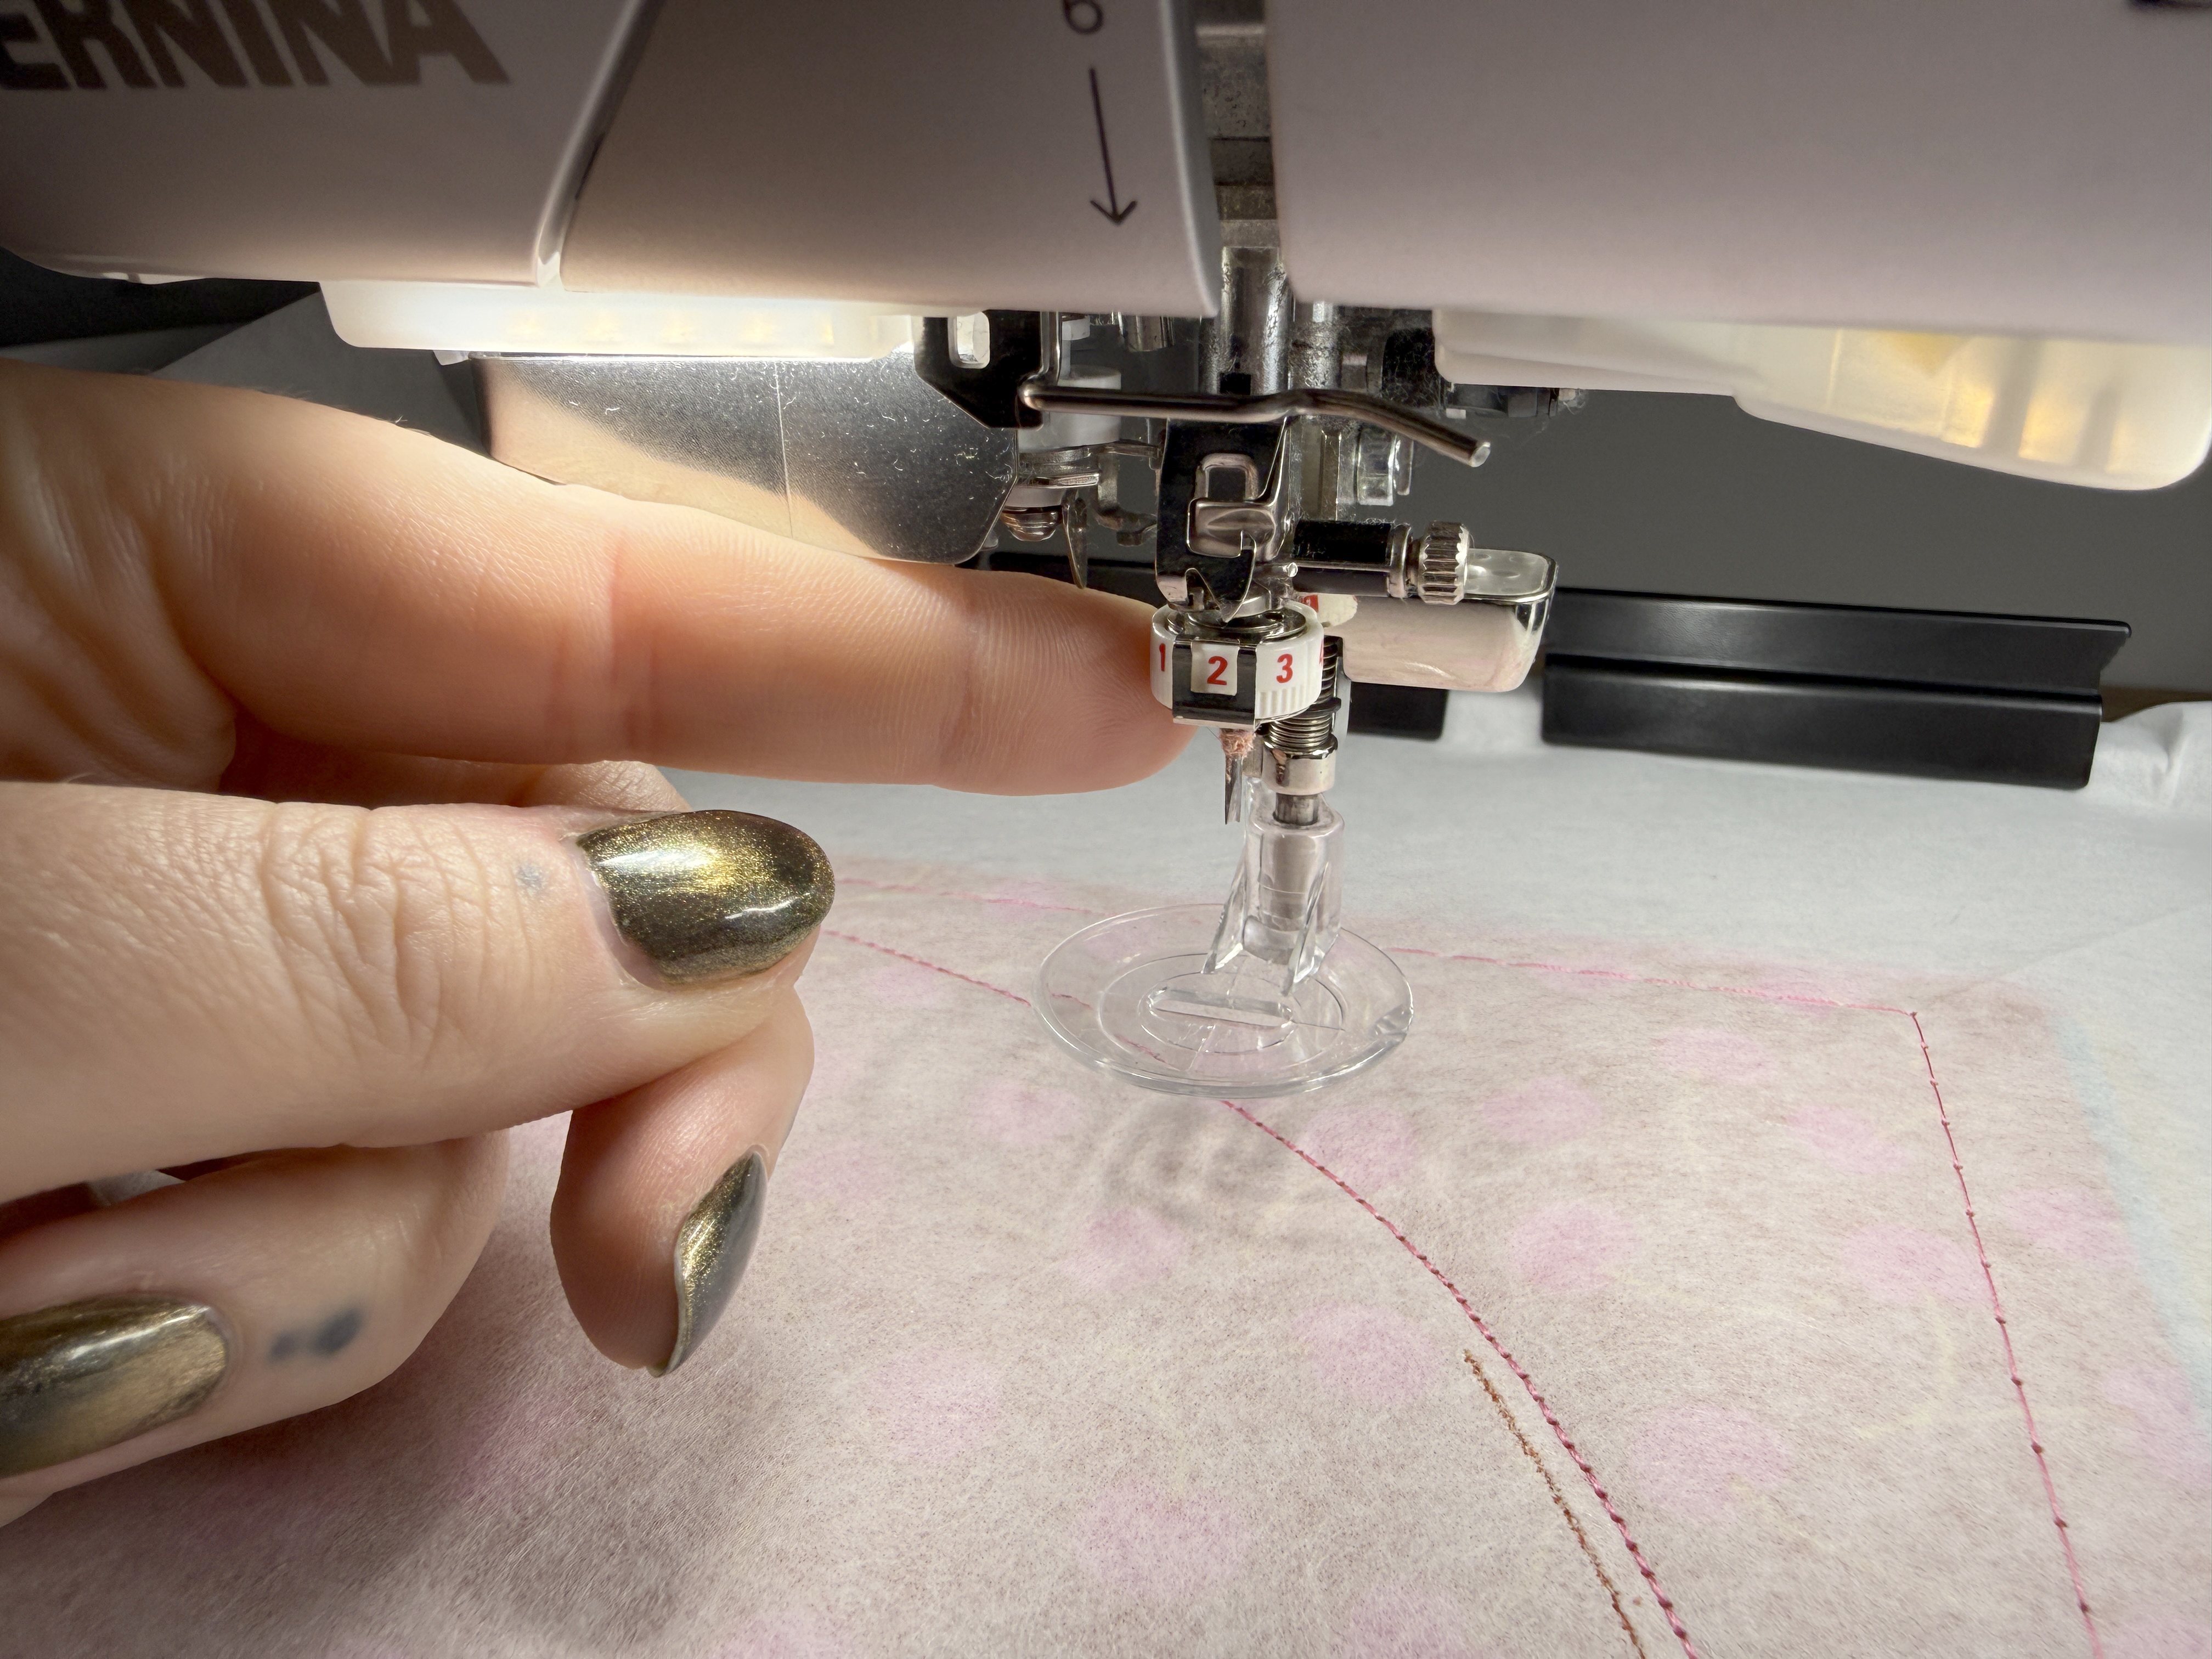
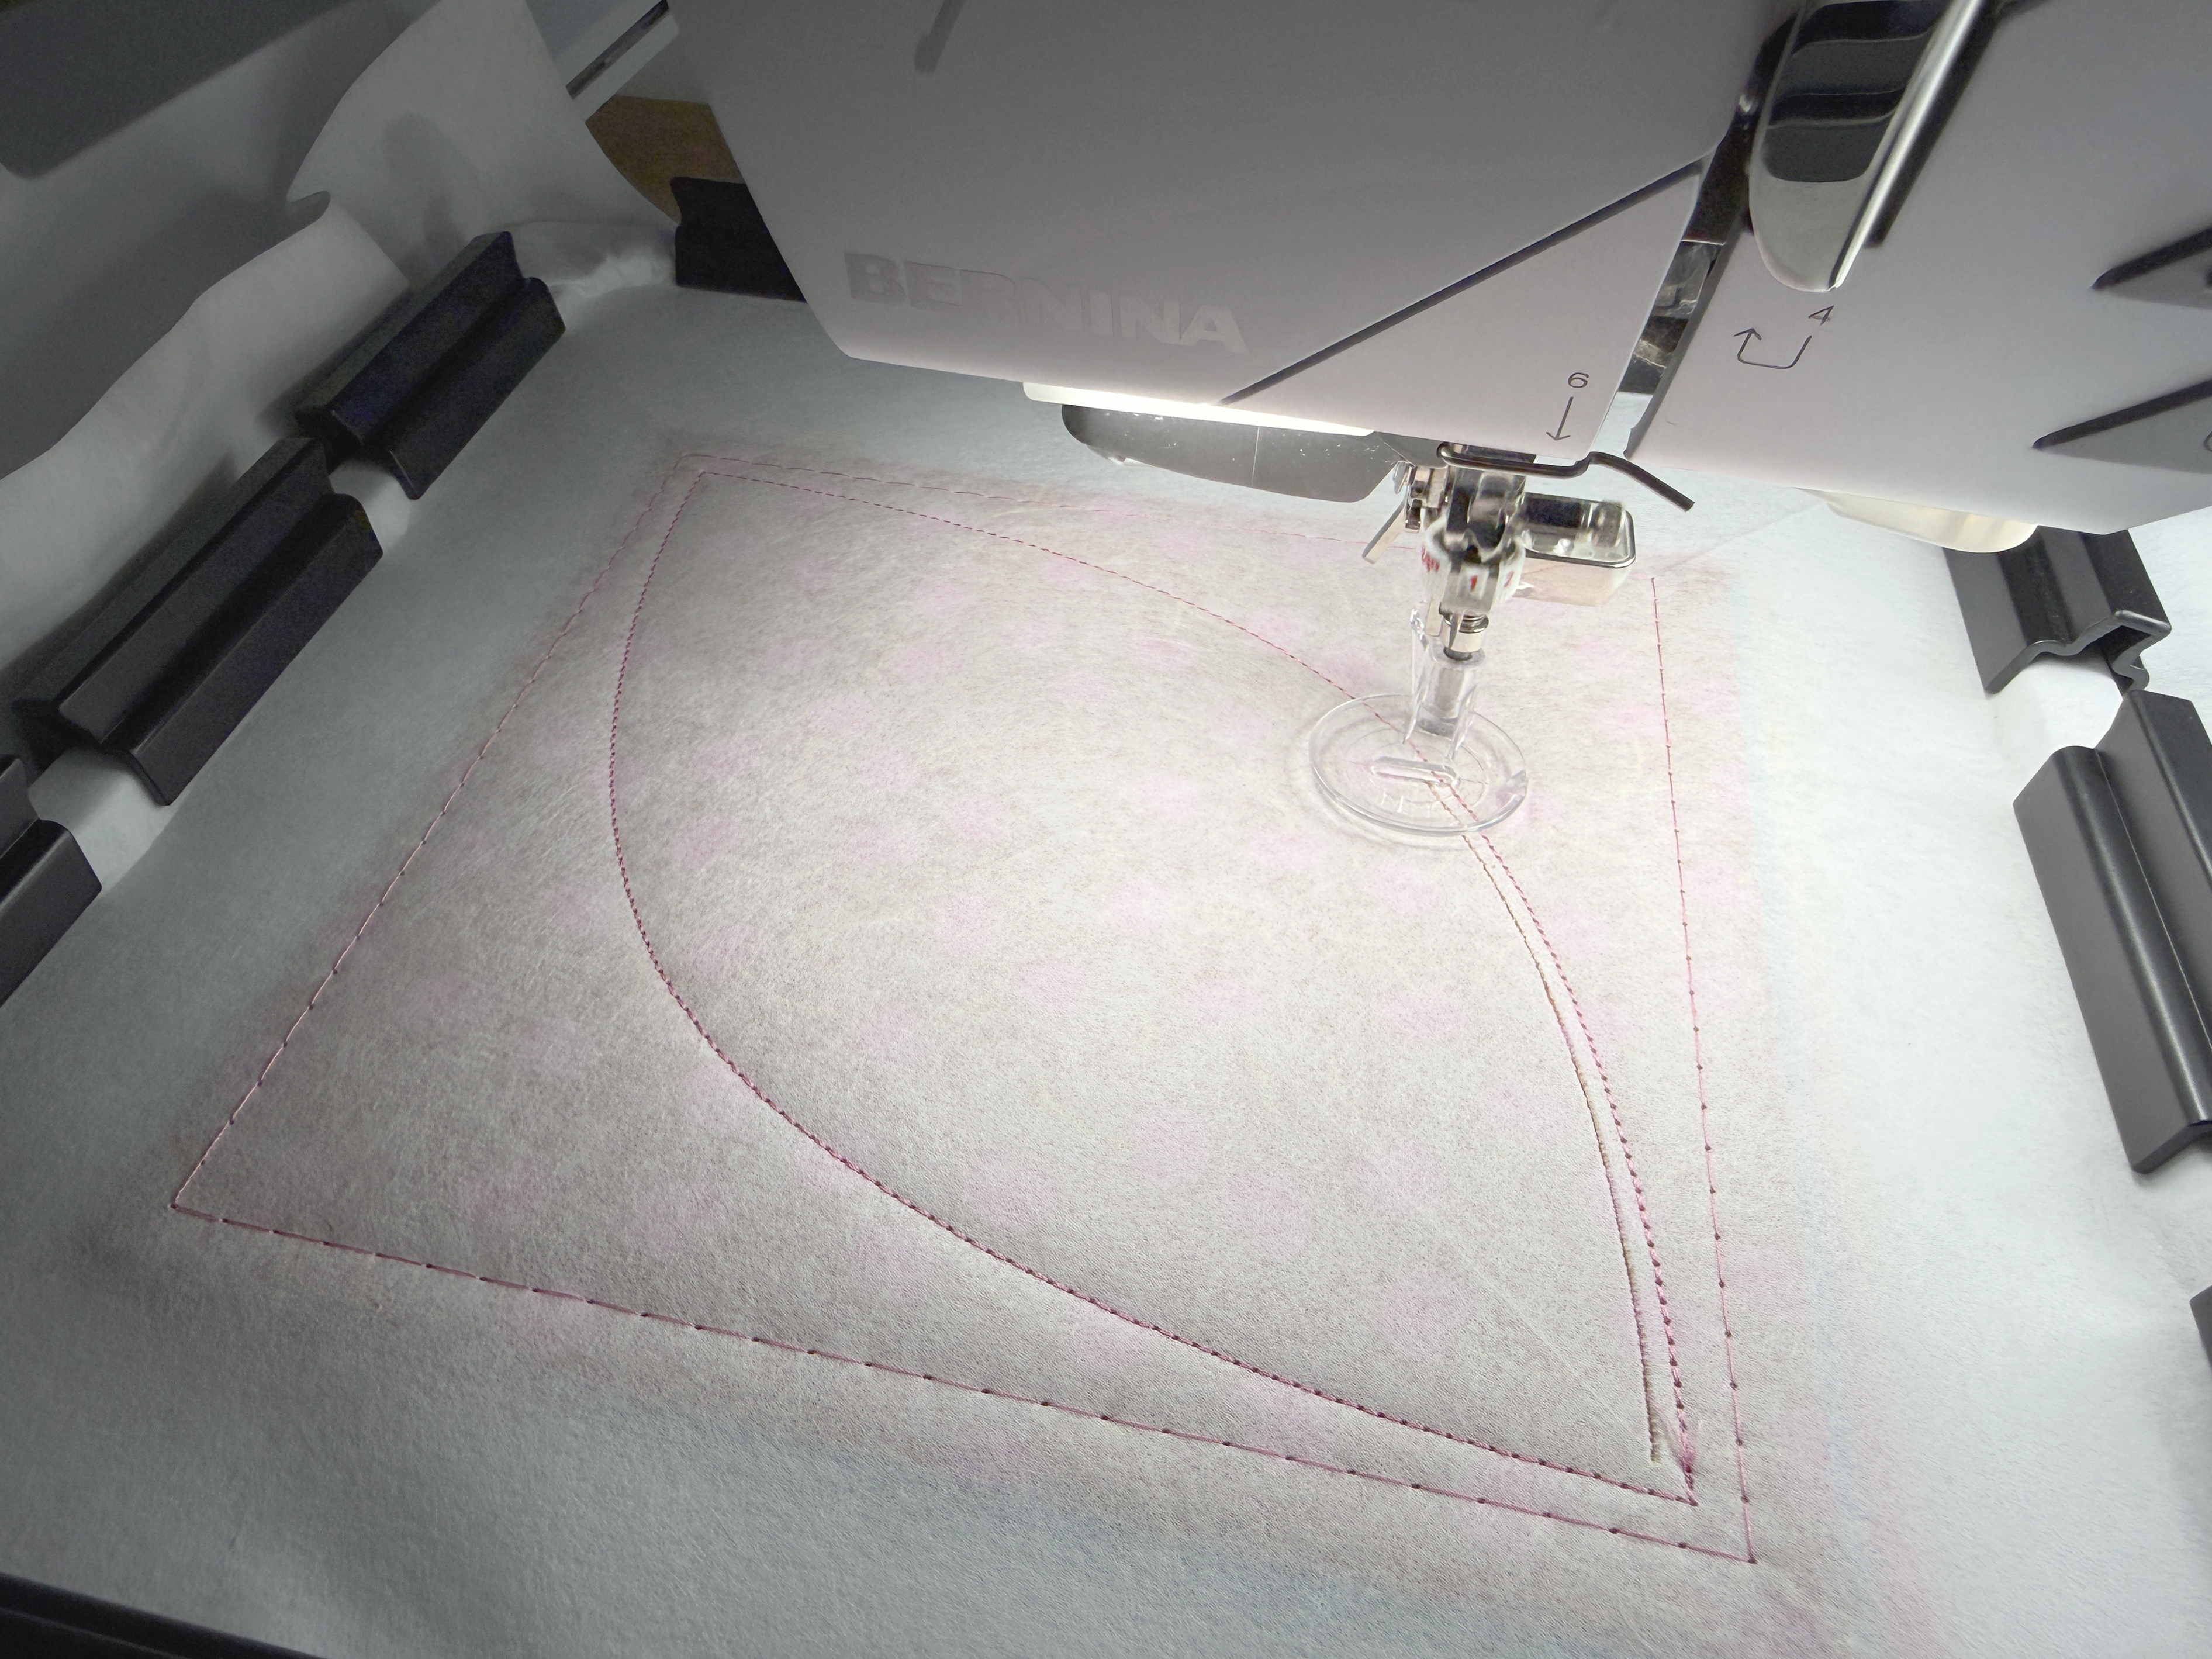
Repeat for the remaining two cutting positions and complete cutting the shape.
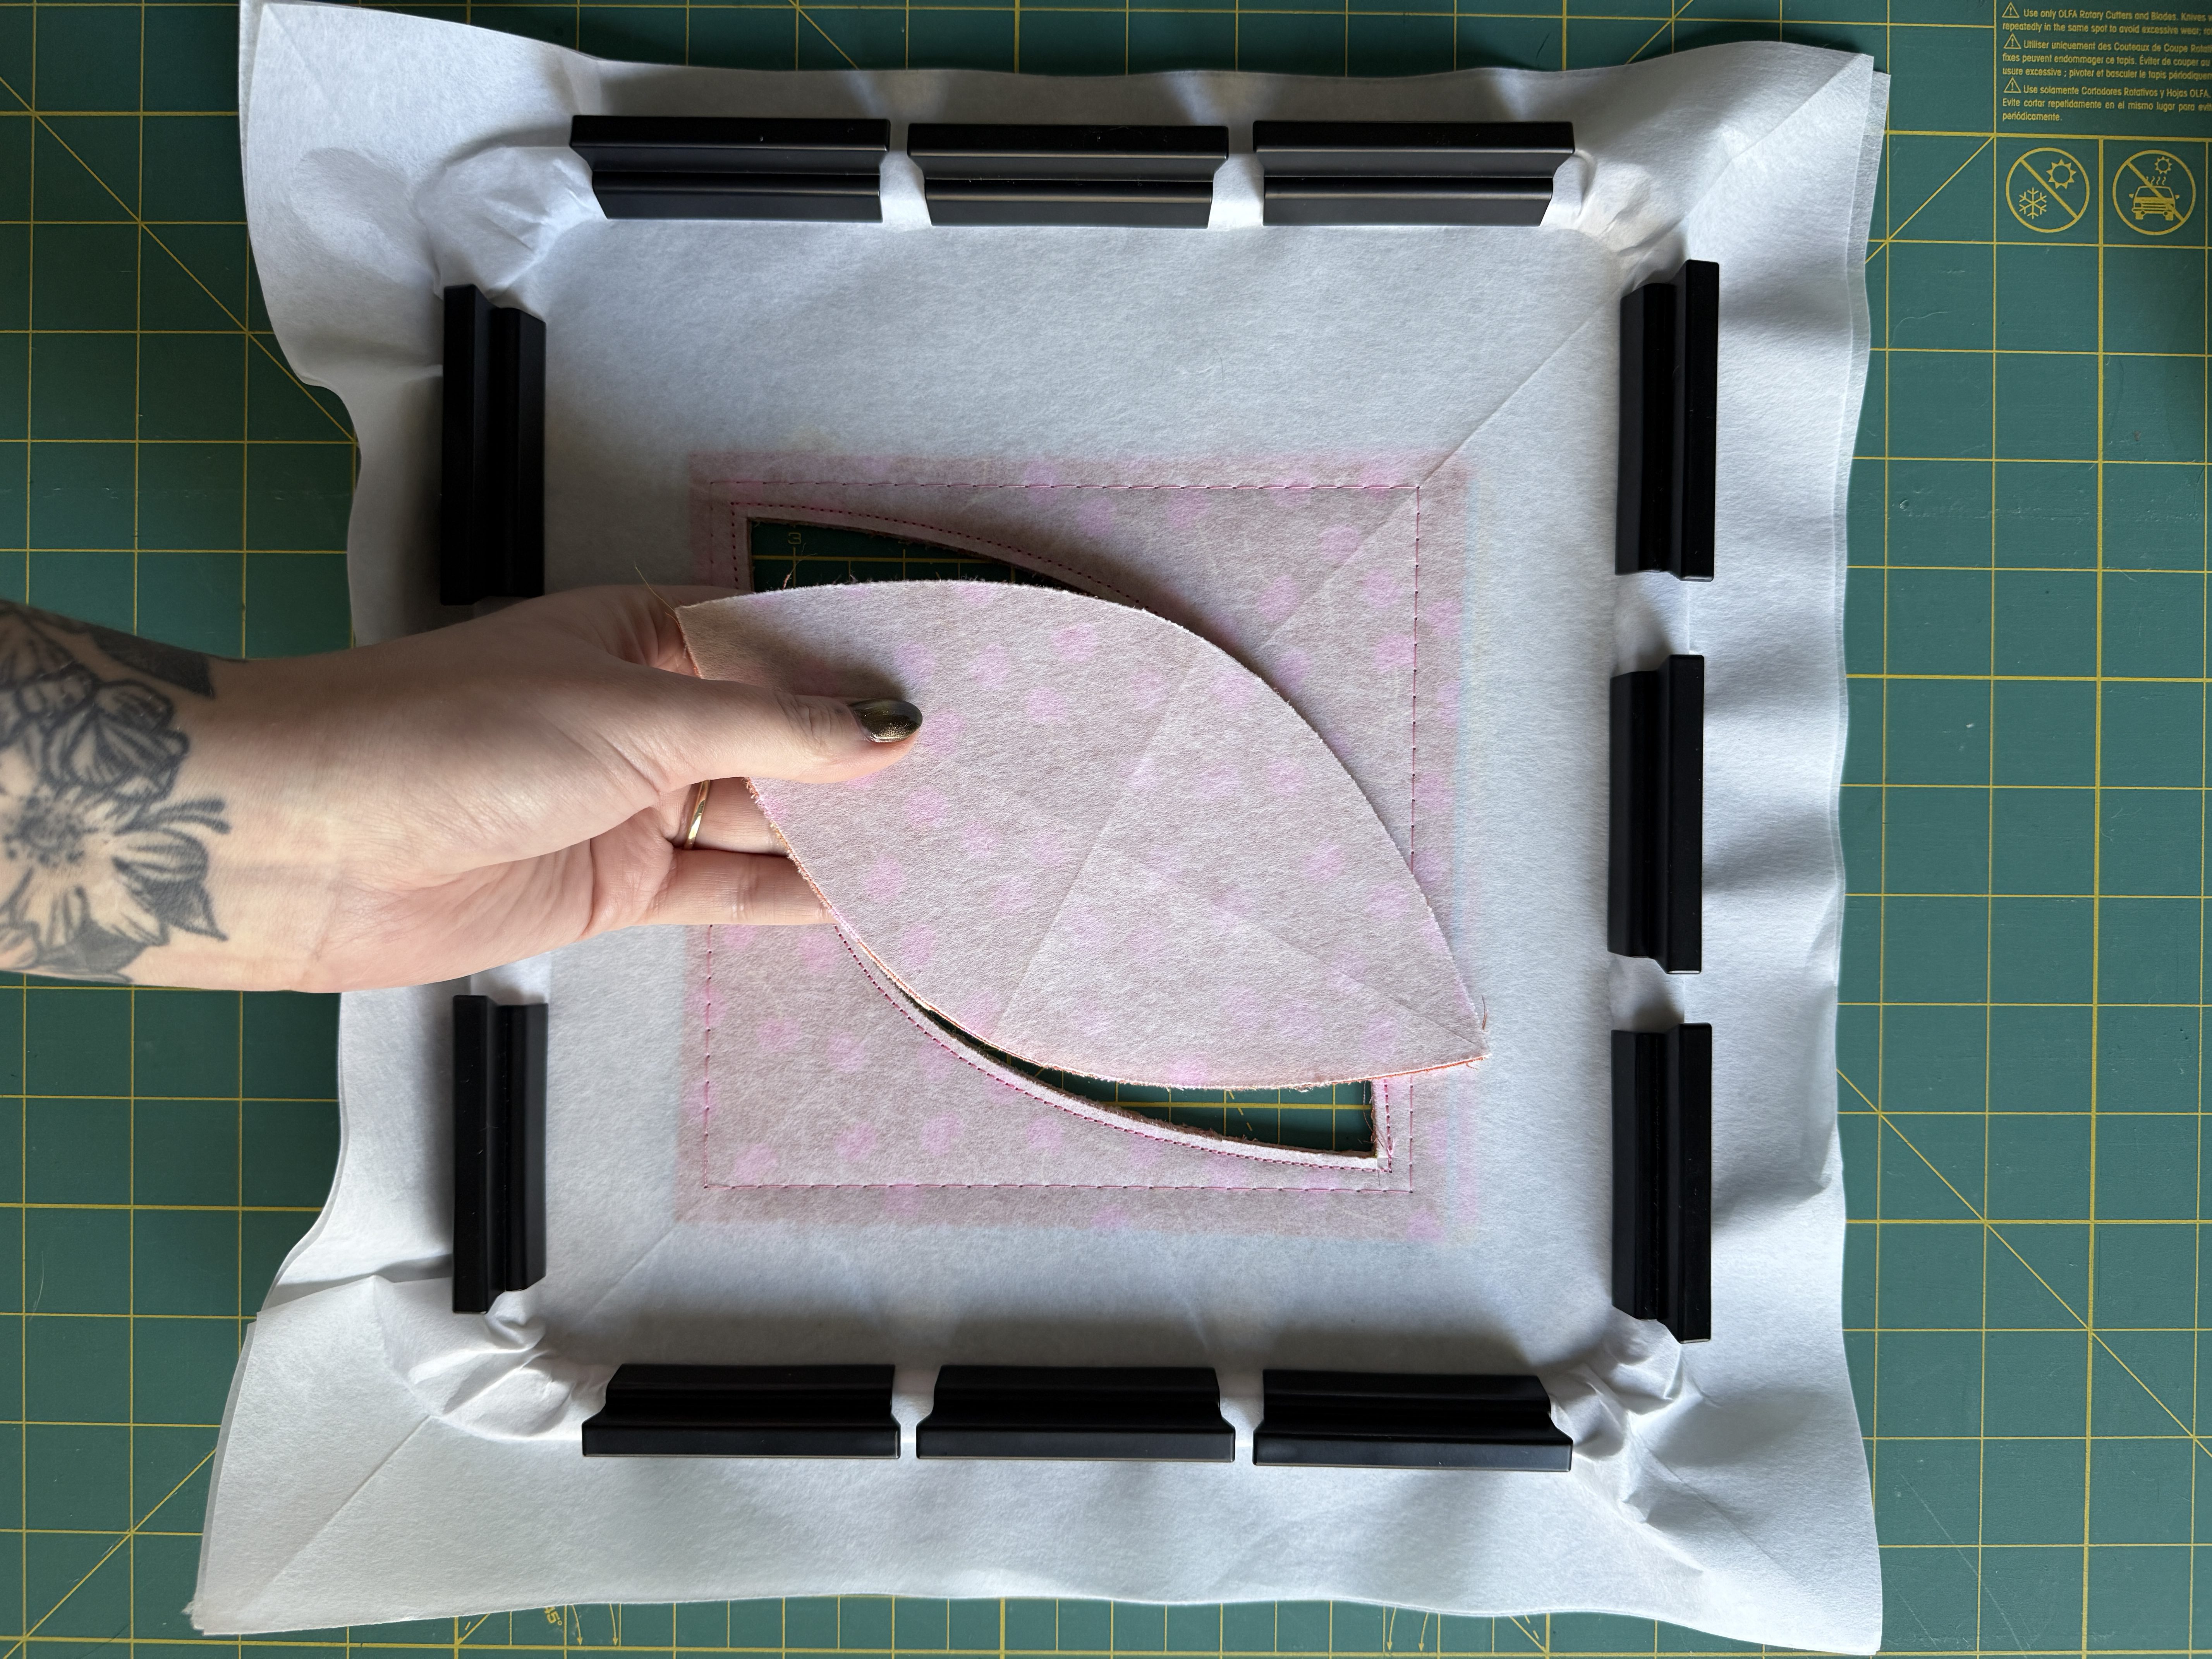
When finished, remove the hoop from the machine. Even after cutting, the appliqués will be held in the hoop by a couple threads at the points of the orange peel shape. Carefully trim these with snips or a small rotary cutter to release the appliqués.
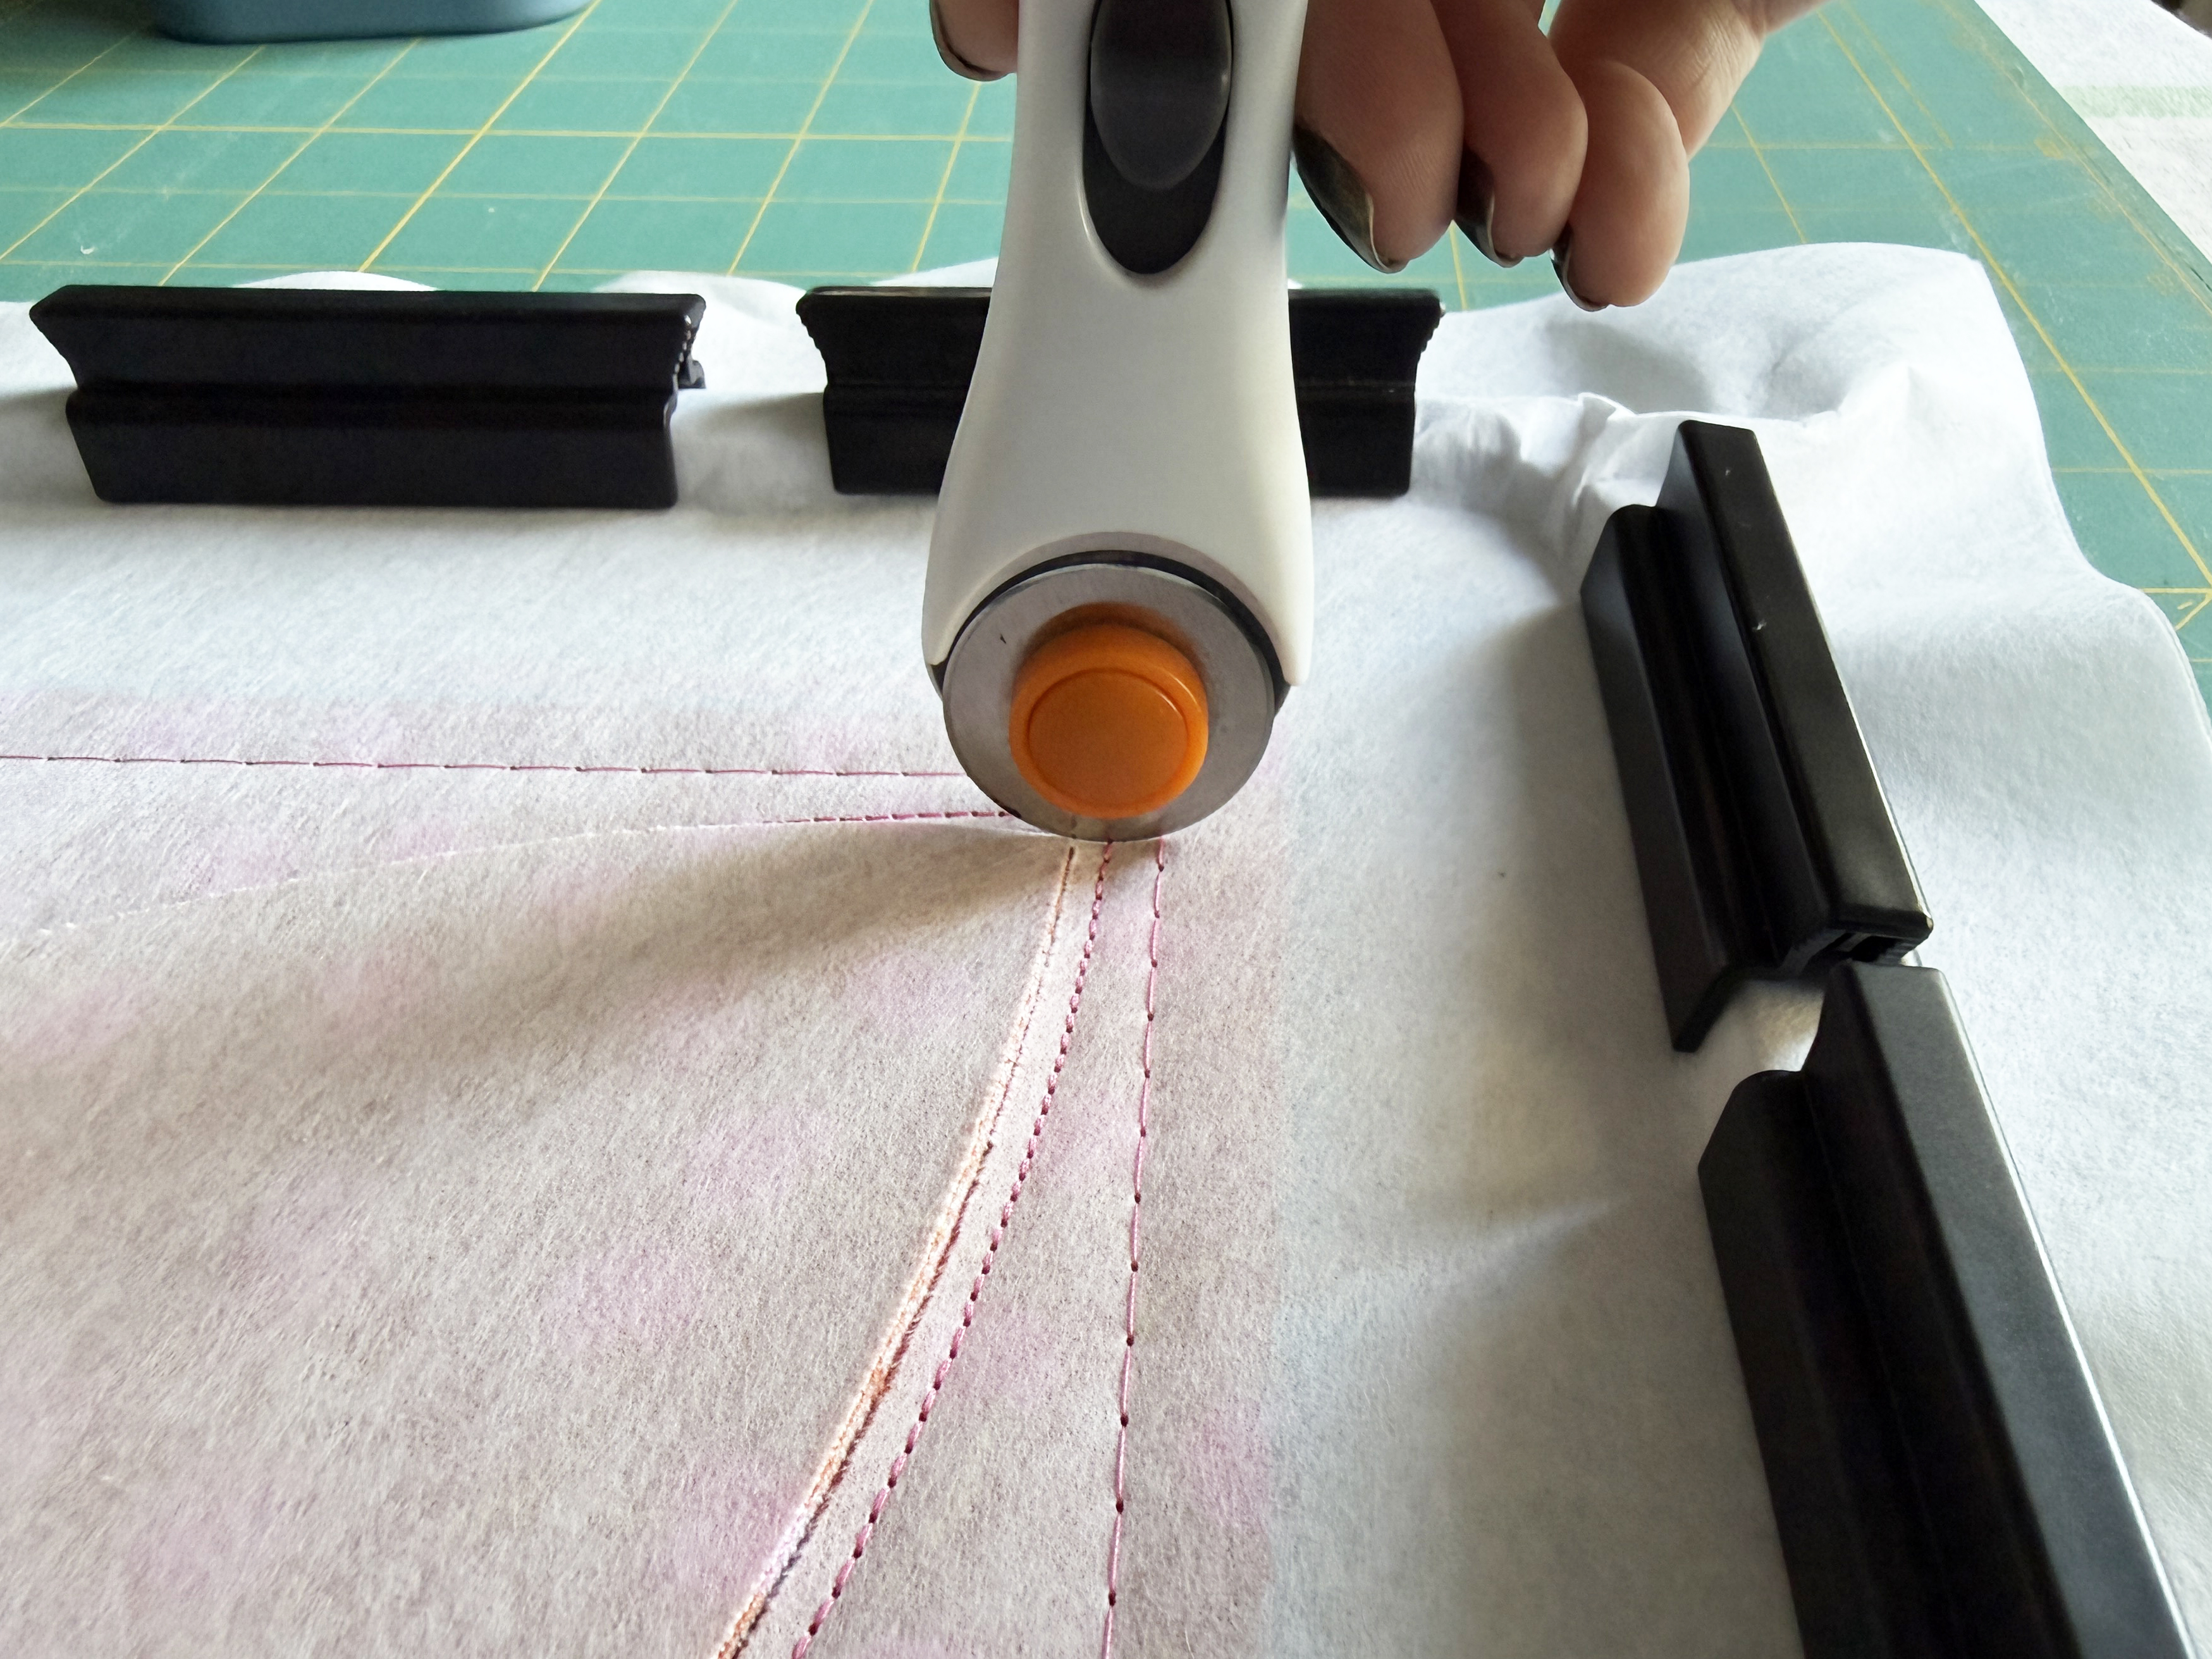
Then remove the cut shapes from the hoop.
Step 5. Repeat As Needed
Repeat this process until all your appliqués have been cut out. The number of layers you can cut in a single hooping may vary, mostly depending on your choice of fusible web. A thicker product, like Fuse & Fix, may not be able to be stacked as much as Soft Web, which is a tiny bit thinner.
Once all your appliqués are cut out, sit tight! We’ll be back in Part Two to stitch these shapes down.